

Pizza on the grill
10 years ago
Featured Answer
Sort by:Oldest
Comments (13)
Related Discussions
Cook pizza on a grill
Comments (6)Hi Azmom - I love grilled pizza - great thing for that hot day... I make it right on the grill with no stone - it's easier to do small pizzas - the dough is easier to handle. AFter it's stretched out, you just pick it up like dish towel and lay on the hot grate. When one side is done, you flip it, quickly lay your toppings on (have them all prepared and handy - and precooked) and by the time they're heated and cheese is melted, the bottom side is done. It has a great flavor. I will paste some great tips from the weber grilled pizza booklet. It was a booklet that was available online a few years ago, that I copied some of - too bad I didn't keep the whole thing as I can't seem to find it now... Lots of information here - I tried to make bold the most important points... Basic Dough Recipe 11/2 cups lukewarm water 1 package active dry yeast 4 cups unbleached all-purpose flour, plus extra as needed 1/4 teaspoon salt 2 tablespoons olive oil, plus extra for oiling bowl Place lukewarm water in a large mixing bowl, sprinkle yeast on top and let sit until foamy, about 5 minutes. Combine flour and salt. Add to water, 1 cup at a time, until well incorporated. If very sticky, add extra flour, 1 tablespoon at a time, until soft and slightly sticky. Add 2 tablespoons oil; mix well until dough feels elastic. Turn the dough out onto a wellfloured surface. Knead, adding extra flour to your work surface as necessary to prevent the dough from sticking, for 10 minutes, or until smooth and easy to work with. Clean and oil the bowl and place the dough in it. Cover with plastic wrap and let rise until it more than doubles in volume, about 1 hour. Punch dough down and knead on a lightly floured surface for several minutes or until smooth. Divide dough into four 4" balls and proceed with pizza-making instructions. (Dough may be made ahead, frozen until needed and thawed at room temperature.) Makes 4 individual pizzas. Food Processor Dough If you crave the taste of homemade dough, but mixing by hand is not your speed, we offer this food processor version. It uses rapid-rise yeast for even speedier results. 11/2 cups lukewarm water 1 package (2 1/4 tsp.) rapid-rise yeast 11/2 tablespoons sugar 2 tablespoons olive oil, plus extra for oiling bowl 4 cups all-purpose flour, plus extra for dusting hands and work surfaces 11/2 teaspoons salt Pour water into work bowl of a large food processor. Sprinkle yeast and sugar over water and pulse twice. Add oil, flour and salt and process until mixture comes together. Dough should be soft and slightly sticky. (If it is very sticky, add flour 1 tablespoon at a time, and pulse briefly. If it is too stiff, add 1 tablespoon water and pulse briefly.) Process another 30 seconds. Turn dough onto a lightly floured work surface; knead by hand to form a smooth, round ball. Put dough into deep lightly oiled bowl and cover with plastic wrap. Place in warm oven (100F). Let rise for 30 minutes or until doubled. Remove from oven, punch dough down and turn out onto lightly floured work surface. Divide into 4" balls, and proceed with pizza-making instructions. DOUGH PREPARATIONS Whether you make your own dough, buy it frozen or purchase it fresh from a pizza parlor, these guidelines will help you prepare your dough for the grill. size: The dough should be the size of a softball, about 4" in diameter. This will yield one medium-sized individual pizza or serve 4-6 people as an appetizer. temperature: The dough should be taken out of the refrigerator one hour before use and allowed to come to room temperature. to prep: Turn the dough out onto a lightly floured work surface and flatten with the palm of your hand. Roll out or pull and stretch the dough gently into either a 12" rectangle or circle. Make it as thin as possible since the dough will rise as it cooks and you want the dough to cook all the way through. Always keep dough covered or the exterior will dry out. 11 ROLLING OUT THE DOUGH There are just a few things you need to know about rolling the dough. It is so easy that after doing it once, youÂll be an expert, inventing your own tricks of the pizza trade. Sticky Business Pizza dough is very sticky, so youÂll need to sprinkle your surface with a handful of flour or cornmeal before you begin to roll your dough. If you like a more rustic crust, opt for the cornmeal. Rolling Pin Method 1. Place ball of dough in center of work surface. Sprinkle with cornmeal or flour. 2. Roll out from center of dough to edges.* * Wine bottle tip: If you donÂt own a rolling pin, donÂt fret. Just use a wine bottle to roll out the dough...and if you are in a real pinch, any bottle shaped like a wine bottle will do. Hand Method 1. Place ball of dough in center of work surface. Sprinkle with cornmeal or flour. 2. Flatten dough from center to edges using the flat palm of your hand. 1. Ball of Dough 2. Rolling the Dough 3. Stretching by Hand 12 ****The high heat of the grill is what gives pizza such a great crust. Because the dough cooks quickly, it is essential that any toppings requiring cooking be prepared before you put them on the crust. Use pre-cooked meats, or grill, roast or sauté your meat to cook it thoroughly. Vegetables can be grilled, steamed, blanched or sautéed. CHECKLIST Have these items handy before you start grilling:  Olive oil  Basting brush  Tongs  Mitt  Pizza peel or cookie sheet  Toppings and cheese in individual bowls or on a plate side by side Ready...Set...GRILL Make sure your gas grill is preheated or your charcoal briquettes are ready to cook on. And, donÂt forget, always cook with the grill lid closed. 1. Brush both sides of dough with olive oil. 2. Pick up dough by 2 edges (like hanging a wet T-shirt on the clothesline) and gently place on grill. DonÂt worry - the dough will not fall between the grates! 3. Cook dough over DIRECT HEAT for 2-4 minutes, or until bottom side is well marked and as brown as a medium slice of toast. If dough bubbles, poke with tongs to release air and flatten crust. Make sure your grill is not too hot or your dough will burn immediately. 4. When bottom is brown, flip dough over. 5. Immediately cover cooked side with toppings and cheese, move to indirect heat, close lid and cook for 5-10 minutes, or until bottom is browned, cheese is melted and toppings are warmed through. (NOTE: If your grill only has one burner, after adding toppings, grill second side for 2 more minutes over direct heat, turn off and finish, using residual heat. DO NOT lift lid! For best results on charcoal see page 7.) 6. Remove pizza from the grill, slice and serve immediately. ready for the grill Great Cheese Makes Great Grilled Pizza When purchasing cheese for your pizzas, look for the authentic versions. Parmesan cheese from Italy (Parmigiano-Reggiano), fresh or aged mozzarella, and Brie from France really do taste better. For maximum flavor, grate cheese just before using. 1. Brushing the Dough with Olive Oil 2. Placing the Dough on the Grill 3. Dough Cooking and Bubbling 4. Flipping the Dough 5. Placing Toppings on the Cooked Side of the Pizza 6. Cutting the Finished Pizza 13 14 Here are a few tips to streamline the cooking process, maximize flavor and minimize stress, whether you are cooking for 2 or 20: TAKE A SOLO TEST FLIGHT - Grilling pizza is easy, but practice does make perfect. To avoid the stress of learning a new dish in front of a crowd, make your first pizza before your party. When your guests arrive, youÂll surprise them with your confidence and expertise. BE PREPARED - Before your guests arrive, have your dough rolled out and your toppings pre-cooked, pre-cut and pre-grated. STAY IN TOUCH - Grilled pizza cooks faster than a "fire in a match factory." To avoid burning the crust while you run around in search of that one missing item, use the Checklist (page 4) and make sure everything you need is within armÂs reach of the grill. MAKE EVERY SLICE COUNT - Usually the last slices of pizza left are the ones with the least amount of toppings. To avoid disappointing your guests - or yourself - spread toppings generously, right up to the edge of the crust. BE CRUSTY - The key to great grilled pizza is getting the cooking temperature and timing just right so that the exterior of the crust browns and the interior cooks before it burns, yielding a perfectly crispy crust. Cooking it slightly longer, over a slightly lower heat, delivers the best results. KEEP IT SIMPLE - YouÂve heard the one about too many cooks in the kitchen... Well, too many ingredients will confuse your palate. Keep it simple. Resist the temptation to pile on everything but the kitchen sink. tips from the surreal gourmet 15 BE FEARLESS - DonÂt be afraid to experiment with your own favorite flavor combinations. And donÂt run from cheese with lots of personality. My favorite pizzas use gloriously stinky cheeses like Stilton and Camembert. CHECK THE OIL - DonÂt forget the olive oil! A generous brushing of oil will make your pizza extra delicious and keep it from sticking to the cooking grate. STRETCH - Make sure the dough is as thin as possible. It will rise as it cooks. JOIN THE ADVENTURE CLUB - Go ahead, raise the pizza bar a couple of levels and try new exotic ingredients and flavor combinations: wild mushrooms, fresh clams, purple potatoes...If you have any questions about whether an ingredient falls into the Adventure Club, ask yourself, Am I thinking outside the (pizza) box?...See MorePizza on the Grill
Comments (6)Here is the current pizza dough that I use posted by Becky over on the Recipe Exchange. She found it in a book about pizza on the grill. Artisanal Pizza Dough posted by Becky 3 cups bread or all purpose flour 1/2 teaspoon active dry yeast 3/4 teaspoon kosher salt 1 1/4 cups 2% low-fat milk 2 tablespoons olive oil -- plus more for bowl Whisk the flour, yeast and salt together in a large bowl, then pour in the milk and oil. Mix together with a large fork or your hands. Knead once or twice to form a ball. It may be sticky, but that's okay. Oil a bowl and set the dough in it. Lay a sheet of waxed paper loosely over the top, then cover with plastic wrap. Place a clean dish towel over the bowl and allow to rise at room temperature and undisturbed for 24 hours. Turn the dough once in the bowl about 3 hours before you want to use it. The 24 hour fermentation process takes the place of kneading the dough. When you are ready to make your pizza, divide the dough in half on a lightly floured board, then proceed with your pizza making. The dough can be frozen for up to a month; Thaw at room temperature before using. Makes two 12"-14" pizza crusts Source: ""Pizza on the Grill" by Elizabeth Karmel and Bob Blumer...See MoreWhat's For Dinner - #327
Comments (100)Ann, your chicken is beautiful. UE, I enjoyed reading your blog. Our youngest daughter bears the same curse but it hasn't materialized yet. There is a similar recipe for a Hobo Dinner in one of my WWII cooking booklets but it's cooked in a coffee can. FOAS, I've been making this baked stew since high school and that was a long, long time ago. The smell of the steam when you remove the lid is intoxicating. It can be baked a day or two ahead of serving and be reheated in the microwave. GREEK BEEF STEW (2-3 servings) 1 lb. lean beef stew meat, cut into 1 inch cubes Salt and freshly ground black pepper 3 Tbs. butter 2 medium onions, coarsely chopped 1/2 bay leaf 1 small stick of cinnamon, broken into 2 or 3 pieces 1/4 tsp. whole cloves 2 Tbs. dark raisins 1/4 cup dry red wine 2 Tbs. water 1/2 can (6 oz. size) tomato paste 1 Tbs. wine vinegar 2 tsp. brown sugar 1 clove garlic, minced 1/4 tsp. ground cumin 1/4 tsp. dried mint, crumbled or 1 1/2 tsp. finely chopped fresh mint Season meat generously with salt & pepper. Melt butter in Dutch oven or heavy casserole. Add meat and turn to coat on all sides with butter. Arrange onions, bay leaf, cinnamon, cloves and raisins over top of meat. Mix remaining ingredients and spread over casserole contents. Do not stir. Cover very tightly and bake at 325 degrees for about 1 1/2 hours. Remove bay leaf and cinnamon sticks and stir sauce gently when serving. Serve with crusty bread to sop up the sauce. If you have any leftover cress and mint, you could make some of the now-dethroned former queen of salad dressings - Green Goddess. I made it this weekend and served on top of cold poached salmon. GREEN GODDESS DRESSING 1/2 cup Greek yogurt 1/2 cup mayonnaise 1 cup (packed) fresh watercress leaves 2 tablespoons (packed) chopped fresh dill 2 tablespoons (packed) chopped fresh basil 2 tablespoons chopped green onion 1 tablespoon (packed) chopped fresh mint 2 to 3 tsp. tarragon vinegar 2 tsp. oil from anchovies or 2 anchovies, chopped 1/4 teaspoon Cholula or other hot pepper sauce Mix all ingredients in blender. Season to taste with salt and pepper. Thin out with a little milk if needed. Pour into container and chill until serving time. I'm making soup today so your steak sandwich will be the star of Wednesday's soup and sandwich dinner, if I can wait that long....See MoreThe Holey Grail of Bread, thank you ann_t!
Comments (32)ann_t, you saw the shine! As my bread mentor, I sure wanted you do see my progress and am thrilled you popped in! I had a better photo showing the shine but didn’t upload it. I let this bread rise the same time, but the difference was the pizza stone and the grill – sure hope I can replicate it as we enjoyed in so much this weekend! I think you’ve done an amazing job at describing the uses of the pockets/holes, the flavor difference, texture difference. dcarch, as always, your words are so kind – thank you. I agree, a bread with only massive holes would be useless. It needs ‘pockets’! I admit, I am proud of this loaf. Ricky (fawnbridge), I’d never heard of ‘voonge’ but clearly I do it, a lot! We used this loaf to voonge gravy and bits from beef tips : ) Thank you for the kudos! mamapinky0 – wonderful descriptions of ciabatta and artisan breads – makes me hungry for it right now – and how blessed you are to have a bakery to make it for you! I like all breads – white and whole wheat sandwich for our lunches, and eggs on toast, savory for cheese and herb breads, uber-soft Hokkaido for melt-in-the-mouth dinner rolls and decadent French toast – and yes, even bread pudding. DH and I love the crust of artisan, the pockets that hold flavor, and the ability of this bread to hold up to moisture over regular sandwich bread – but the flavor is also quite good. We all have our preferences : ) Hi chas045! Seems you’ve been following posts! The credit really goes to ann_t, who in her recipe (link above) explains the entire process and includes wonderful photos. I thought it was the grill – my first pizza on the grill had nice holes and pockets accompanied with an excellent crust, but the 2nd was like my cast iron in the oven pizza… I suspect it’s the wetter dough, among other things. As with my first attempts decades ago with white bread, there came a point when it was muscle memory while kneading – it just felt and looked right at some point. Hopefully I can attain this over the next year on a consistent basis with artisan. annie1992, thank you! I’ve seen photos of your breads – and your bread always looks better than mine (and while it’s not about looks, when bread looks right, it tastes right) – and you explained it so well also, the artisan is chewier and more substantial. Chewier does not equate to ‘tough’ in case anyone who hasn’t tried it is wondering. . I started making artisan bread a few years back, but it was rather tasteless and touch, rather than chewy. The crust was like concrete also – and my pizza could not hold up to sauces, so I just stopped all attempts. ann_t’s tutelage and recipe have improved my recent efforts to the point we prefer this over sandwich breads now. I’m hoping others who want to try artisan breads will be encouraged to! I’ve learned some wonderful lessons in bread-making, but the biggest lesson which ann_t taught me: Don’t be afraid of the dough – it can take a lot!...See More 10 years ago
- 10 years ago


Related Stories
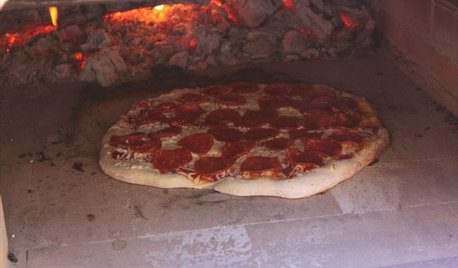
GREAT HOME PROJECTSHow to Get a Pizza Oven for the Patio
New project for a new year: Light a fire under plans for an outdoor oven and claim the best pizza in town
Full Story
SHOP HOUZZFall Grilling Alfresco
Take your fall feasts to the great outdoors with a grill large or small and the right tools
Full Story0
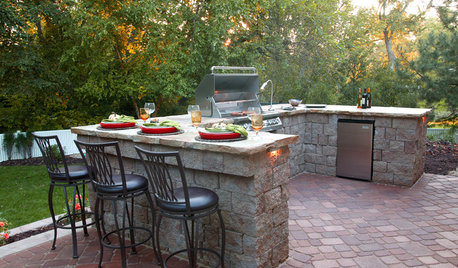
OUTDOOR KITCHENSYour Guide to Grills and More for Great Outdoor Cooking
Learn the pros and cons of gas versus charcoal grills, and about neat add-ons that let you do more
Full Story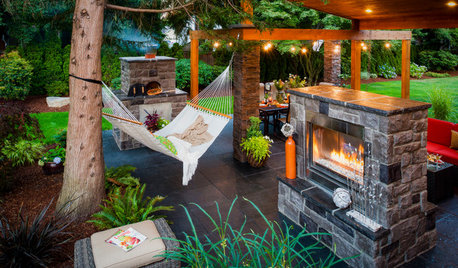
OUTDOOR KITCHENSOutdoor Room of the Day: This Patio Cooks, Even in the Rain
Washington homeowners create their dream outdoor kitchen with a pizza oven, gas grill, fireplace and more
Full StoryMOST POPULAR13 Upgrades to Make Over Your Outdoor Grill Area
Kick back on your patio or deck with a grill that focuses on fun as much as function
Full Story
MOST POPULAR8 Ways to Improve Your Grill Setup
Rethinking the old grilling station? Here’s how to pack more function and style into your backyard cooking zone
Full Story
GREAT HOME PROJECTSHow to Get a Built-In Outdoor Grill
Put fresh-air grilling on the menu with a built-in setup that suits your patio or yard
Full Story
GARDENING AND LANDSCAPINGSplurge of the Week: The Kamado Grill
These Unique Grills Look as Good on the Outside as What's Cooking Inside
Full Story
OUTDOOR KITCHENSYour Grill Season Checklist
Get your barbecue in top shape and round up essential grilling tools to make your backyard cookouts sizzle
Full Story
HOUZZ TOURSMy Houzz: Easygoing Elegance for a Massachusetts Saltbox
With beers on tap, a pizza oven and a guitar collection, this home mixes classic with generous doses of fun
Full Story


Olychick