


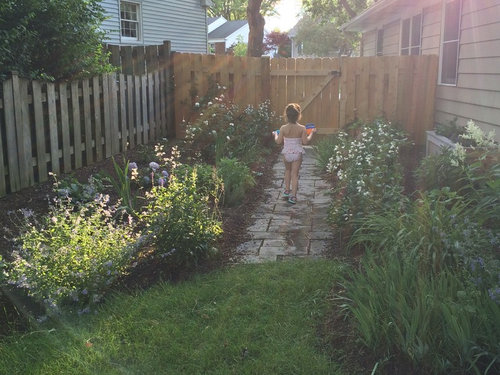
An introduction, a garden, and a question about soaker hoses
fairlywell
7 years ago
Featured Answer
Sort by:Oldest
Comments (9)
Related Discussions
Soaker hose question
Comments (10)I know these are tangents from your soaker hose question, but hopefully you'll find some info useful: I don't know what kind of weeds you have or how extensive the problem is. But the key to getting rid of weeds and keeping an area weed free is planning far enough ahead and constant maintenance. I don't recommend Roundup, you don't need it. Weed eating is a futile effort unless your taking out the roots as well. So long as the roots are still in the ground, most of your weeds will continue to come back. You need to completely eliminate the entire plant: top and bottom. Depending on what "weeds" were in your soil, if you tilled, you most likely brought up dormant weed seeds that were too deep to sprout and broke up stems (crab grass for instance) into smaller pieces where the nodes still sprouted. If tilling is the chosen method, then do so at least six weeks in advance, and preferably months in advance in order for the soil tilth to build back again as well as for dormant seeds to sprout so you can skim them to kill them as they come up. Do this a few times for a couple of weeks until they've subsided, then you're ready to plant. Next you need to mulch and mulch well (2-3 inches). This will prevent further sprouting of weeds and prevent migrating wind born seeds from taking root in your soil. If you plant vegetable seeds, you can mulch with a thin layer of shredded leaves or grass clippings or compost or straw, etc. When the seedlings get 3-4 inches tall you can mulch at a greater thickness and more as they get larger. If you want to go the newspaper route, try Freecycle.org and ask for newspaper. You might be pleasantly surprised. There's probably someone out there (like me) with plenty of newspaper to share, especially if it's going to good use and getting recycled. You can also call your local newspaper, tell them what you need it for and ask if they have any discards. You need to do layers of 8-12 damp (soak them in a bucket of water first) sheet, then cover with soil. If you don't it will dry and fly away. But if you can cover with soil, or mulch, it would work. You can also try cardboard. Call local businesses for both. You can also try black plastic mulch, but it won't add organic matter to your soil. The issue with straw are seeds which might sprout and cause problems. It works great, just make sure you know what you're getting: When using hay or straw, you need to know your source and exactly what is in the bales. Hay and Straw Glossary A popular organic mulch, hay is commonly used to protect soil and plants from the elements, to line pathways, and to address various needs in the garden. What many people don't realize, however, is that various products are often labeled as "hay" at garden centers, but there are many different types of hay and straw that are commonly sold in bales. While they are easily confused, it's important for gardeners to become familiar with the differences. Salt hay Salt hay, or Spartina patens, is a grassy plant that grows in salt marshes and wetlands. MIt is useful for keeping weeds from growing in paths, preventing runoff, and keeping soil from turning into mud whenever it rains or the garden is watered. A layer of salt hay will keep soil moist and encourage worms to come to the surface, which will help to aerate the soil. It also makes an attractive path to walk on between garden rows. Salt hay is an ideal all-purpose mulch because its seeds won't grow away from salt water so it won't germinate in your garden. Golden straw What is commonly termed "Golden straw" is either oat straw, Avena, or wheat straw, Triticum. This straw is a by-product of the process of separating oat or wheat seeds from their stalks. Golden straw is often used as bedding in horse stalls; because there are no seeds, the horses won't eat it. This straw spreads nicely, and the lack of seeds means there is no risk of it germinating in your garden. It can be used in the same way as salt hay. Wheat straw An excellent choice for straw for use in the vegetable garden. Lay down six inches in height in the fall then direct sow seeds in the spring. No need to dig. There will be a handful of weak sprouts from seeds, just pull them out. Feed hay Just as its name implies, feed hay is used to feed livestock. Though inexpensive and plentiful, it is not a good choice for use in gardens because it is full of seeds. The main ingredient of feed hay is alfalfa, Medicago sativa. It also frequently contains flowers and seeds from many other plants and weeds such as clover and golden rod. These seeds are likely to germinate, resulting in a garden full of weeds rather than flowers and vegetables. Soil Solarization is another technique you can use, using clear 6 mil plastic. It has been around for a long time. It's effective for those who have patience and can plan ahead. A drawback is that it kills beneficial organisms and bacteria in the soil. What I do is lay roof shingles over any area where I want to create a bed. Within two weeks vegetation underneath is weak and pretty close to dead. I wait until the soil is crumbly underneath, sink my spade in and start hand sifting and pulling out everything then I crumble it back in the spot along with compost so it's light and airy and never walk on it again. Then I'll mulch with leaves and/or grass clippings. Usually the latter. I don't do huge areas of space at a time. Literally just lay them on top of the grass and overlap them a bit so light doesn't get thru. After a couple of weeks and after a rain check to see if the soil is "friable" (soil crumbles in your hands). Length of time after a rain will depend on whether your soil is sandy, clay, etc. For me it can be 2-3 days in certain parts of the yard, 1 day in another area of the yard. When you lift the shingles, you'll see there is little to no grass and what you can see is yellow or white. Sink a spade in and lift up, then just get in there with your hands and fingers and take a chunk and pull out the roots. This works fabulously with bermuda grass because the main runner stem is in tact but the roots have died off so all you have to do is follow the runners. Sometimes they're 4 feet long. But they're soooo much easier to get out! Much less work than tilling and sifting. Then crumble the soil lightly back into the spot with your fingers. As you crumble take out out any weed matter and into the compost pile they go. This is the best time to incorporate compost or any other soil amendments. Now don't walk on the area or you'll compact the soil. I'll take out large rocks as well since we grow rocks around here. I've responded to "Wanted: Rocks" on freecycle.org a couple of times so now they're gone and have found use to fill holes under fences so dogs don't escape. The problem with tilling bermuda grass is that when you do that, you create a lot of little pieces that are not easy to find and get out without a sifter. If one tiny piece with a node gets left behind, it'll take root and take off and you have the same problem all over again....See Moreblack plastic/soaker hose/my set up questions
Comments (5)You'll have quite a selection to pick this year. First thing you'll need to do is separate the determinates from indt. varieties. that way you can plan a taller trelis for the INDT varieties and shorter for the DETs. I'd avoid interplanting them as much as possible. Most Det. varieties will send out a network of branches faster than you will be able to weave them into the panel openings. You may end up just weaving string around the plants at different heights to hold them partially against the panels. The soaker hose will need to go under the plastic. If left above at any spot the water will just run to the lowest point- which is often the edge of the plastic. I would first lay out your soaker hose lines over your prepared bed in straight rows. Then lay the plastic over the hoses, exposing only the source ends (for waterline hookup). To minimize exposed area use a utility knife to cut a 6-8" slit parallel with the soaker hose where each plant will be planted. Then with a scissors cut a 3-4" perpendicular to each slit in both directions being careful to miss your soaker hose when cutting toward it. Now you can fold the flaps out, plant your tomatoes (again careful against the soaker hose) and then fold the flaps closed again against each plant. I don't think you need to be so careful with soaker hose but I use driptape and on occasion I'll need to splice a section that I nick with the utility knife or digging trowell. This method doesn't work if you need to trench plant. For that I usually plan to have the plastic mulch seam overlap slightly at the row and then laying rocks between each plant is necessary to hold the plastic down. I lay old boards between the rows to hold the plastic in place, provide a solid fotting and to keep from packing soil excessively throughout the season. Quackgrass is hardy and it will seek light at the slightest crack so be prepared. Some might suggest a newspaper "collar around each plant tucked under the plastic. Using a vegetative mulch around each plant might help but you'll need a thicker layer to prevent grass from growing through it. That brings up another point. Be sure the black plastic mulch is thick enough (2 mil.+) to keep quackgrass from sending tillers right through it....See MoreNon-toxic soaker hose for veg garden?
Comments (0)Hi there, Does anyone know if the rubber soaker or drip hoses are toxic for use in raised bed vegetable gardens? I'm looking for a more efficient and less time consuming way to keep my gardens watered. I'm trying to keep things as organic and non-toxic as possible so wouldn't want to undo things with the hose leaching toxins into the soil. Any suggestions about where to order in the UK would also be appreciated. Thanks in advance!...See MoreAir + Garden soaker hose + compost pile + air compressor
Comments (13)tete, I don't think it would release carbon, but it would allow water vapor and ammonia gas to escape. As far as aeration goes, I've tried piling the compost on a pallet, using pipes, using a chicken wire tube, but in the end, I just pile it straight on the ground and turn it. I keep it covered with a plastic leaf bag to help retain moisture but I don't seal the compost, just roughly enclose it. I once caused myself trouble because I kept piling partially finished compost into a bin and the compost became compacted, turning into a black mud. Not good. Now, once a compost bin has been filled once, I don't add to it and I allow it to shrink down....See More
fairlywell
7 years agomnwsgal
7 years agofairlywell
7 years agoken_adrian Adrian MI cold Z5
7 years agofairlywell
7 years ago
Related Stories
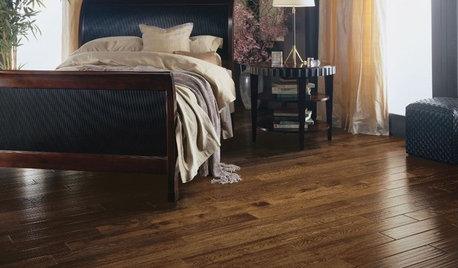
REMODELING GUIDESYour Floor: An Introduction to Solid-Plank Wood Floors
Get the Pros and Cons of Oak, Ash, Pine, Maple and Solid Bamboo
Full Story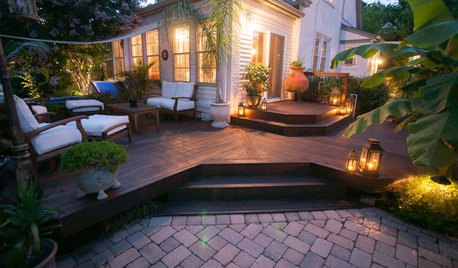
MOST POPULARWhat to Know About Adding a Deck
Want to increase your living space outside? Learn the requirements, costs and other considerations for building a deck
Full Story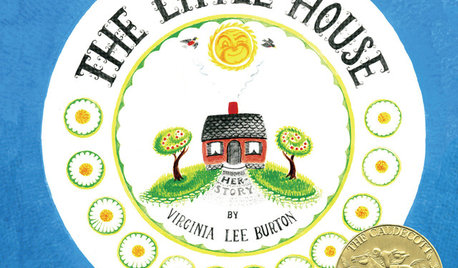
BOOKS11 Great Children’s Books About Home (and 2 Honorable Mentions)
Homes come in many different shapes and sizes, and these kids’ books highlight the tallest, the smallest, the oldest and the silliest
Full Story
HEALTHY HOMEWhat to Know About Controlling Dust During Remodeling
You can't eliminate dust during construction, but there are ways to contain and remove as much of it as possible
Full Story
GARDENING GUIDESEdible Gardening Essentials: Tips for Traditional Hand Watering
Save the expense and hassle of a complicated garden system with a simple watering can or inexpensive hose add-ons
Full Story
CONTAINER GARDENSContainer Garden Basics: How and When to Water Potted Plants
Confused about soil moisture, the best time to water and what watering device to use? This guide can help
Full Story
GARDENING GUIDESNorthern California Gardener's September Checklist
Welcome to the best season for planting just about everything, and for tackling major landscaping projects to boot
Full Story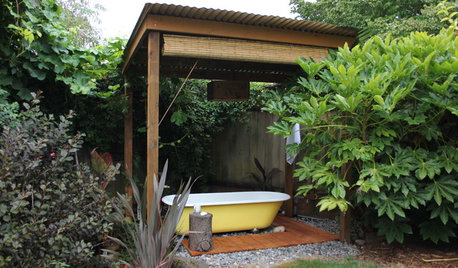
GARDENING AND LANDSCAPINGWhy Is There a Bathtub in the Backyard?
Nope, it's not waiting for bulk trash pickup. These days outdoor tubs are serving soakers, beer drinkers and even the fishes
Full Story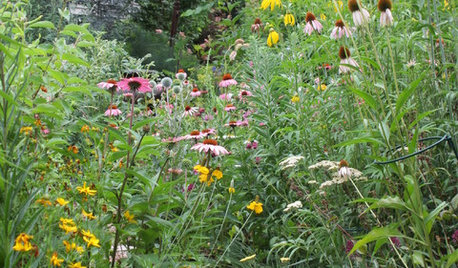
GARDENING FOR BUTTERFLIES3 Ways Native Plants Make Gardening So Much Better
You probably know about the lower maintenance. But native plants' other benefits go far beyond a little less watering and weeding
Full Story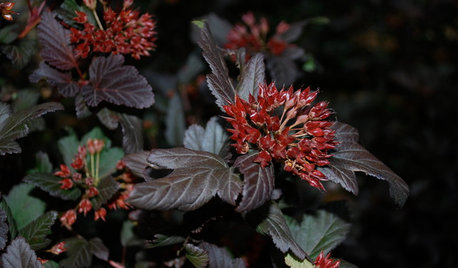
LANDSCAPE DESIGNGreat Design Plant: Sun-Loving Ninebark Puts on a Color Show
This tall, dark and handsome native shrub is equally at home in jeans and boots or in a suit and tie
Full Story
gardenweed_z6a