


Renovation - before and after
DYH
7 years ago
last modified: 7 years ago

Featured Answer
Sort by:Oldest
Comments (37)
Related Discussions
Subway with a Fringe on Top
Comments (19)Hi all! Thank you for your kind comments! The counter is "brushed" black pearl; 1/4' eased edge. It's amazing. In the short time we've had it in, we really love it! I was so happy to carry the black up in the backsplash detail. It really brought everything together. We had our first guests this weekend, and the kitchen "functions" really well with multiple cooks, guests, two tiny tea-cup dogs and one big one (our precious Maddie is all better)! Woohoo!...See MoreRenovated ranch kitchen- before and afters
Comments (43)Sue - I got the tiles from a local tile shop here MI. I saw them online and fell in love and went seraching. I found them right away. I would guess any good tile store would have them or something very similar. Holly - amazon! search berkey stand :)...See MoreLighting is Everything (a story to share)
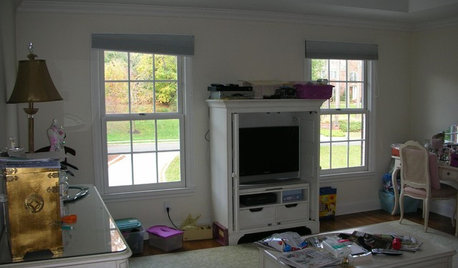
Comments (4)YES....I totally agree. We just redid our kitchen from browns and yellows to grey and white. We ended up changing all the lights in the room to LED daylight bulbs. The yellow "soft" lighting make the greys look muddy brown/purple and all the lovely white cabinets look yellow. Much happier with the daylight lighting. BEFORE: AFTER: In the "after" you can see the hood light under the stove that is still "Soft" yellow and what a difference it makes to the grey and white in the marble behind the stove. I'll be switching that SOON!...See MorePlayroom Renovations Before & After
Comments (2)Nice! I love the hanging artwork too. A neighbor of ours had a room just like that. It ran the length of his house. For some reason the previous owners had enclosed the long narrow porch. That is a great use of the space....See More
DYH
7 years agoDYH
7 years agoDYH
7 years agoDYH
7 years agolast modified: 7 years ago
Related Stories
BEDROOMSBefore and After: French Country Master Suite Renovation
Sheila Rich helps couple reconfigure dark, dated rooms to welcome elegance, efficiency and relaxation
Full Story
TRADITIONAL HOMESBefore and After: Beauty and Functionality in an American Foursquare
Period-specific details and a modern layout mark the renovation of this turn-of-the-20th-century home near Boston
Full Story
BEFORE AND AFTERSBefore and After: 19 Dramatic Bathroom Makeovers
See what's possible with these examples of bathroom remodels that wow
Full Story
DESIGNER SHOWCASESBefore and After: See How Rooms Came to Life at the Pasadena Show House
Read the design details behind transformations at the 2016 Southern California showcase house
Full Story
FRONT YARD IDEASBefore and After: Front Lawn to Prairie Garden
How they did it: Homeowners create a plan, stick to it and keep the neighbors (and wildlife) in mind
Full Story
MY HOUZZMy Houzz: After Renovating, a Family Flips Over Its House
What started as a 'buy, renovate and flip' project turns into so much more for a creative family in Australia
Full Story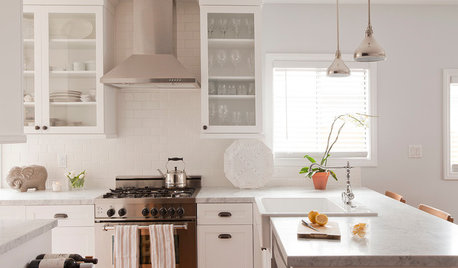
REMODELING GUIDES10 Things to Do Before the Renovation Begins
Prep and plan with this insight in hand to make your home remodeling project run more smoothly
Full Story
REMODELING GUIDES13 Essential Questions to Ask Yourself Before Tackling a Renovation
No one knows you better than yourself, so to get the remodel you truly want, consider these questions first
Full Story
WHITE KITCHENSBefore and After: Modern Update Blasts a '70s Kitchen Out of the Past
A massive island and a neutral color palette turn a retro kitchen into a modern space full of function and storage
Full Story
HOUZZ TOURSHouzz Tour: After a Fire, Reimagining a Home
A freak accident destroyed this family’s home on the night before Christmas, but they rebuild and make it a better fit
Full Story


DLM2000-GW