


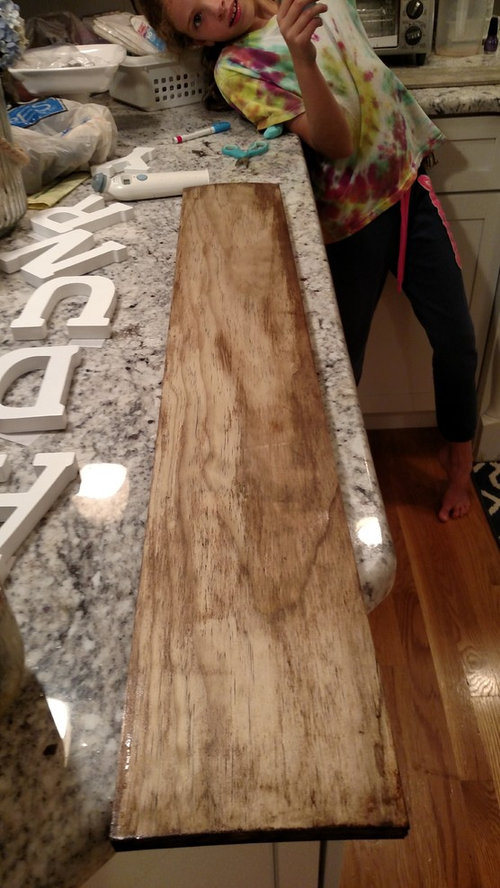
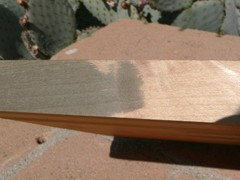
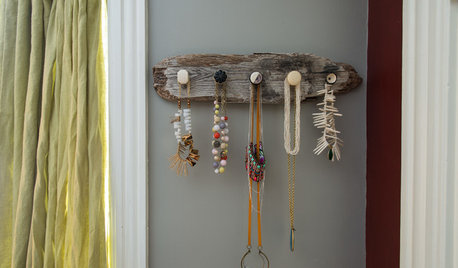
Fun way to make new wood look old - DIY hack
rebeccamomof123
8 years ago
last modified: 8 years ago


Featured Answer
Sort by:Oldest
Comments (8)

amykath
8 years ago
graywings123
8 years agoRelated Discussions
15'X28' Do-it-Yourself Greenhouse
Comments (16)7000ft, I am totally convinced you ought to write a book. Your family sounds very interesting and it sounds like you all work as a cooperative of sorts. How much of your food do you produce? The tomatoes that I grow are primarily for sauce, so I use Roma-type tomatoes. They are odd-looking, being long and quite large. The variety I grew this year was Super San Marzano. I've tried some others, but this one is the best. The sauce-type tomatoes are awesome for making sauce. They are very meaty with minimal juice and seeds. Making sauce is a breeze because you can skip the steps for squeezing the juice and seeds out. According to the catalogs, some varieties have pectin in them that helps to thicken the sauce. We ended up with 25 jars of sauce in the freezer. That is a record for us, so we are pleased! That's 25 dinners during ski season that I don't have to cook. :) I also grow a cherry tomato and some sandwich-type tomatoes. I've had good luck with Early Wonder, which is early yet tasty. (way better than early girl!) Inside the GH we enjoy our first tomatoes in mid-July. Without the GH we are lucky to get any red tomatoes at all. I'm sure it's the same for you. My gardening efforts are pretty much solo, but my husband was instrumental in building the GH and in helping look after things as needed. He is an expert at raising seedlings because I tend to travel a lot in the spring. He also built a root cellar and he is fully on board with our quest to grow as much food as possible. It's a bit of an oddball pursuit, so I'm happy that he's into it!...See MoreDo-It-Yourself Wall-O-Water
Comments (29)For a couple of years I had a garden spot away from my house, with no water supply available so if I wanted to supplement rainfall I had to haul gallon jugs of water. To make my watering efficient, when I planted my peppers & tomatoes in the spring, I dug down and buried empty gallon plastic jugs, one between each plant. I had poked 4-5 holes in the bottom of each, of course, and left the caps on until later in the summer. Once the weather warmed, and after a good soaking rain, I mulched the beds 4-6" deep with chopped leaves, being sure to cover the tops of the (so far empty and still capped) bottles to protect them from the sun since I had found that the plastic degrades and becomes brittle when exposed to the sun. (In previous years, just cultivating around the bottles inevitably resulted in my breaking the tops off by midsummer.) When the weather reached a point where I actually needed to water, I cleared the mulch away for the moment and poured a gallon of water into each buried bottle. I set the cap loosely back atop each bottle to keep the leaf debris from falling in and clogging the exit holes in the bottom, then pulled the mulch back up to protect the plastic. I did not care about how long it took for the bottle to empty-- it seemed like a gallon or two a week per plant was sufficient, and the best part is that by burying the bottles the water went right down to the root zone where it was most effective. As for using wall-o-waters, since I had gotten some free from a friend, I tried them last year with 3 really early tomato plants I started specifically to experiment with. While they survived a good bit of frosty weather, in the end the plants I had started weeks later and planted out a month after the first ones when the weather had warmed quickly caught up to the wall-o-water ones and all the tomatoes pretty much bloomed & set fruit at the same time & rate. So my conclusion is that it was satisfying to my eager gardener's soul to be out planting early, but it really made no difference in overall plant performance. I have found the same to be true with early plantings of such things as peas and salad crops, too. Early plantings may survive, but later plantings quickly catch up and may even surpass earlier ones that have been stressed by the weather....See MoreHelp! New floor makes woodwork look heinous
Comments (61)Good heavens, how on earth did I miss all this discussion? I guess I was busy in the bedroom. I mean, DECORATING the bedroom. Squirrel, thanks for clueing me in on my other post. D'oh!! Annz, you are right, the room with a darker color is just downright dreary. I think I made a quick reference somewhere above to having a disastrous go at it with a darker color (which happened to be blue). It was AWFUL and dark and ... just ... No. No no no no no. This room, like the bedroom I'm trying to finish, has a lower-ish ceiling and is quite shady in the summertime. "Cozy" and dark was depressing, even though it only lasted 12 hours. I just wanted to cry in there. One thing that really complicates the matter is the floor-to-ceiling brick fireplace. Of course, that doesn't go with the yellow-y oak at all. So finding a hue that worked with BOTH the brick and the oak was a chore and a half. BM Carlisle Cream was IT. For whatever reason, it just pulls the two together and now I don't hate them. I think you can see the brick fireplace on one of the pics in the link to "other pics" in my initial post. I just don't know what to think about the crown, but Squirrel, you ROCK!!! Giving me the view of so many options is incredibly helpful. I do like the "taller" base moulding -- absolutely balances better, assuming the crown stays. And the crown is definitely better wrapped, but wow, I'm not sure how we would accomplish that. I think this was all custom made for the previous owner and they told us the carpenter who did it is actually now deceased!! So ... hmm. Tell you what. The contractor is back today to install slate around the base of the brick hearth, and our area rug, which was sent out to the cleaners, should be delivered back to us today. We should be able to put the room back together tomorrow and then I'll post new pics. Maybe that will help! You are all so incredibly generous with your time and ideas. Thank you, thank you all (especially Squirrel, with your terrific mock-ups)!!...See MoreJust for fun. How would you make this look better?
Comments (16)How cute!! Be sure to follow the inspector's advice-listen carefully!! Ask LOTS of questions, and listen to your "gut". This could really be a cutie!!! IF all is well. THere are so many possibilites, depending on your buget. We always do necessities then build on that-thus are homes have always looked good; and this keeps our spirits up in between projects. Now a few thoughts: Exteior: The dark red is nice, it can fade-red oxidizes. If you want to go for cottage, the tri color combo is great. Would you consider Lt. Med. BLue, Darker med. Blue and white? For shutters-can you use a simple skill saw? take 2 planks of wood and cut half a heart from each, then with a small space between put the hearts together for a shutter-We did this and it worked great!! Of course you'll need to sand and paint. not sure how well I am at explaining-but does work great. Depending on how much you do with the porch,( more bri-brac), a new white screen door could help. Landscaping is the next biggy; around that foundation, flowering scrubs, ect. Have fun!!...See More
mustangs81
8 years agoUser
8 years agoUser
8 years ago
ravencajun Zone 8b TX
8 years ago
rebeccamomof123
8 years ago


Related Stories
STORAGEStroke of DIY Genius: Get Hooked on These 15 DIY Storage Hacks
These DIY homeowner ideas include a repurposed vintage tennis racket and reclaimed-wood pieces
Full Story
BUDGET DECORATING14 Ways to Make More Money at a Yard Sale — and Have Fun Too
Maximize profits and have a ball selling your old stuff, with these tips to help you plan, advertise and style your yard sale effectively
Full Story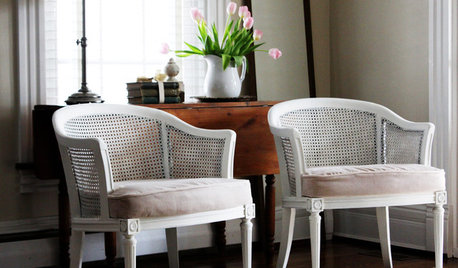
BUDGET DECORATINGBudget Decorator: 8 Ways to Make Old Furniture Look Brand New
Learn stripping, staining, painting and reupholstering basics to make bargain-basement furniture worthy of center stage at home
Full Story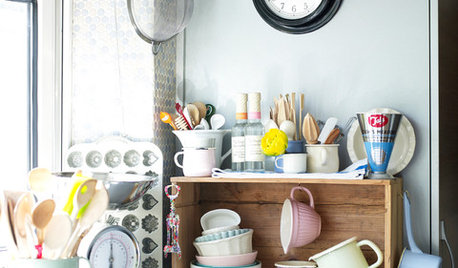
KITCHEN STORAGEKitchen Storage Hacks to Make Use of Every Space
Cupboards full? Try these kitchen ideas for working more valuable storage into your cooking space
Full Story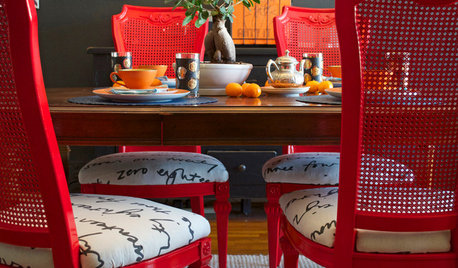
DIY PROJECTSDining Set Makeover: Paint and Tea-Tinted Fabric Make Old Chairs New
Reclaim dated dining chairs for far less than buying new, using spray paint, modern fabric and a handful of tea bags
Full Story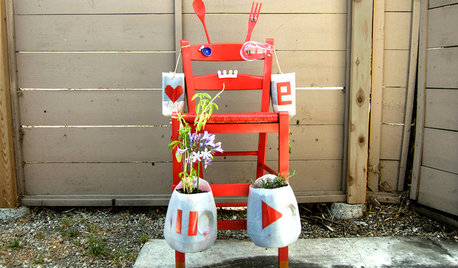
DIY PROJECTSMake a Fun Robot Plant Holder for Kids
Introduce your children to the wonders of gardening by appealing to their love of robots
Full Story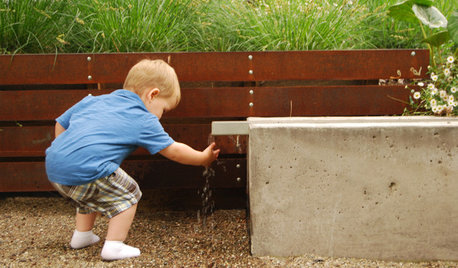
GARDENING AND LANDSCAPING9 Ways to Make Your Yard More Fun for Kids
Draw the younger set outside while keeping grown-up spaces and style intact. Some of these ideas don’t even cost a dime!
Full Story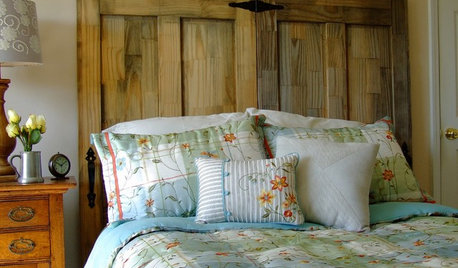
DIY PROJECTSMake Your Own Rustic-Chic Headboard From Salvaged Doors
Turn old doors into a charming headboard with these step-by-step instructions from an expert woodworker
Full Story
DIY PROJECTS14 Fun and Easy DIY Projects With Paper
Look at the abundant and affordable material in a whole new way with these stylish creations
Full Story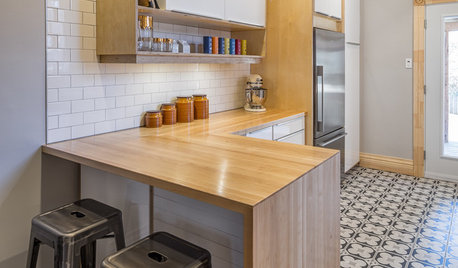
KITCHEN OF THE WEEKKitchen of the Week: Ikea-Hack Cabinets and Fun Floor Tile
A designer turns an uninspiring kitchen into an inviting and functional contemporary space
Full Story


rebeccamomof123Original Author