


De-cluttering... but what about the angle food cake pan?
mabeldingeldine
8 years ago
Featured Answer
Sort by:Oldest
Comments (25)

Errant_gw
8 years ago
ediblekitchen
8 years agoRelated Discussions
Thinking about getting a food saver...
Comments (35)Linda, a foodsaver is one appliance I would not be without. I can buy tenderloins, shrimp, ground meats, etc, all on the "cheap" and not worry about freezer burn or icky flavors six months later. I have dinners ready after long days at work or when I am too tired to cook. My home grown produce is packed and ready to go. A double batch of something is no longer a leftover a month or two later. A freind has a baby or is ill and I can send dinner over in minutes. Why are some of you using paper towels for moist items? Freeze them first! Annie, return yours to Kohls, and grab one at Costco/Sams or at the FS site. I have known several people that bought the Kohls ones and they never worked. No clue why though. Make sure it has both the dry and moist setting for sealing. Moist does not squish the items as much. And our dinner tonight? A brochole that Annie made at my house at the end of February last year. I froze it first, vac'd it, defrosted it this morning, warmed it up and we had dinner with great memories attached. Thanks my friend....See MoreWhat has been your favorite Birthday gift - cooking or food relat
Comments (26)This is a totally different idea, but I wanted to mention it because I recently rediscovered my immersion blender. I wanted something I could take out of town with me that was small and easy to pack, and...I know this would sound odd to some...offered a little bit of ''help'' in case I decided I wanted to bake. (A readily-available kitchen is a good thing.) Anyway, I realized my immersion blender (Kitchen Aid) had a whip attachment (like a miniature hand-mixer) that I'd never used. Eureka! Of course I had to try it out, and it works beautifully. If your friend doesn't have one, she would probably love it for blending soups, making smoothies or chopping things. The best part is they're not terrible expensive. (FYI; maybe not for now, but for the future.)...See MoreFood Photo Tips: Part I - Lighting
Comments (0)I can only post the instructions not the photos. Posted by canarybird (My Page) on Sat, Jul 11, 09 at 17:18 Food Photo Tips: Part I - Lighting Hi everyone. Here I hope to be able pass on a few useful hints about photographing food. Im just another self-taught hobby photographer, but after taking these photos nearly daily over a period of several years I've established some norms for myself in how to go about taking pictures of food. Assuming that most people will be using a point and shoot digital camera, I'll leave the DSLR (digital single lens reflex) cameras for the time being. The basics about lighting and positioning will apply to both types of cameras. If you're an occasional photographer and haven't read your camera instruction book and understood all the creative possibilities available with your camera don't feel bad, since many people never get around to it either. But I will go over some of the important menu icons and shooting modes that will make a big difference in your pictures once you learn to use them. But first let's get down to what is one of the most important factors in taking food photos: LIGHTING. Light is what defines the shape of an object and is the one factor which can make the difference between a beautiful photograph, an ordinary one, or a downright bad one. Finding or creating the right lighting for what you want to shoot should be your number one concern, especially with food, which can look really unappetizing when photographed in the wrong light, such as flash, or heavenly when seen in a good light. The ideal lighting for tabletop photography, especially food, is natural daylight. But there's a problem when people are wanting to take pictures of their dinner, which is usually an evening meal and in winter especially, a time of day when it is dark. DAYLIGHT For the moment though, let's look at one good daylight setup. Perhaps you're baking bread or cakes during the day, or canning and want to show off your work. Finding the right window in your house is important. Try to find one which is not in full sunshine at picture taking time. There should be indirect light and you should be able to put a table near or under that window, which could be curtained with a thin net if the light is too strong. Most of the time the quality of your photo will depend on finding that window where the light is right. If the window is too high so light doesnt fall on the subject, get a few books, take out a kitchen drawer and top it with a tray and a cloth to raise up your food plate. Position your camera facing towards the window and pointing down at the subject. FIG 1. (I'll call the plate of food the subject...okay?) If you can mount the camera on a tripod you will have less chance of camera shake although nowadays most cameras have IS (image stabilization) incorporated. Still you are in better control with your hands free, and even more so if you invest in a cable release. Thats a little cord that plugs into the camera with a plunger on the end. Pressing that instead of the camera shutter release button lessens the possibility that you jerk the camera when you shoot. Cable releases are not an expensive extra item and are nice to use. The light should come down through the window and skim across the food, bringing out the texture. FIG. 2 Using your optical zoom (not digital zoom) close in a little on the plate until you have it filling your LCD screen or viewfinder. Fig. 3 & 4 show the unzoomed image in the camera and Fig. 5 shows the zoomed image. You are better off moving the tripod back and away from the table a little and then using the zoom to get closer than if you were to stick the camera right up close to the subject. Getting too close will make a distorted picture. You may get that potato in the front line filling up half your picture, while the rest of the plate seems to be falling away at an angle. Move back and zoom in to avoid distortion. How high you want to have the camera is up to you. If you want to show the plate from the same angle as someone who is sitting down to dine, then have the camera at that height, so you can show whats on the plate. If you are looking more for an art photo at a low angle then get down and take it from a low side angle. Its up to you how much of the food you want to display. You can always crop out a lot of the plate with post editing if you only want to give a closeup impression of a dinner without showing every carrot or pea on the plate. But we can talk about that later. For now youre still setting up the camera. Be careful of too much hard reflection bouncing off any liquid on the plate.You may have to adjust the tripod or move the plate. You may have to turn the plate to avoid too much bright reflection off gravy or sauce. A little is okay but you want to see down into that sauce too, and not have it look like a bright sheet of white ice. If the side of the subject facing you is too dark, then you can easily set up a piece of white paper or styrofoam to reflect the window light back onto the dark side of the subject. FIG. 6 In this example I just taped some white paper onto the nearest objects at hand (a vase and a lantern) to reflect light onto the dark side. You can set up something a little more sophisticated with just some folded cardboard lined with tin foil or white paper. FIG. 7 shows the paper reflecting on the dark side. I love being able to invent things like that out of objects that are already in my house without having to go out and buy professional photo reflectors. But of course they would be nice too! When you press the shutter, remember to press it half way down and pause a moment while the camera reads the light meter and focuses, Then continue to press all the way down. Some cameras will give an affirmative beep after that half press to let you know that it has your subject in focus. By pressing quickly all the way down without that halfway pause you may have out of focus pictures and wondered why. Try and practice with some fruit on a plate or dish during some free time during daylight. Take a few pictures on the following settings. If your camera is like many others, you will have a fully automatic option.Try taking a couple photo on that. Then go to your "scene" modes and try taking a couple on Portrait mode if you can find it, (icon is a girls head), and on Indoor, if your camera has that. When you find youve taken something you like, make a note of which mode or scene you used. I know I havent yet explained how to take a picture, but next installment will be about another daylight shoot, taking photos under artificial light and how to set some of the options such as white balance WB and exposure evaluation EV. I hope this has been an easy read and that next time you will learn more. Before finishing, I'll show here a couple of my best photos taken with my smallest pocket point & shoot, the Olympus Stylus 800 with 8 megapixels. I went to a charity lunch where we were squeezed onto long tables in a crowded room. By extreme luck I was seated across from the only window in the room. It was a tall one with a light white curtain and the light reflected down onto my fish in cream sauce and the luscious creamy dulce de leche in a way that I thought was a perfect example of what I have shown above in FIG. 1. The light is skimming across the food into the camera, leaving lovely reflections. Here are the pictures. Just shows you don't always need a big expensive camera when you have the right light and correct exposure. Thanks for joining me, I'll have the next installment ready soon. Sharon (Canarybird) (All text and photos copyrighted)...See MoreWhile I’m at it, can we talk about cast iron frying pans?
Comments (63)We do the majority of our cooking in cast iron. We have 2 pans that were my husband’s grandmother’s. And 2 newer pieces we bought. My husband is a freak about them. The newer ones we seasoned when we first got them. Vegetable oil or canola oil and bake in the oven. Then use a lot! I have the lodge scrapers and use those and super hot water to clean. No soap. Maybe once in a while if I feel like it really needs a cleaning. When I do that I tell my husband because he will dry it and then wipe it down with some oil, his favorite now is coconut. My son and daughter are already making noises about who inherits what pan lol....See More
localeater
8 years ago
Lily Spider
8 years agolast modified: 8 years ago
oasisowner
8 years ago
rococogurl
8 years ago
funkycamper
8 years ago
Lavender Lass
8 years ago
zorroslw1
8 years ago
huruta
8 years agotuesday_2008
8 years agoalexamorrie
8 years ago
beth09
8 years agosjhockeyfan325
8 years ago
jerzeegirl (FL zone 9B)
8 years agolast modified: 8 years ago
enduring
8 years agollucy
8 years agolast modified: 8 years ago
Bunny
8 years agomabeldingeldine
8 years agoTexas_Gem
8 years agoErrant_gw
8 years ago
Gooster
8 years agolast modified: 8 years agoBunny
8 years ago
Fori
8 years ago
Related Stories
DECLUTTERINGClutter vs. Keepers: A Guide to New Year's Purging
Simple questions to get in touch with your clutter comfort level — and figure out what needs to go
Full Story
DECLUTTERINGDecorate with Intention: Clutter Clearing 101
Fearlessly face disorganized areas to find the home of your dreams
Full Story
DECLUTTERING10 Types of Clutter to Toss Today
Clear the decks and give the heave-ho to these unneeded items
Full Story
KITCHEN DESIGNHouzz Call: Tell Us About Your First Kitchen
Great or godforsaken? Ragtag or refined? We want to hear about your younger self’s cooking space
Full Story
MOST POPULAR19 Kitchen Projects Every Homeowner Should Know About
Could your kitchen use a new sink, a backsplash, updated hardware, better organization, a good cleaning? Here's how to get started
Full Story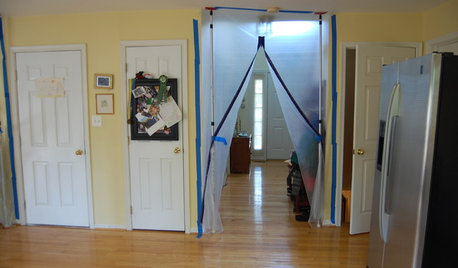
HEALTHY HOMEWhat to Know About Controlling Dust During Remodeling
You can't eliminate dust during construction, but there are ways to contain and remove as much of it as possible
Full Story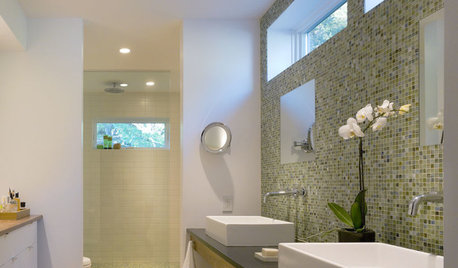
REMODELING GUIDESWhat to Know About Budgeting for Your Home Remodel
Plan early and be realistic to pull off a home construction project smoothly
Full Story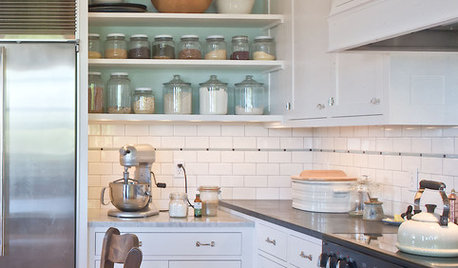
KITCHEN DESIGNLove to Bake? Try These 13 Ideas for a Better Baker's Kitchen
Whether you dabble in devil's food cake or are bidding for a bake-off title, these kitchen ideas will boost your baking experience
Full Story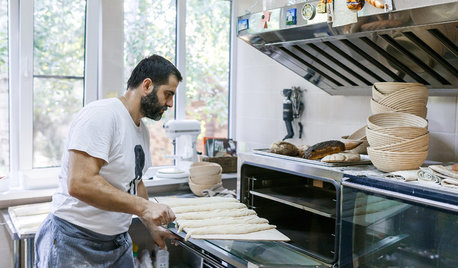
KITCHEN DESIGNWorld of Design: Global Foodies and Their Kitchens
Join us as 11 food lovers tell us about their kitchens and give us a taste of their culinary heritage
Full Story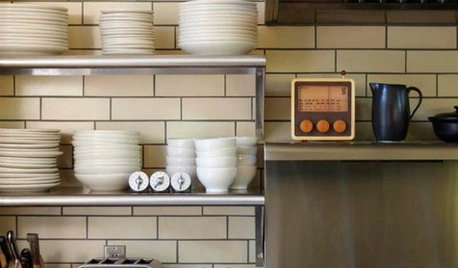
KITCHEN DESIGNCreate Your Own Checklist for a Well-Stocked Kitchen
Personalize the kitchen with your own must-haves from our list of top cooking tools, small appliances, pots, pans and more
Full Story


rococogurl