


Internet: What's useful, what's contradictory, and what saves money?
strawchicago z5
9 years ago
last modified: 9 years ago
Featured Answer
Sort by:Oldest
Comments (7)

Sue_va
9 years ago
ravencajun Zone 8b TX
9 years agoRelated Discussions
your most useful crop re: saving money
Comments (25)Here near Hartford CT, usually corn is $4/doz in the grocery store but lots of sales lately are half that, and as I said I just got some 8/$1. But 2 weeks ago at the farmer's market it was $6/doz. Of course, that market is in a very yuppified old mill town - the deli near the market sells $7 chicken salad sandwiches! There's a waiting list and it's $100 for a table for the season, but only $10/wk if there's an opening that week, so I may bring some berries/jam and extra produce down next year. At those prices it's worth sitting there for 4 hours on a Sunday AM!...See MoreWhich would save us more money? Help!
Comments (25)You don't say where you live. I assume its in the south somewhere? Even here in NH its been very hot this past week (in the 90s) and humid. However it did cool down to about 70 at night. We don't have ac because the climate doesn't need it very often, but we do have a whole house fan that we run at night. Its great! The key is the strategic opening of windows so the ww fan will draw cool air all through the house. If a window is open right next to the fan that's where it will draw most the air from so you don't do that. Before the fan we would open the windows as soon as it got cooler out than in, and have fans blowing OUT the upstairs windows, and then close everything down in the morning when it got warmer again. This made a huge difference. Maybe the ww fan would work for you in spring and fall if you live in a very hot place, and save money on ac. It would definitely keep your upstairs cooler since they blow into the attic (also called attic fans). This makes me wonder if your attic is properly vented. Its possible that a po did something that they shouldn't have to your attic vents. OUr house is very well insulated. My dh keeps adding insultation to the attic, and years ago he blew in insulation in the walls. Our heating bill last winter was about $400, with the upstairs kept cool. My moms was $2000 tho for a somewhat bigger victorian house but she keeps her thermostat on 62. We replaced a few windows that were in terrible condition (with wooden windows) but our house is very plain and from the 1920s so not that old. We got 2 over 1 s like the rest of the house and they seem to blend in. I understand what people are saying though. Sometimes you see window replacements and it looks like the soul is gone from the house after. Some folks also object to getting rid of the old weight system windows, but that big gap in the wall where the weight is is an uninsulated weak spot. My dh retrofited many of our old windows so we don't have the weights and he filled the gaps with insulation. I must admit tho that the weight system works great, and I have an easier time opening the windows in which the old system remains. We got interior storm windows which cost about $170 each and they had to be custom cuz the window openings are all slightly different sizes. They are great, but finding a place to store them is a challenge even tho we only take down the ones where we put screens for the summer. They are less expensive than replacement windows, clearly. It did make a big difference in our comfort this winter, and they are a lot nicer than plastic. The other bad thing about them is that they take up some windowsill space and they don't come in very many colors. Good Luck!...See MoreWhat do you do that saves you money AND is kind to nature?
Comments (14)Keep advertising flyers printed only one side using typewriter paper to use to write notes, make calculations, etc. The ones written on both sides I save in a grocery bag to put in the recycle bin for fine paper. Got a heavy paper/card flyer, regular office size from a local deli in the mail today - will punch holes in it and use it for subject divider in ring binder. When I get their flyers half that size, glue a store flyer printed one side to them - then can use it to write material that I want to use frequently (e.g. phone numbers, listing of area codes, frequently used web site, e-mail addresses, etc.) on that blank sheet. Newspapers saved in different bundle. Use large sheet of scrap cardboard to build open-top box to organize magazines that I wish to save for future reference, to stand up on bookshelf. Cardboard pie boxes will do the job, as well - but they don't stand alone as well. Need to cover plastic window on inside so doesn't catch on mags with a sheet of (used) printer paper, held in place with a dollop or so of glue. We just had a shot of snow this morning - much earlier than usual. Brrr-r-r-r. With electric baseboard heating (and inadequate insulation in this rented townhouse), I can adjust heat room by room, so keep heat level low in kitchen, where I'm usually moving around. Turned heat up in bathroom yesterday. Keep it rather low in office, as well. Put on winter underwear this morning. When it gets cold I wear a sweater, batting-insulated vest and light jacket. Wear a hat to cover my head (only lightly insulated by hair). Get along O.K. until fingers get cold. My 22 year old Ford van has couple of leaks in roof, small holes in body and major hole in floor. Am getting some body metal, pop rivets to secure pieces that I've cut and shaped, tar to coat the outside under floorboard, fender, etc. and body paste to smooth over new metal to blend in with current body, then can sand and paint. Retrieved several spray cans with a dab of paint left from garbage, a couple of years ago. Several colours - but I plan to use only black and white, thank you. Not really a hard job. Should cost approximately $50. Better than scrapping the vehicle - which looks rather scruffy and some said that I should do four years ago when I did last body job. Takes a lot of materials and energy to build a new vehicle - so I say it's best to run the old ones into the ground. There are some rust spots on the hatch at the back of the 13 year old car, so need to use wire brush in electric drill to clean off rust, then smooth out with body paste, and paint with primer and finish coat. (Don't have right colour paint on hand). If I don't do it soon - I'll have rust holes to deal with. Much more effort required, then. Annual insurance (I don't carry collision coverage, of course) on both costs about 150% of what I paid for the van, 13 years ago. It had around 150,000 mi. on it then - about 190,000 now. Originally used it to deliver corn-fired heating stoves that I used to sell. Anyone know where I can find some hot air? Surely not produced by anyone around here! joyful guy...See MoreSaving Time so You Can Save Money
Comments (11)I'm not sure I'll be much help on this subject since I'm just now decluttering and reorganizing my home. Here's a few little things I'm doing: Since I don't have a regular pantry (I'm going to make one somewhere, someday--lol) I keep all breakfast items in one drawer, like instant oatmeal, grits, hot chocolate, etc. So, I know in a glance what I need and don't buy extras. I just tear off the top of the pkg. and set the whole thing in the drawer. I also keep my ironing supplies on one drawer---irons, spray starch, etc. I actually had to buy a second iron because I couldn't find the first one---before I organized! I took all on my junky paper and cut it into note size, put it in my desk drawer. If I have pretty junky mail, or envelopes, I cut them up to use as gift tags or small note cards. I hate frying bacon, so I bake it now on a rack. It's healthier and I don't have to spend so much time at the stove. I actually baked a pkg. this morning, used it all at once---now, we have bacon for tomorrow. I don't have very many closets, so I'm using decorative tins and hatboxes (I went thru a hatbox-making phase a few years back) for storage of sewing and craft supplies, and anything else that I can't find a place for!!! LOL These things hold a lot, so I may not have to buy any shelves. In my foyer area, I have a narrow table with a mirrow above it. I just cleaned out that drawer in the table----I have a place for car keys (his & hers), gloves, hairbrush, and glasses. Since I wash my hands a zillion times a day, I keep either an old dish detergent bottle or shampoo bottle with soap, water (*and now hand lotion or baby oil mixed in) under the sink to wash hands with. I just saw a Dr. on Tv say that if you wash your hands too much and they're dried out, germs can enter your body thru the cracked dry skin EASIER!! They were talking about the flu viruses. He actually said that rubbing your hands back and forth, creating friction, would kill germs on your hands!! Rub your hands, rub your hands!!!!!!...See More
nicole___
9 years agolast modified: 9 years ago
socks
9 years ago
strawchicago z5
9 years agolast modified: 9 years ago
maddielee
9 years ago
Related Stories

SELLING YOUR HOUSESave Money on Home Staging and Still Sell Faster
Spend only where it matters on home staging to keep money in your pocket and buyers lined up
Full Story
DECORATING GUIDESLook-Alikes That Save Money Without Skimping on Style
Whether in woodwork, flooring, wall treatments or tile, you can get a luxe effect while spending less
Full Story
ACCESSORIESEasy Green: Cut Electricity Use With 15 Unplugged Home Devices
Crank up the energy savings, courtesy of household items that come into power the old-fashioned way: manually
Full Story
GREEN BUILDINGSunlight Used Right: Modern Home Designs That Harness Solar Power
Embracing passive heating principles through their architecture, siting and more, these homes save energy without skimping on warmth
Full Story
DECORATING GUIDESBudget Decorator: How to Save When You Don’t DIY
You don’t have to be crafty to decorate your home inexpensively. Here are other ways to stretch your design dollars
Full Story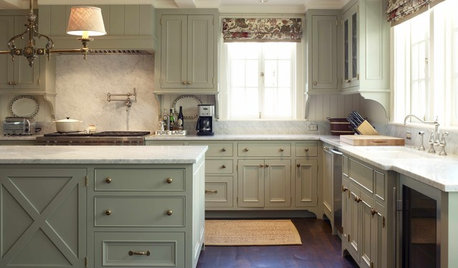
KITCHEN DESIGN9 Ways to Save on Your Kitchen Remodel
A designer shares key areas where you can economize — and still get the kitchen of your dreams
Full Story
GREEN BUILDINGWater Sense for Big Savings
Keep dollars in your pocket and preserve a precious resource with these easy DIY strategies
Full Story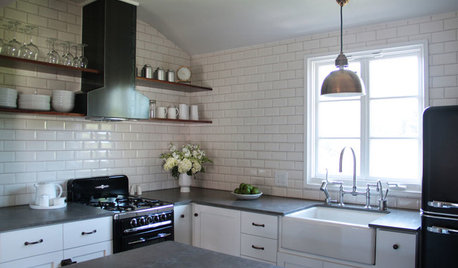
KITCHEN DESIGN10 Big Space-Saving Ideas for Small Kitchens
Feeling burned over a small cooking space? These features and strategies can help prevent kitchen meltdowns
Full Story
BATHROOM DESIGN9 Big Space-Saving Ideas for Tiny Bathrooms
Look to these layouts and features to fit everything you need in the bath without feeling crammed in
Full Story
ARCHITECTUREEnergy-Saving Ideas From 3 Affordable Green-Built Houses
Get lessons in budget-friendly green building from design competition winners in New York state
Full Story
rob333 (zone 7b)