Building a Refrigerator Garden
Where do dead refrigerators and freezers go? In your garage, or the local landfill. Here’s an alternative used for those unwanted white elephants, if you have the space and inclination: Grow your own fresh veggies!
Depending on the terrain, or area you want to install the freezers or refrigerators on, ground prep is minimal. I leveled out the ground just beneath the appliance to insure it was flat when laid down on its back. As to watering, I trenched from an existing water source and laid PVC pipe to each unit location. You may want to use a garden hose to water one or two boxes, or a special connector if you want a lot of boxes. To control the water flow, I installed a simple inline valve, and buried it in a bucket to prevent freezing.
There are plenty of free refrigerator ads on Craigslist, or you may know someone who will let you have one. Trust me, getting them is no problem, I got 12 boxes in under three weeks! I found side-by-side refrigerators to be unsatisfactory for my garden, preferring the over and under boxes, or better still, freezers with no divider at all.
Once I pick up the unit, I have an A/C guy that recycles Freon/coolant for free, so I stop by on my way home to get the unit drained. (Check around.) Sometimes he will take the coils and pump out if they are good enough to re-use! After hauling the free refrigerator/freezer home, the first thing I do for safety is take off the doors. I set these aside for use later, or to recycle.
At home, I strip the innards out of the box, shelves, drawers, etc. and set these aside. What remains is a clean, empty box ready to place!
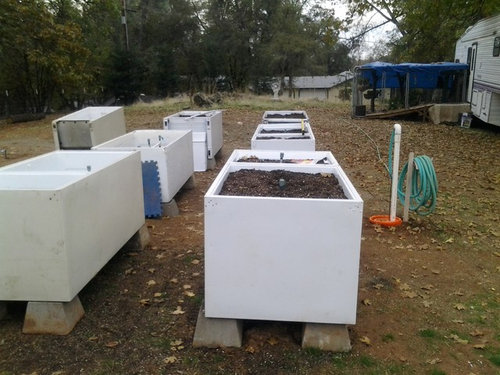
Four pier blocks underneath each corner of the box for support raise the planting bed off the ground, preventing rust and providing access to plumbing and drain holes. Of course, even on a concrete patio or driveway raising it a bit makes sense for drainage.
I used an inch and a half metal drill to make a hole for drainage and a water source hole, and a connecting hole between partitions if it is an over and under unit. Once the plumbing hole is drilled, I lay the box over on its back and center the plumbing hole over my water source pipe. I previously trenched and pre-measured where each box would lay, and stubbed off the water pipes just above ground with mushroom bubblers to be used later in the boxes. With the box centered and in position on the blocks, I again check for level.
Plumbing the box:
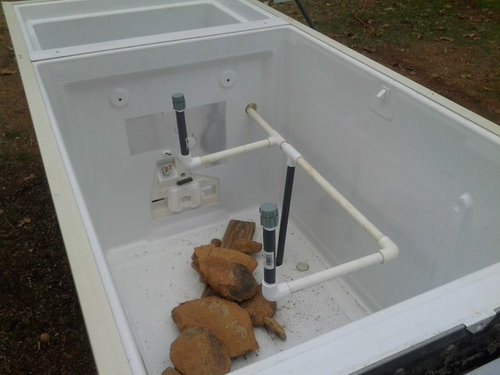
I use 18" risers threaded to a 'T' with a couple of laterals to elbows. These may be topped with 3" risers and a mushroom bubbler head. I use mushroom bubblers because they can be adjusted individually. Alternately, 360 degree sprinkler heads may be used for above the plant watering. Your plumbing options may change to fit your needs, so “MacGyver” your project as needs be. NOTE: Before you fill the box with soil, purchase a can of spray foam insulation and plug any drain holes or other holes the box may have, including the one you make for the riser. Water has a tendency to flood through these holes, and it needs to be controlled until the box has settled the soil. Wherever it is convenient, either in the end or the side, drill a small hole and install a short pipe with an inline valve to drain the box about 3" up on the side. This will prevent root rot from pooling water. When the box gets over-watered, simply drain through this valve into a bucket and use the water elsewhere on plants. Don't forget to seal this drainpipe hole as well. What you want is as near a watertight box as possible.
Filling the box:
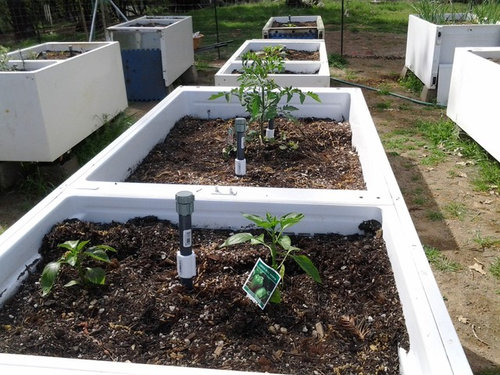
I used stones I have here on the property to fill about six inches in the bottom of the box for drainage, but 3/4 gravel will work just as well. (Don't break the pipe coming up!) Then I cover the rocks with a layer of sand, topping everything off with amended soil (great garden topsoil) that I purchase at a local nursery by the yard. A half a yard will fill a freezer, after rocks and sand. Turn the valve on in the bucket, or use your garden hose with a proper connector, open the mushroom bubblers to bleed the air, and you are good to go!
Note:
The soil will compact over the course of time, so have more on hand to top off the box before you plant, I'd say give it a week to settle. Water drains can be plumbed to a bucket to recycle the water either out the bottom or the end of the unit, about 3/4 the way down works for me. I use spray foam to fill any incidental holes left over from manufacturing the unit to prevent leakage of water. If built on raw land, the weight of the boxes filled will settle over time depending on the hardness of the soil beneath, so the box may have to be jacked up and shimmed to make it level for proper distribution of water. To do this I used a simple car scissor jack. I plan to grow climbing vines on the perimeter fence to screen the refrigerators from view. (Not that I think they’re ugly!)
In conclusion:
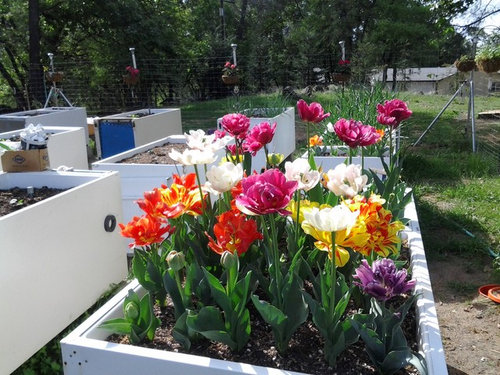
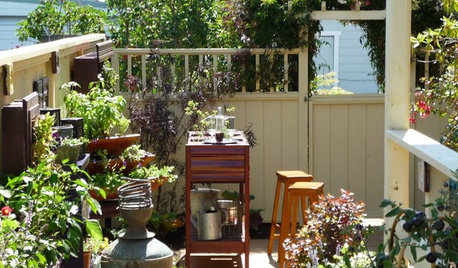
The garden is just the right height to walk or wheel around and pull weeds without breaking your back. People with wheelchairs or walkers would appreciate the accessibility as well. Water can be controlled precisely, using mushroom bubblers or even installing drip irrigation. Using recycled refrigerators and freezers keeps them out of the landfill, so it’s a win-win for us and the environment!
In short, no more gophers, rabbits, moles! And I don't have to worry about the condition of my soil, or bending over to weed!
*Basic plumbing skills and someone to help with the moving stuff around is a definite plus, but this project could involve the whole family or a determined individual like myself!


docmom_gw
nancyjane_gardener
Related Discussions
Try, try again! Garden pics - 2
Q
Do You Have a Garden Refrigerator?
Q
Succulent and Cacti Garden...giving it a try!
Q
Trying to diagnose low refrigerant
Q
zzackey
flowerchild59
Marie Tulin