


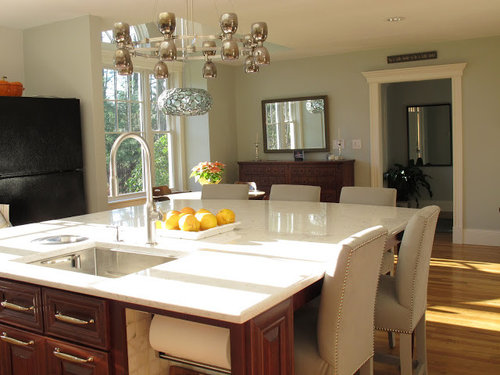
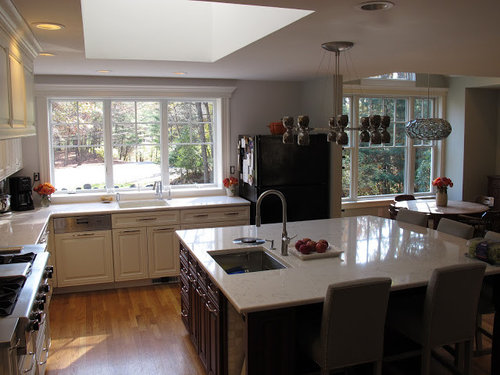
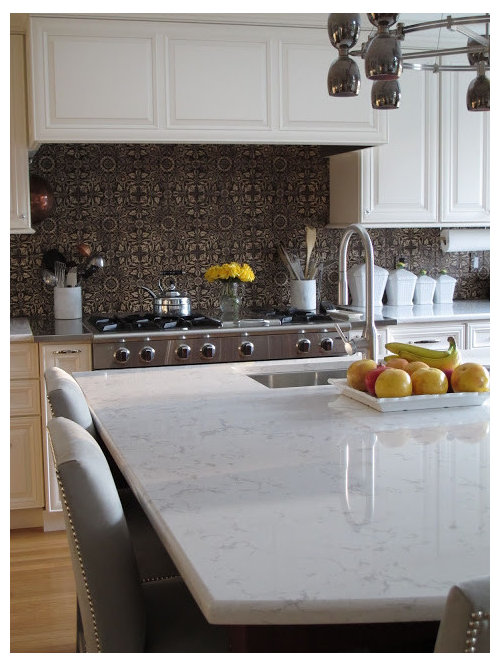
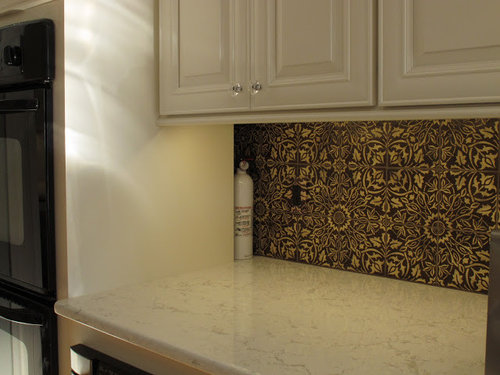
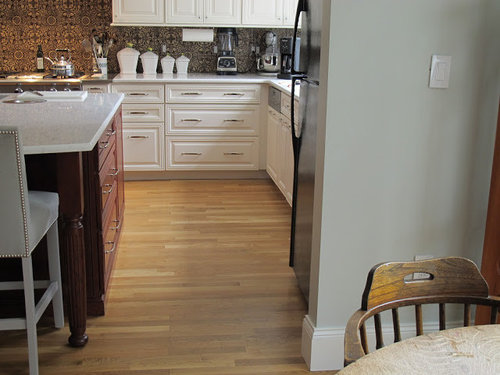
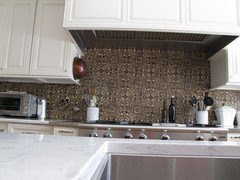
Bold Tile, Sunlight Filled Kitchen
oldbat2be
11 years ago


Featured Answer
Sort by:Oldest
Comments (85)

Mick Mick
11 years agolast modified: 9 years ago
secondhalf
11 years agolast modified: 9 years agoRelated Discussions
Oldbat2be reveal - photobucket pix
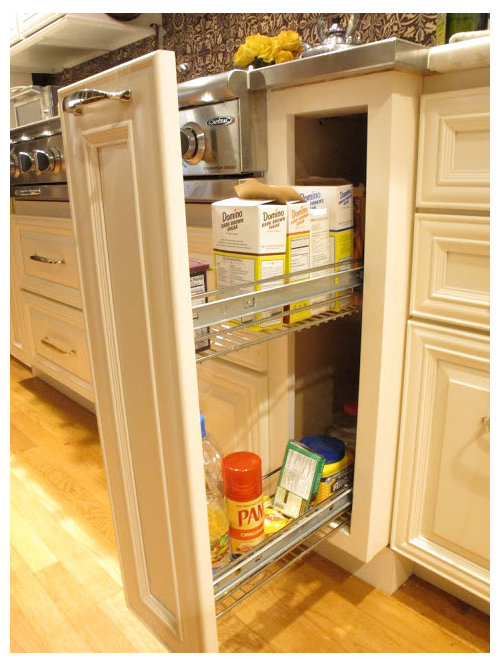
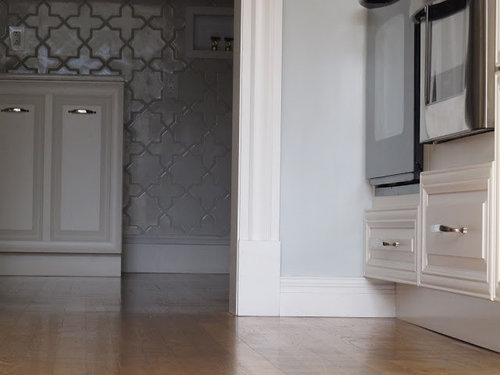
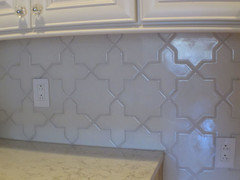
Comments (34)Thanks a2 - You probably saw most of these in the original reveal but there were a few new ones. Any progress with Photoshop? I know you are going to have a lot of fun with it. Ginny20 - Thanks!! We've been surprised at how well it turned out. The nicer it gets though, the nicer we want it to be. I'm thinking about redoing a few things here and there.... Angie_DIY - wish you would and wish you were closer so I could come see your kitchen in person. Hi Renee, so glad you like the tile and kitchen. I always smile when I see your name and remember the help you gave me on my hose reel thread. (I really like the ones I ended up getting by the way). How goes your lovely garden? kristi-stl - I'm so sorry I didn't reply earlier. The Island is Cherry with the cordovan stain. What I'd do differently with the door is to have a flat outer edge (ours is raised). Also, the cordovan is pretty red. In hindsight, I was looking for a more traditional, honey cherry color. kateskouros - Thanks for the kind words! While it may not look like it, your gorgeous kitchen was one in my inspiration file. Obviously I am not very good at copying elements:) We are very much enjoying the layout and new space. seosmp - It's 8.75 inches from the wall to the start of the window trim; just about 12 to the actual window glass. The bumpout shelf was an afterthought. I'd wanted one but forgot to specify to our architect. When our builders started framing the window, I remembered. It was a fairly easy adjustment. I question sometimes whether I should have continued the bumpout at countertop height but in our case, the window is visible from the front of the house and I don't think I would have liked seeing objects on the countertop from outside (if that makes sense). I planned originally to have plants on the shelf but it looks a little messy from the outside so usually I leave it clean. I am planning on a Torquay shelf in this space at some point....See MoreHave you painted a bedroom a bold or deep color?
Comments (62)yes. definitely green for the bedroom; white trim; brown/natural accents. Probably a bright/medium yellow toned spring, lime, to acid green--a happy, lively color. Looking around my home, I have many accessories in this color range, as well as being prominent color outside. Definitely not a greyed, pastel, sage, or forest green. @ Tibbrix; I think you're right about that color, I looked at it again. The next deeper on the color chart works better. Will be looking for more natural and wood accents, and possibly a medium brown for the smaller bedrooms....See MorePLEASE HELP me choose which granite for kitchen with no natural light!
Comments (54)@salonva preliminary picture of the new countertops and sink!!! I'm really enjoying the new countertops. The fabricator is coming to do a second layer of sealant on the countertops too. We really love how this color looks. We worked on replacing 1/2 of the hinges yesterday with invisible ones- I'm hoping the rest will be done by the end of the week and that we may be able to paint the cabinets this coming weekend (at least the uppers!!) With that in mind, after seeing the countertops installed and envisioning the pure white cabinets, I'm thinking a white backsplash will look too sterile. I think once we have the cabinets painted I will do a separate post asking for new backsplash tile recommendations! but I figured I would share how the new countertops came out, The river white really looks nice!...See MoreBlending Old Kitchen Tile Kitchen Updates -What colour Base cabinets
Comments (27)Finally our kitchen journey is finished. Thanks to everyone for their suggestions, designs and advice. Every comment was reviewed, considered and in many cases incorporated, even when the advice was not to include an element that would not serve the aesthetics or budget for our project. Much appreciated to all. I especially appreciate the time and effort of the professionals in the thread who helped without compensation. Their expertise was invaluable and gave us the econfidence to make choices that helped to push us to the finish line. I wanted to share our final pictures and some of the learnings from the process. 1. Budget is a guideline. Our guideline was 10k, a significant sum for a face lift and sufficient for a basic reface in my area, repainting cabinets, sink and countertop. It didn't allow for all of my wishlist (e.g. extending cabinets, custom rangehood, waterfall countertops, extra large sink and antique brass fittings). Those items required extra budget and some serious negotiation and shopping excursions to support. All in we spend 14K and that included extra cost fo unplanned updates (rewiring for undercabinet lighting, range vent, plumber to replace old plumbing). We also paid twice as much for our counters than we expected. $2700 grew to $5500 but still very reasonable considering our configuration. It meant that my island depth had to be reduced which still bugs me a little but ultimately works better for our floorplan. 2. Sometimes you just can't get a deal on price. I was desperate to find a backsplash that would be timelines, add texture but not break the budget. We were going to go with quartz to match the counters but that was a budget buster. We decided on subway tile but had made spanish tiles that matched out counters exactly. We found the perfect tile but it was 45% higher than our budget so we searched high and low, for weeks but never found an alternative option. We went with that option and have not regretted it for a second, it has an old world feel that works with the rest of our transitional home. 3. Somes reusing something better serves the overall project The floors in our kitchen were my biggest concern. "Lipstick on a pig" came to mind everytime we discussed, picking a cabinet colour, quartz countertops and tiles. We had to find a way to incorporate the existing flooring with a new bright kitchen. I needed to refresh our tile to a standard that would not detract from the new cabinets. This was a journey. We finally decided the biggest impact was to regrout the floor reducing the impact of the patter and lightening the floor overall. I think this labour intensive, cheap exercise ($50 in materials) was our biggest bang for our buck and the most satisfying update to our kitchen. 4. Having a plan will save you heartache and reduce regrettable spends. We poured over thousands of pictures, asked hundred of questions and discussed the project with as many experience people to have a solid picture of what we were trying to achieve. This helped us to know where to spend our dollars effectively. We researched all of the people we worked with and understood the work that would need to be done and we only hired people who understood our vision. 5. Be realistic You can't have everything, everything won't be perfect and sometimes concessions will have to be made unless you have unlimited time, resources and an army of tradesmen who can do anything you can imagine. I learned that the real fun is in the problem solving and thinking outside of the box. It took 6 1/2 months but it was more than we had hoped to achieve within our budget. Project: Update our builder kitchen, making it brighter, in line with the rest of the work we had done on the main floor and reusing as much of the original kitch as we could. 17'X 19' floorplan remained the same. It was dark, crowded outdated and just worn out from 17 years of use. The cabinet had a 10" dust collecting gap, the counters were laminate and in need of repair and we didn't have backsplash. We focused on light, bright updates that were not overtly trendy or specific to 2023 but rather aligned with the transitional design that we have been incorporating throughout the house. We also replaced the lighting to create unobstructed views within the room and out to the backyard. Perfect spot for morning coffee, chatty dinners at the end of the day or a hand of crazy eights with the kids. Is our kitchen magazine perfect? No but neither is the rest of the house but it is beginning to be perfect for us. :-)...See Morewags848
11 years agolast modified: 9 years agogwlolo
11 years agolast modified: 9 years agoolivertwistkitchen
11 years agolast modified: 9 years ago
Bunny
11 years agolast modified: 9 years agosixtyohno
11 years agolast modified: 9 years ago
fouramblues
11 years agolast modified: 9 years ago
enduring
11 years agolast modified: 9 years agolabbie
11 years agolast modified: 9 years agolabbie
11 years agolast modified: 9 years ago
oldbat2be
11 years agolast modified: 9 years agooldbat2be
11 years agolast modified: 9 years agoannkathryn
11 years agolast modified: 9 years agofirstmmo
11 years agolast modified: 9 years ago
a2gemini
11 years agolast modified: 9 years agoiroll_gw
11 years agolast modified: 9 years agoMizLizzie
11 years agolast modified: 9 years agooldbat2be
11 years agolast modified: 9 years ago
Pipdog
11 years agolast modified: 9 years agooldbat2be
11 years agolast modified: 9 years agoangie_diy
11 years agolast modified: 9 years agoppbenn
11 years agolast modified: 9 years agowi-sailorgirl
11 years agolast modified: 9 years agocaitlinmagner
11 years agolast modified: 9 years agooldbat2be
11 years agolast modified: 9 years agoEATREALFOOD
11 years agolast modified: 9 years agoJfay
11 years agolast modified: 9 years agoLisaSE
11 years agolast modified: 9 years agoMizLizzie
11 years agolast modified: 9 years ago
Debbi Branka
11 years agolast modified: 9 years agooldbat2be
11 years agolast modified: 9 years agoMizLizzie
11 years agolast modified: 9 years agoTxMarti
11 years agolast modified: 9 years agooldbat2be
11 years agolast modified: 9 years ago
localeater
11 years agolast modified: 9 years agorikerk
11 years agolast modified: 9 years agooldbat2be
11 years agolast modified: 9 years agocarsonheim
11 years agolast modified: 9 years agooldbat2be
11 years agolast modified: 9 years ago
Holly- Kay
11 years agolast modified: 9 years agoLara
10 years agolast modified: 9 years agosteph2000
10 years agolast modified: 9 years agoMags438
10 years agolast modified: 9 years agoHolly- Kay
10 years agolast modified: 9 years agoalicewhite354
8 years agooldbat2be
8 years agowellil
7 years agoenduring
7 years ago


Related Stories
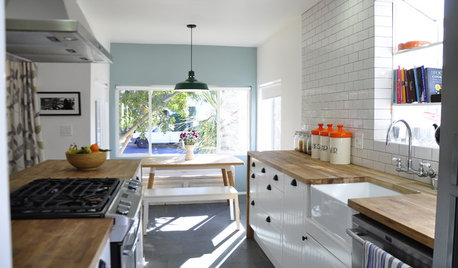
HOUZZ TOURSHouzz Tour: Sunlight and Family Friendliness for a California Cottage
A family of 4 gets comfy in a guesthouse, thanks to lots of light and forgiving materials
Full Story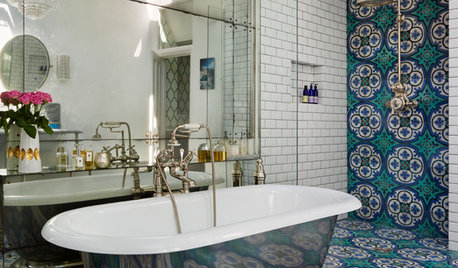
BATHROOM DESIGNRoom of the Day: Bold Tile and Classic Style in a London Bath
Vivid Mediterranean hues and vintage-style hardware create a stunning family bathroom
Full Story
CONTEMPORARY HOMESMy Houzz: Light and Serenity Fill an 1890 Home
Remodeling enhances a Jerusalem home’s architecture while bringing in more sunlight and a peaceful vibe
Full Story
REMODELING GUIDESHouzz Tour: A Light-Filled Paris Studio Redesigned for Living
An architect reconfigures rooms and brings sunlight into a furniture restorer and trapeze artist’s window-lined home
Full Story
KITCHEN DESIGNKitchen of the Week: Simple Lines and Bold Color
When imagining a new look for this space, the designer started with orange
Full Story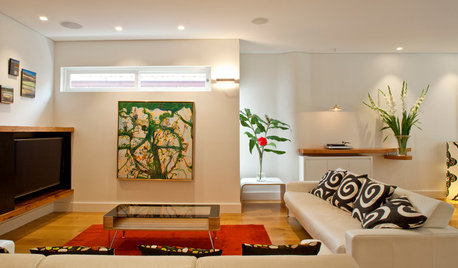
CONTEMPORARY HOMESHouzz Tour: Brood Spreads Its Wings in Art-Filled Addition
An Australian beach house in a tropical setting expands beautifully for a family of 6
Full Story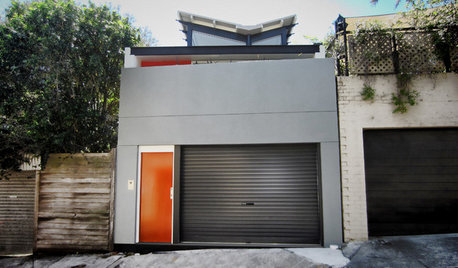
COLORGoing Bold With Just Enough Color
Using color with restraint inside and outside can be far more effective than a less subtle approach
Full Story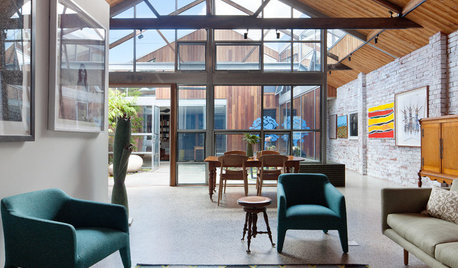
HOMES AROUND THE WORLDHouzz Tour: Historic Warehouse Becomes an Art-Filled Home
A renovation of a brick warehouse in Melbourne, Australia, creates an urban sanctuary for easy living and entertaining
Full Story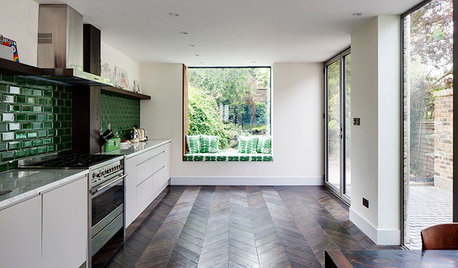
ADDITIONSLight and Personality Fill a Remodeled London Home
Eclectic and heritage elements mix in a clever extension that adds volume without digging into the home’s foundation
Full Story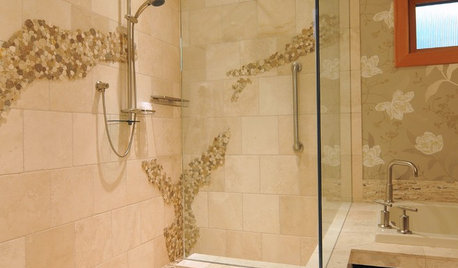
Live Boldly In Your Home Design Choices
Try something new and unconventional in your home and let your personality shine through
Full Story

User