


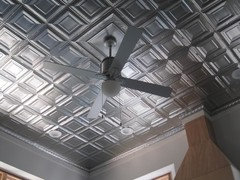
Nailing into plywood overhead - nails bounce
JHZR2
9 years ago
Featured Answer
Sort by:Oldest
Comments (12)

mushcreek
9 years ago
Elraes Miller
9 years agoRelated Discussions
Roofers ruined my pretty blue porch ceiling
Comments (39)Most of you need to understand manufactures requirements. Roofing nails MUST penetrate 1/4 Inch thur the decking. You will have no warranty if wind blows your roof off or insurance due to improper installation. I would have made you sign a warranty waiver knowing you were voiding your warranty. So when this takes place you will be complaining he used the wrong nails. It is not the roofers fault your house was built with the roof decking as the ceiling. Know your facts people before you talk trash about something you know nothing about....See MoreExpansion Gaps In New Plywood Subfloor Missing
Comments (13)Wood subfloors require expansion joints. I have subfloor panels with instructions printed on the boards to leave a 1/8 inch expansion joint. Yet, the idiot contractor butted all joints together. Now I have squeaks and high spots where the floor pops when someone walks over it. The reason for an expansion joint is obvious. Wood expands and contracts relative to the humidity surrounding it. Also, wood floor manufacturers will tell you the same thing for subfloor preparation....See MoreBouncy I-Joist floor
Comments (8)The web "stiffners" that are referenced stiffen the web against local web buckling, they will do very little, if anything, to reduce the bounce. Static deflection and vibration or dynamic behavior are two different animals. Limiting deflection prevents failure from overstress. Objectionable "bounce" can be had long before any overstress. It has to do with the fundamental frequency of the floor system and the amount of damping that the floor system has. A floor with insufficient damping will continue to oscillate when excited. This is like having a car with adequate springs to handle the load but no shock absorbers. The springs control the static deflection under load, but the shocks are what dampen out the response to the impact. The car continues to bounce after the initial bump until it dampens out and stops. Less damping means more cycles until it stops. If the natural frequency of the floor is close to the frequency of walking then every step excites the floor (or causes another impact) and it continues to bounce until it has no more excitation and then dampens out. Bottom line is that to substantially change the existing condition you need to either change the fundamental frequency so that it isn't easily excited (this is what happens when you cut the span in half) or add more damping (by stiffening the floor with additional diaphrams/section buy adding mass and vertical stiffness through side plates or additional joists). FWIW, putting more mass in the center of the room will increase the number of cycles required to dampen out the oscillations. If you can't or don't want to live with a post downstairs then I would recommend doubling the joists to a 12 in. spacing. Good luck....See MoreStabilizing long ceiling joists (attic floor of 2-story garage)
Comments (0)We are finishing out the 2nd floor of a 2-story garage built in 2006. It measures 20'x30' with 20' 2x12 ceiling joists placed 16" on center that span 20' under the second floor, and 20' 2x8 ceiling joists placed 16" on center under the attic plywood floor. There are no interior walls upstairs, so essentially like a barn --> purlin hangers are probably inappropriate in the attic as there is no internal wall support for the 2x8 ceiling joists that the hangers would rest on. The long 20' ceiling joists under the attic floor need to be vertically stabilized (they are covered with nailed-on plywood so they are stable horizontally although may twist) as they bounce and vibrate if you jump up and down in the attic. To date, we passed city structural inspection, but none of the above is on the radar of inspector -- so I am trying to deal with it via my contractor. The solution I propose is as follows:1) Drop vertical 2x4's from the rafters (spaced every three ceiling joists = 48" max) 2) Ensure two 2x4's are used per selected joist and place them 5' from the ends of the ceiling joists (rafter nail-in will occur vertically above the tie-in to the ceiling joist) 3) nail the dropped 2x4 into the ceiling joists -- only to dampen vibrations. The structure was built in 2006, so there has been plenty of time for the wood to settle. Using the above approach, I would be locking in the long ceiling joists from vibrating so much and wouldn't (I think) be placing any additional stress on the rafters or the ceiling joists. Essentially, this would be like locking the current vertical locations of the ceiling joists via the rafters -- only to minimize the flexing when in the attic. So in a way, it's almost cosmetic -- without stress, it wouldn't be purlin bracing, but locks of the ceiling joists from flexing. How does this sound for a solution?...See Morejakuvall
9 years agoJHZR2
9 years agoElraes Miller
9 years agoJHZR2
9 years agomushcreek
9 years agomushcreek
9 years agoJHZR2
9 years agomushcreek
9 years agomushcreek
9 years ago

Related Stories

BATHROOM DESIGNFloor-to-Ceiling Tile Takes Bathrooms Above and Beyond
Generous tile in a bathroom can bounce light, give the illusion of more space and provide a cohesive look
Full Story
MATERIALSWhat to Ask Before Choosing a Hardwood Floor
We give you the details on cost, installation, wood varieties and more to help you pick the right hardwood flooring
Full Story
KITCHEN CABINETSKitchen Cabinet Color: Should You Paint or Stain?
Learn about durability, looks, cost and more for wooden cabinet finishes to make the right choice for your kitchen
Full Story
REMODELING GUIDESOriginal Home Details: What to Keep, What to Cast Off
Renovate an older home without regrets with this insight on the details worth preserving
Full Story
GREAT HOME PROJECTSHow to Add a Window Seat
Get a comfy, cozy spot with a view — and maybe even extra storage too
Full Story
MOST POPULARGarage Cleaning Tips for the Overwhelmed
Don’t let this catch-all space get the better of you. These baby steps can get you started
Full Story
KITCHEN DESIGNKitchen Remodel Costs: 3 Budgets, 3 Kitchens
What you can expect from a kitchen remodel with a budget from $20,000 to $100,000
Full Story
DECORATING GUIDESImproving a Rental: Great Ideas for the Short and Long Haul
Don't settle for bland or blech just because you rent. Make your home feel more like you with these improvements from minor to major
Full Story
REMODELING GUIDESContractor Tips: Finish Your Basement the Right Way
Go underground for the great room your home has been missing. Just make sure you consider these elements of finished basement design
Full Story
KITCHEN DESIGNKitchen of the Week: Casual Equestrian Feel on a Horse Farm
Red cabinetry, salvaged barn decor and a window for feeding treats to horses combine in a lively, comfortable family kitchen
Full StorySponsored
Central Ohio's Trusted Home Remodeler Specializing in Kitchens & Baths


sombreuil_mongrel