


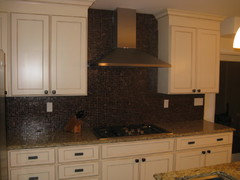
Backsplash Material for New Venetian Gold Granite
cherri
15 years ago
Featured Answer
Sort by:Oldest
Comments (9)

jackiemcg
15 years agoraehelen
15 years agoRelated Discussions
Cabinet Color/Backsplash/Paint Color Help with Venetian Gold
Comments (1)I’m wondering what you ended up doing....See Morevenetian plaster backsplash? pics? (Igloochic?)
Comments (20)walkin I found my file where I'd typed out instructions long ago for another board - thankfully 'cause I'd hate to have to do this again! Don't know what the word limit is here - I'll try and post but if it doesn't work you'll have to email me for directions. I'm giving you 2 directions for 2 different finishes and either one will work for a backsplash - subtle movement, easy to do (don't let the wordiness scare you, do practice boards and you'll see) and easily undone. Just prep as you would for any repainting, roll on new paint and it's gone. If you have any questions, email me - dlm054@gmail.com Parchment Faux This finish will work with any color(s) but to achieve the true parchment look, base color and glaze color should be only 2 to 3 shades different. Toned colors look the best to me, and you dont have to stick to the traditional yellow tones of parchment. Grayed greens look great, golds, terra cottas  even jewel tones look beautiful in this finish, although parchment will not be the word that comes to mind! Application tools: I prefer cotton knit (like t-shirts) rags approx. 18" x 12"  no seams  they will show in the wall finish. If you have old white tÂs to tear up thatÂs fine, or they are sold at HD and most paint stores. Do not us color tÂs. Basic Technique : I like a darker glaze over a lighter wall color. So start with your walls based in the lighter of the two shades, use an eggshell finish. You want the glaze to be able to move on the wall a bit but not a lot  semi-gloss is too slippery. Mix your glaze and paint 3 to 1 or 4 to 1 and add extender if you are using latex paint. You need a long open time to get the really soft look of parchment. You will need tight fitting gloves for this and 2 buckets. Mix your glaze in a small bucket (1 gal) and place it inside a big one (5 gal). This cuts WAY down on splatters. You need two rags at a time to work this. Soak one rag with glaze  totally drenched  then carefully keep it within the big bucket and wring out a lot of the glaze. It needs to be wet, but not dripping. Open it up, grab one corner and hold the whole thing over your other hand. Put the end opposite where you are holding into the open palm of your empty hand. Slowly lower it and allow the rag to create its own folds  it should all rest on your open hand, no tails hanging out  this is called your ÂroseÂ. Try this with a dry rag and youÂll see just what I mean. Take it to the wall and start washing in circles  overlapping  cover an area about 2 x 3 irregular shapes  no square edges. With your dry rag (which is in your other hand at all times and scrunched up in much the same way) start patting over the edges of what you just applied and feather them out till they are very soft. Then work the interior of this area in the same way, only donÂt soften it as much and leave high and low, dark and light. What you are doing is disguising the circular marks of application and applying the texture of the parchment. Re-do your rose  you probably wonÂt need more paint till you have done 3 sections  and do the next area. Start adjacent to but not touching what you just worked. Feather your new area back into the old and continue as before. This is a good finish to do by yourself  you donÂt need a partner. DonÂt plan on taking a break until you finish one whole wall. There is a brown paper tape that has a light tack on one little strip only. Put this down the corner of the wall you are working towards (sticky part in the corner) and it will protect your next wall from getting smeared while you finish the first. If you do want to do this with someone, make sure you play the up-down game. One of you starts high on the wall and one starts low (same wall right on top of each other) when you get to the middle, the low man goes high, the high man goes low. This way, your different techniques will be thoroughly mixed up on each wall and it will look appropriate. Terry Cloth Faux Supplies: Paint Glaze 2 2-1/2" or 3"chip brushes (can be purchased at Home Depot usually found next to the foam brushes, white bristles natural wood handle about $1  chip means cheap to me) Terry rags  can be purchased also at HD  should all be the same otherwise your treatment will change look every time you change rags. Wash & dry before use to remove lint. Dampen your towels  not wet!  barely damp, and fold into a pad so that all hems are on the inside  you will refold as you work, but try to always keep hems out of your paint  they make lines. Instructions: Mix your glaze 5: 1 or more glaze to paint. I just did my 28 x 18 kitchen/family room and used 5C glaze 1C paint, and I have close to 2C left  this technique does not use a lot. A standard size backsplash would only need a couple of cups total! Technique: Use a chip brush and apply fairly random strokes of your mix to the wall in patches. You are going to put a stroke about 5" long, move over and down a few inches, angle a bit and do another stroke, move up and over, stroke again. You arenÂt reloading the brush each time  some strokes will have more paint, some less  thatÂs ok. You want to work in an area of approx 18" but not square  keep it irregular. Very little paint is on the wall  almost like an abstract painting. Now, with your damp terry pad, tap into the edge of one of your strokes and keep tapping as you move the paint towards a bare place. Move in and out of your painted strokes, tapping the pad and moving the paint about. This probably sounds very complicated because there is no visual, but itÂs really a very simple technique. You are tapping, pouncing and ever so slightly sliding the paint around, but you should not see any sliding marks  this should look almost stippled. DonÂt totally even out the paint you stroked on  leave some areas a bit darker some lighter, but do totally eliminate the brush strokes. Fade your edges out to almost nothing  that makes it easy to blend in the next area. Use your chip brush, move over and up or down, and do it again. Keep moving all around the wall. As long as you always fade out your edges, your areas will blend. For a backsplash, you are obviously only moving sideways not up or down. Corners, ceiling lines and baseboards (or cabinet/tile lines as the case may be): Load your chip brush tips only  very little paint is required  and gently tap the paint near not in the corner or ceiling. You should have worked your patches close to the corners by this time, but you couldnÂt get into them because the pad is too big. Now, with your clean chip brush, tap into the paint you just applied and move it to the corner in small pouncing motions. It should blend into your other areas perfectly. You donÂt want to leave your corners or they will look like a halo around each wall and you donÂt want them too dark and smeared or it will look like you didnÂt know how to handle corners. Corners, and ceiling lines are the give-away on an amateur job  thatÂs where you need the most patience for any faux finish. Making a sample first: On a poster board (approx.18 x 24) painted in your base color, paint a vertical swatch of your glaze mix (1 brush width and about 4 or 5 inches long) in the upper left corner, then another in the middle running on an angle as if from 10 to 4 on a clock, then another in the lower right corner kind of horizontal and a small one right above it because you wonÂt have much paint on your brush by that time. Then put a bit more paint on your brush and put another towards the lower left corner. That's the type of coverage you start with in each area of your wall before you start pouncing with the terry pad. There is really very little glaze applied to the walls. What you are doing is thinning it out and moving it around. Keep varying the angles of the swatches but don't make yourself crazy about it - the distances are approx. and there shouldn't be any particular pattern to it. Once you try this, you'll see how much the paint will get moved around and you'll know how much you need to apply to cover a given area. Remember it will dry a bit darker. It will also mellow as it dries - what looks harsh when you are done will be fine in the morning....See MoreDoes anyone have New Venetian Gold and Tumbled Marble Backsplash?
Comments (18)Thanks very much for that photo, monkeyjac. Wow, that is an amazing job they did with your seam. In my case the sink is centered on the island, with the widest part of the arch across from the sink and facing the family room directly. If I knew for sure that it would look like yours, I would have no concerns! This has actually been my hardest decision. I have come to think something like NVG could work best in my kitchen for a number of reasons. Not only does it complement both of my cabinet colors but I feel that as much as I love the movement granites, too much in a large space could easily overwhelm (there's a desk and bar area I'm covering, too). Thats something that my KD has cautioned me about as well and he loves granite with movement. Also looks like you put in the exact Artisan sink I'm considering. I'm between this or the Ticor. PS Sorry for all the typos in the earlier post - it was late!...See MoreLooking for granite suggestions - similar to New Venetian Gold
Comments (4)I am using New Ornamentale which is a lot like the New Venetian Gold. I'm not sure if it's the same as Giallo Ornamentale or not (it seems so many places put their own name on the slabs). It does have some movement, which is why I ended up selecting it over the New Venetian Gold. I will be seeing the templating of my slab this week and will take pictures to share. I don't have any pics of the slab at this time. My cabinets are all cherry. The perimeters are in a toffee (medium brown) stain, and the island is in an espresso (dark brown) stain. The granite was beautiful with both....See Moreorganic_nettie
15 years agoafr66
15 years agojackiemcg
15 years agonancyvh
15 years agolmedw
14 years ago
Teresa Reed
8 years agolast modified: 8 years ago
Related Stories
WALL TREATMENTSSurface Smarts: Venetian Plaster
Centuries-old Venetian plaster has made a roaring comeback in modern interiors. Could this old-world wall favorite work in your home?
Full Story
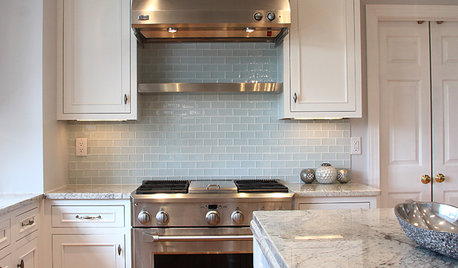
KITCHEN BACKSPLASHESHow to Choose a Backsplash for Your Granite Counters
If you’ve fallen for a gorgeous slab, pair it with a backsplash material that will show it at its best
Full Story
KITCHEN DESIGNHouzz Quiz: Which Kitchen Backsplash Material Is Right for You?
With so many options available, see if we can help you narrow down the selection
Full Story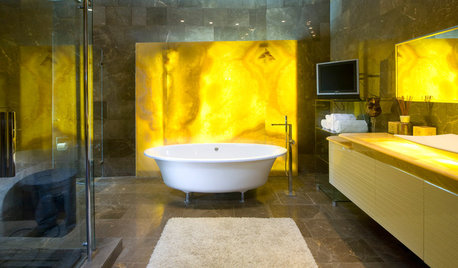
REMODELING GUIDESInspiring Materials: Honey Onyx
This Warm, Decorative Stone Adds Drama to Backsplashes, Counters, Fireplaces and More
Full Story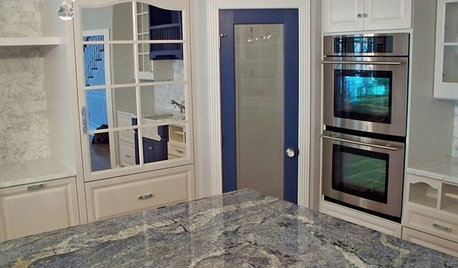
KITCHEN COUNTERTOPSKitchen Counters: Granite, Still a Go-to Surface Choice
Every slab of this natural stone is one of a kind — but there are things to watch for while you're admiring its unique beauty
Full Story
KITCHEN DESIGN5 Favorite Granites for Gorgeous Kitchen Countertops
See granite types from white to black in action, and learn which cabinet finishes and fixture materials pair best with each
Full Story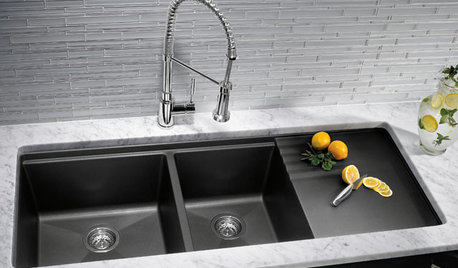
KITCHEN DESIGNKitchen Sinks: Granite Composite Offers Superior Durability
It beats out quartz composite for strength and scratch resistance. Could this kitchen sink material be right for you?
Full Story
COLORA Great Color Combination: Gold Meets Gray
See How Warm and Cool Tones Combine in Elegant Interiors
Full Story
KITCHEN COUNTERTOPSWalk Through a Granite Countertop Installation — Showroom to Finish
Learn exactly what to expect during a granite installation and how to maximize your investment
Full Story


jackiemcg