Our home was built in 1987, and we bought it two years ago. This summer, we remodeled the kitchen. Our aim was an understated, elegant kitchen in an updated Shaker style, where the three of us (me, DH and DD, age 9) could work together. Thanks to all the wisdom that was so generously shared on this forum, we have survived our remodel and are feasting every night!
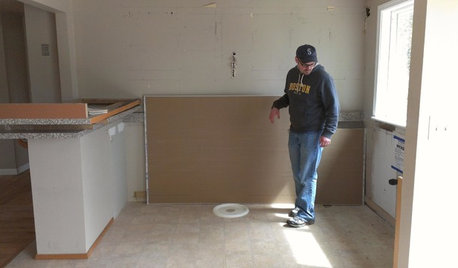
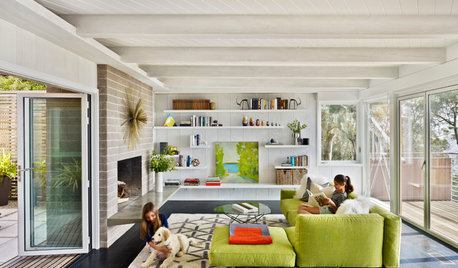
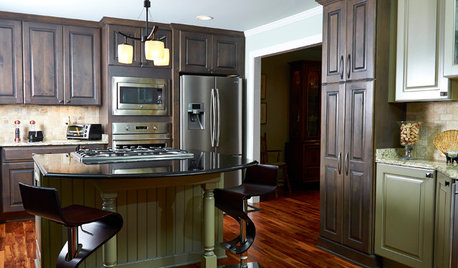
To give you a feel, here are some before and afters…
{{gwi:1912424}}
{{gwi:1912425}}
Yes, we still need light rail under the cabinets. It’s on order….
{{gwi:1912426}}
{{gwi:1912427}}
{{gwi:1912428}}
{{gwi:1912429}}
Bottom line: We love our new kitchen. LOVE it.
It was worth the 3 months of time and inconvenience, the 53 days of washing dishes by hand in cold water in a laundry sink in the backyard, cooking with a microwave and a grill, eating out, and all the stresses of making so many big choices in such a short time period.
So now, the backstory:
The house was built as part of a fairly large subdivision, and so the kitchen was a fairly standard “production builder’s” kitchen for the area. Oak cabinets with fixed MDF shelves, 4x4 ceramic tiles for the countertop (white, with gray grout), and a big garden window looking out at the back fence. As far as we could tell, there had been no updates in the kitchen other than the floor and the dishwasher. We think the floor tile was updated just before the house was put up for sale. A nice ivory tile, but more gray grout that made it hard to use an old-fashioned broom to sweep up crumbs.
The layout was a G-shape, with a peninsula that had no upper cabinets so that the room was open to the family room. However, this meant that when the refrigerator was opened, there wasn’t enough room to walk by and out of the kitchen. If we wanted to grill, we had to walk around the peninsula to get out the sliding door to the patio (where the grill is). That peninsula was our only big stretch of prep space. However, because it was an easily accessible horizontal space, it became a general dumping ground (mail, schoolwork, remains of craft projects, etc.) and the prep space had to be cleared before each meal.
For the remodel, our objective with regard to function was to create more useful prep space, add storage, and make the storage in the lower cabinets more accessible. Without moving any walls or windows, we changed the work flow of the kitchen by removing the peninsula and extending cabinets along one wall, adding a pantry cabinet, and shifting the location of the fridge about 8 inches further away from the corner. We also moved the dishwasher to the other side of the sink so it would be farther away from the stove. We removed the soffit over the cabinets and took out the popcorn ceilings.
I don’t have a “before” floorplan, but my rendition of the “after” is below.
{{gwi:1912430}}
I'll add in a few more photos, and then I’m including a list of details and specifications, and a summary of expenses.
Here's the Kohler Stages sink, with its sliding cutting board and shallow "wet prep area" (on the top in the second photo):
{{gwi:1912431}}
{{gwi:1912432}}
And my favorite part, the backsplash:
{{gwi:1912433}}
{{gwi:1912434}}
See the Picasa photo album Finished Kitchen -- East Bay for more pictures, including some closeups of the details mentioned below.
DETAILS AND SPECIFICATIONS
New Cabinets: Amero cabinets with Bellmont doors (cherry reverse raised panel) in the Whistler door style and the Nutmeg finish. Made by Pacific Crest Industries, in Washington state. Amero is the more affordable line, and Bellmont is semi-custom.
Cabinet knobs and drawer pulls: Amerock’s Mulholland line.
Countertop: Caesarstone in Buttermilk color, with a bevel along the top edge.
Backsplash: Field tiles are Arizona Tile’s Seagrass limestone, in 2x4 brick. Accents behind the stove are Seagrass 6x6 squares, ogee trim, and 1x1 Sonoma Tilemakers’ Tantrum crackle glass, in Tazo. The backsplash goes to the ceiling behind the vent hood, and up to the bottom of the cabinets everywhere else.
Appliances
Stove: GE Profile 30” smoothtop electric slide-in range, PS905SPSS
Vent Hood: GE Profile 36”, PV976NSS, 450CFM, with 4 airspeeds (which we fondly refer to as spring breeze, sailing weather, Nor-easter, and Jet Engine)
Dishwasher: Existing Bosch, changed out black panel and controls for stainless
Fridge: existing Kenmore Elite
Plumbing
Sink: Kohler Stages 45 (K-3761)
Faucet and Soap Dispenser: Eclipse Stainless KPS 3030 Cascade
Wall paint: Sherwin Williams’ Oyster Bay (we used the Harmony zero-VOC low odor interior latex paint, and I was really glad we did)
Lighting (way, way more than we need, it turns out; I'll see if I can write up a whole different post about that!):
- 8 Recessed overhead lights, with compact CFL dimmable bulbs
- 7 Under the counter Xenon bar lights from Feit Electric
- Above the sink: Rejuvenation Lighting’s Bernard, 2 light semi-flush mount, 60watt bulbs, dimmable
Small Appliances:
- Microwave: Kenmore 1.2 cubic feet, MS-1242KLSY
- Toaster: Cuisinart 4 slice, CPT-190
- Undercabinet radio: Sony clock radio, ICF CDK50
Organization inside cabinets (see Picasa photo album)
- two super susans in the lower corners
- rollouts in one lower and in the pantry
- pullout to right of stove for oils, vinegars, salt and pepper
- 18” trash pullout with 2 cans
- Rev-a-Shelf drawer inserts (purchased ourselves): (4WB-1 for knives; 4WUT-1 for cooking tools; 4SCT-1 for silverware; BDC200-20 for bread)
- spice rack (freestanding within a cabinet): 3 drawer spice organizer from StacksAndStacks.com
- expanding shelves (freestanding): Seville Expandable Kitchen Shelf from Bed Bath and Beyond
SUMMARY OF EXPENSES
- cabinets, 16K
- labor, 15K
- counter, 5K
- tile, 3K
- hood & stove, sink and faucet: 4K
- replacing panel on dishwasher: $250
- light over the sink: $275
- small appliances: $500
- organization inside cabinets: $300
- paint: $75 (we did it ourselves)
GRAND TOTAL (gulp!): $43,650
In Closing…
Thank you all from the bottom of my heart for all of your help! I benefited SO much from the collective wisdom of the iVillage GardenWeb Kitchen Forum. Emotional support, advice, ideas I would never have thought of myself, inspiration photos…. I cannot thank you all enough.
I probably won’t be able to hang around much this fall, since things get crazybusy around here once school starts again... but my username is set up to receive email, so feel free to bump the post or send me a message if you have more questions months from now. I’ll do my best to “pay it forward” and help folks who come after me.
My picasa photos will stay up for as long as I can keep them there, so please link to the Finished Kitchen -- East Bay album in the FKB.
From


firstmmo
sadiebrooklyn
Related Discussions
Weekend Journal 14-15 August 2010
Q
'Gota' show my 2010 firewood harvest +.
Q
1987 East Bay kitchen: to remove soffit or not? (5 photos)
Q
My finished white kitchen ($8k budget)
Q
mitchdesj
hpxmirage
jsweenc
bostonpam
cat_mom
quincin
rjr220
artemis78
honorbiltkit
chris45ny
sochi
rjr220
sabjimata
eastbaymomOriginal Author
remodel-mama
stevie_2010
steelerfan_2010
eastbaymomOriginal Author
elizpiz
shelayne
redroze
TY Interiors