


Advice/lessons learned for potential DIY kitchen renovation
northpegram
11 years ago
Featured Answer
Sort by:Oldest
Comments (28)

weedmeister
11 years agolast modified: 9 years agosserra85
11 years agolast modified: 9 years agoRelated Discussions
Renovation Complete --- modern kitchen update
Comments (8)Oops- let me see if I can get it to work this time! It's messy and the rock tiles standing up by the cooktop are what we are looking at for that entire wall as a backsplash....See MoreKitchen Renovation Advice
Comments (9)I drew up an idea... Structural changes: I removed the following walls: * both pantry wall sides (left the back wall) * the wall next to the current refrigerator I then expanded the kitchen 3' into the LR...you said you would consider expanding into the "Christmas Tree room" :-) If 3' is too much, you could do 2' and reduce the depth of the Pantry and the "Dish Hutch" (more on that later). However, unless you want a counter-depth refrigerator, I would at least leave the 3' depth for the Message Center & Refrigerator...both of which are contained in the original pantry alcove space. I added another pantry wall 4' from the DR side (see pic below) Layout: I incorporated all your appliances and added a prep sink. Your work flow goes from the refrigerator......to the prep sink and prep on the peninsula......to the cooktop or ovens......to the cleanup sink or DR. Message Center: You mentioned the peninsula seems to be a clutter magnet. By adding a Message Center you should be able to cut down on some of the clutter. The Message Center would have the house/land line phone (this location is convenient to both the kitchen and the FR); a place to recharge cell phones, cameras, etc.; a place to store phone books & directories; and a place for your keys and other paraphernalia that seems to accumulate at entrances. Refrigerator: Good location b/c while it's in the kitchen, it's still convenient to the FR and outsiders using it won't interfere with the prep, cooking, and cleanup. Landing Space: Dish Hutch Dish Hutch: This 30"W x 30"D cabinet is really a 30"W x 30"D base cabinet plus a countertop plus a 30"W x 15"D ceiling height wall cabinet with, possibly, glass doors. This will give it a furniture look and will provide a lot of storage space for dishes, small appliances, gadgets, etc. The 15" deep countertop can also serve as landing space for the Refrigerator and Pantry. Pantry: This actually can work two ways: (1) Shallow walk-in. 48"W x 30"D with 15" deep shelves floor to ceiling along the back wall. Then, along the side walls, you could install peg boards and store things like brooms, mops, etc....or anything else you like (e.g., someone on GW stores their pots & pans in their very shallow (12"D?) pantry hung from pegboards on the back and side walls.) Bi-fold doors provide full access to the pantry front. (2) Pantry Pullouts. You could alternately put in 52" of pullout pantry cabinets. Why 52" instead of 48"? B/c if you use pantry cabinets you won't need that 4-1/2" wall like you do w/the walk-in. (There may be a way to eliminate that wall for the walk-in as well, but I would be careful since a door will be hanging from it. Shelves can be secured along the back.) Landing Space: Dish Hutch Peninsula: From what I can tell from your current layout, it appears that you currently have a 12" overhang. 15" is recommended for counter-height seating. It means expanding only 3" into the FR. It also provides a nice expanse of countertop (84" x 39"!! I'm envious!!) for baking, normal prep work, school/art/craft projects, and homework (if you have school-age children). Hopefully, DW will be OK with that. I also added a prep sink to that area to keep the cleanup and prep zones separate (and to provide a place to wash hands or get a drink of water w/o interfering w/the kitchen work). [In our home, DH and I are always in each other's way since we only have one sink and it's only 24" away from the range. We're adding a prep sink and moving the cleanup sink to the other side of the kitchen when we remodel.] Prep Sink Landing Space: Right of sink Next to the prep sink, I added a 12" trash pullout for prep scraps. Note one other thing: I put in a Beverage Chiller (or could be Wine Chiller or small refrigerator) under the peninsula counter on the FR side and added a 12" x 12" wall cabinet facing the FR on the end of the window wall to hold cups, napkins, etc. Things that might be useful in the FR. It could also have 2 doors--one opening on the kitchen side and the other the FR side. Window Wall: I put in a 33" double-bowl sink (1-3/4) under the window. It's not quite centered (off by 1.5"), but I don't think it will be noticeable. I wasn't sure if you wanted a double- or single-bowl, so I put in a double. [If you're unsure, search the forum for several discussions on single vs double sinks!...oh, be sure to use the "search" box at the bottom of the page, not the top!] I also bumped out the sink 3" to give you more room behind the sink. I've noticed that most sinks take up the majority of the depth of counters, leaving very little room for faucets & soap dispensers. By adding 3" it gives you a little "breathing space" behind the sink. The 3" on either side could be converted to a "filler pullout" (see the Rev-A-Shelf Spice Racks for Fillers -- Have you seen these!!!! thread). If possible, I would also recommend bringing the window down to the counter height and running your counter into the sill. Several GWers have done this and it looks very nice... (see the Counter Height Windows Love them? Hate them? thread) The DW is to the left of the sink (it's the reason I had to put the sink slightly off center. If the sink is smaller, it could probably be centered). To the right of the sink is a full-size trash pullout for sink & cooking scraps. You may also be able to put a recycle can in there (2 cans total). There's a 36" lazy susan b/w the trash pullout and the cooktop (corner) Sink Landing Space: Both sides of sink Cooking Wall: This wall has your 36" induction cooktop w/a 42" vent hood, vented to the outside. It is highly recommended that vent hoods be at least 6" wider than your cooktop to better catch heat, grease, smoke, etc. There is also a 6" spice/oils pullout to the left of the cooktop. (see the Rev-A-Shelf thread above). Then, there's 24" of landing/space b/w the cooktop and the ovens. The oven stack contains your Convection MW and Convection Wall Oven. Cooktop Landing Space: Left & right of cooktop Oven Landing Space: Left of oven stack Doorways & Clearances: Between the ovens and pantry: 42". This is also the size of the doorway into the DR. Between the Message Center and peninsula: 42" +++++++++ And now, the picture! ++++++++++++ +++++++++++++++++++++++++++++++++++++++ Some general recommendations: * Mostly drawers in your base cabinets. Especially the wider ones. The wider drawers are perfect for pots & pans. Other drawers are great for "tupperware", utensils, linens, baking tools, prep tools, etc. Check out the following threads: What do you wish you had done differently? Best advice from this forum Now that I have [X], I think I could have lived without it Checklist For Granite Installation? (just in case!) tray cabinets - top 1/2 wasted space And, to help you with our kitchen design: Kitchen Forum FAQ I hope you like it. However, remember this is your kitchen, so if you don't like it, change it! Good luckand let me know if you have any questions or thoughts!...See Moreis it worth learning Google Sketchup for laying out my kitchen?
Comments (10)I give it a mixed review. I used a different program for 2D CAD for layout, and then used Google sketchup for 3D renderings along the lines you are envisioning. The pluses: -Certain tasks in sketchup are MUCH more intuitive than on other CAD programs. F'rinstance, creating a 3D object is as easy as pie. -There is a huge database of premade objects that you just download and plug into your drawing. Many manufacturers upload their wares to make it easy for you to design them in, and lots of amateurs like to show off their creations. For example, Kraftmaid has a lot of their offerings in the database. This can give you a huge leg up on producing a nice-looking drawing. -The program is quite flexible. -There are instructional videos from google that make it pretty easy to get started. -It's free! The minuses: -I found certain things that would be trivial to do with almost any conventional CAD program to be very difficult to do with sketchup. Say you want to move a cab over 2.25" to the left. Most programs would have a "move" command. I could not find a way to do this except for to create a guide that was 2.25" away from where the cab was now, then move the cab to that guide. Perhaps there is a better way, but I couldn't find it. -Occasionally, I absolutely could not place an object in the 3D spot that I was shooting for. (As a 2D representation of 3D space, the program has to guess what depth you are aiming for.) The object kept projecting to a different spot, no matter what I tried. For me, the only solution was to delete the object and start again! -This is not sketchup's fault, really, but I feel a bit "locked into" my previous efforts. For example, my initial drawings were off a few inches in one dimension. Totally my fault, but the effort it would take to redo this does not seem worth it to me. I would have to subsequently move everything. -File sizes grow quickly. Mine started small, but have grown to about 40 MB as you add and subtract items. Obviously, this depends on what you download. However, I don't think a kitchen-design-specific program would have this problem. I think if I had to do it over, I would have chosen a kitchen-design-specific program. I am on a Mac, and that influenced my choice, as there are not many of those available for Mac. Here is a rendering of my kitchen. You can also see my sketchup "development" at my original layout thread linked below. Here is a link that might be useful: Challenging Layout Conundrum...See MoreBiggest lesson learned while remodeling a kitchen?
Comments (45)Work with a talented KD. Interview many KDs, and it will become clear who the true professionals are. Make all of your decisions beforehand so you can make the tradeoffs (ie, busy countertop OR backsplash?) consciously, before you are backed into a corner by prior decisions. Don't cut corners on the foundational items in favor of "bling." Think of what features you will really need and use rather than being sold on the latest "must haves." i know many on this forum downplay the usefulness of a KD, but ours was the key to making our kitchen everything we wanted. He coordinated the whole process seamlessly with our GC and save for a few surprises (issues that cropped up with the house itself), the reno was completed on time and without major headaches....See Moredebrak_2008
11 years agolast modified: 9 years ago
Fori
11 years agolast modified: 9 years ago
suzanne_sl
11 years agolast modified: 9 years agostephsgarden
11 years agolast modified: 9 years agoFori
11 years agolast modified: 9 years agobarbcollins
11 years agolast modified: 9 years agoginny20
11 years agolast modified: 9 years agowoodenconcepts
11 years agolast modified: 9 years agopiggyspen
11 years agolast modified: 9 years agoauroraborelis
11 years agolast modified: 9 years agonorthpegram
11 years agolast modified: 9 years agoFori
11 years agolast modified: 9 years agoauroraborelis
11 years agolast modified: 9 years ago
likewhatyoudo
11 years agolast modified: 9 years agonorthpegram
11 years agolast modified: 9 years agoauroraborelis
11 years agolast modified: 9 years agoangie_diy
11 years agolast modified: 9 years agoCEFreeman
11 years agolast modified: 9 years agojakabedy
11 years agolast modified: 9 years agomacybaby
11 years agolast modified: 9 years agoangie_diy
11 years agolast modified: 9 years ago
Annie Deighnaugh
11 years agolast modified: 9 years agojterrilynn
11 years agolast modified: 9 years agoangie_diy
11 years agolast modified: 9 years agoSparklingWater
11 years agolast modified: 9 years ago


Related Stories
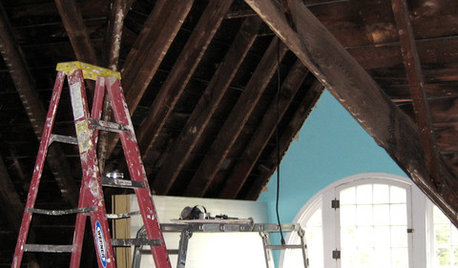
REMODELING GUIDES8 Lessons on Renovating a House from Someone Who's Living It
So you think DIY remodeling is going to be fun? Here is one homeowner's list of what you may be getting yourself into
Full Story
DECORATING GUIDES10 Design Tips Learned From the Worst Advice Ever
If these Houzzers’ tales don’t bolster the courage of your design convictions, nothing will
Full Story
REMODELING GUIDES6 Must-Know Lessons From a Serial Renovator
Get your remodel right the first time, with this insight from an architect who's been there too many times to count
Full Story
CONTRACTOR TIPS6 Lessons Learned From a Master Suite Remodel
One project yields some universal truths about the remodeling process
Full Story
LIFEDesign Lessons My Mother Taught Me
In honor of Mother’s Day, professionals on Houzz reflect on the design and style wisdom their mothers passed on
Full Story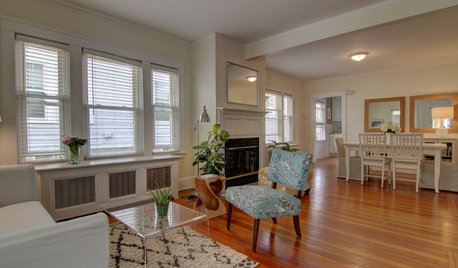
SELLING YOUR HOUSEA Moving Diary: Lessons From Selling My Home
After 79 days of home cleaning, staging and — at last — selling, a mom comes away with a top must-do for her next abode
Full Story
LIFEThe Day She Learned the Serenity Prayer for Homeowners
A flooded house and a high school graduation party intersect to teach some life lessons
Full Story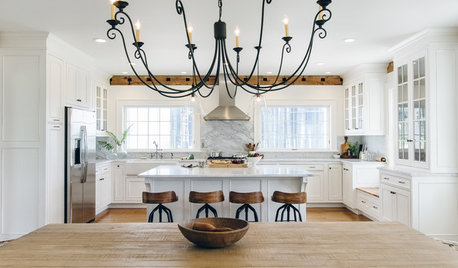
WHITE KITCHENS4 Dreamy White-and-Wood Kitchens to Learn From
White too bright in your kitchen? Introduce wood beams, countertops, furniture and more
Full Story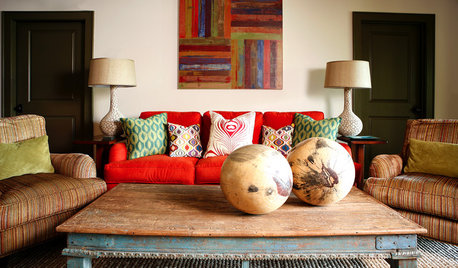
DECORATING GUIDESLessons in Living Comfortably: Embrace the Scratches and Dents
When you celebrate wear and tear, you send a message that your home is designed for relaxation
Full Story
REMODELING GUIDES5 Ways DIY Remodels Get Derailed — and How to Deal
Keep your remodel on track by knowing the potential pitfalls ahead of time
Full Story


rmtdoug