


DIY Plans for Custom Range Hood?
ironjawedwoman
18 years ago
Featured Answer
Sort by:Oldest
Comments (13)

User
18 years agolast modified: 9 years agoironjawedwoman
18 years agolast modified: 9 years agoRelated Discussions
Custom Stucco range hood advice please
Comments (4)I believe that if you get a stucco hood, it has to be stuccoed over some kind of wood frame. So you'd have to have the wood frame made and then have the stucco put atop it. At least that is what is going on for our stucco fireplace chimney (which, incidentally, is being made by our cabinet maker in the model of a range-hood style and looks kind of like lynn's hood). The wood frame for ours which is being made by our cabinet maker is $465.00. Our GC is doing the stucco and I do not yet have a price on that. Our cabinet maker is VERY reasonable, so you might have a hard time finding it at that price. When I had described the idea of what I wanted (curved stucco chimney-style) to my GC, he indicated that if he had to build the frame, it was going to be $$$$ (evidently due to the need for bendable plywood or something)...See MoreNeed Pix of Custom Hoods for 36' Range Plz
Comments (15)Do you think I should go with the 48" wide x 27" deep hood over the 36" range? That run of cabinets has a 24" wall oven tower on the right and the range to the left of center so the prep island is not so much a barrier island. I can control the length of the run by changing the opening from the kitchen to the keeping room. The plans have it as 12' into a 13.5' room. When I played around with it, I reduced the opening to 11' and the range fit nicely with a 42" hood. The cabinet maker reduced it even more by the way he shifted the range down while maintaining a 48" hood. I don't know if he realized it, but he shut the opening down to 8'-8" which is unsatisfactory. That is the one place in the house that we want a really open feeling. I'll work on it over the weekend & post a layout and some renderings. I did a quick look online & really like this corbel style if I could get it in the right proportions:...See MoreSheetrock around Custom Range Hood
Comments (17)Patricia Colwell Consulting - There are typically two major clearances. 1st, the distance of any combustible materials directly above the cook top or stove. 2nd the clearance to combustible materials directly to the left and right side of the stove or cook top if they are below a certain height, such as cabinets to the counter top or the type of situation that the OP has. As mentioned these vary according to the stove or cook top. We just had one which was a Miele cook top, it also required that the left and right uppers be a minimum of 6" away from the left and right side of the cook top. The cook top was 36" which meant that the opening for the hood, distance between the left and right uppers, had to be at least 48", regardless of the hood being used....See MoreRange hood that looks like floating shelf (custom)
Comments (15)opaone: I trust you mean in the sense of capturing effluent headed upward and outward such that it would miss a 27-inch entry aperture boundary by 3 inches. Weifei Zheng: A four-inch high shelf hood really won't have a significant buffer volume (assuming you mean volume below the baffles); the baffle assembly itself might be 1.5 inches thick and will have to be low as possible. The air flow in the volume above the baffles will not have any lingering fumes. But to get the flow at the baffles to be roughly equal across the baffle area, the pressure inside this type of hood has to be low relative to below the baffles, and this pressure loss moves the user up and to the left on the fan curve, reducing volumetric flow rate. Hence the suggestion for zero static pressure rated flow rate to be twice the required operating flow rate. (Also note that I did the calculation for a nominal 24-inch entry aperture (front to back); a 27-inch will require 1/8 more air flow to keep the velocity at 90 ft/min. Maximum stud space ducts of 3.5 x 14 might be advised, along with nearly matching slots in the hood rear.)...See Moremewton
17 years agolast modified: 9 years agofreedee
17 years agolast modified: 9 years agosweeby
17 years agolast modified: 9 years agobrickeyee
17 years agolast modified: 9 years agomewton
17 years agolast modified: 9 years agopjb999
17 years agolast modified: 9 years agobrickeyee
17 years agolast modified: 9 years agopjb999
17 years agolast modified: 9 years agodjm3311_aol_com
16 years agolast modified: 9 years agoAcd34411_aol_com
12 years agolast modified: 9 years ago
Related Stories
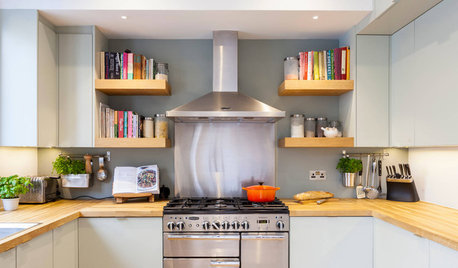
KITCHEN APPLIANCESWhat to Consider When Adding a Range Hood
Get to know the types, styles and why you may want to skip a hood altogether
Full Story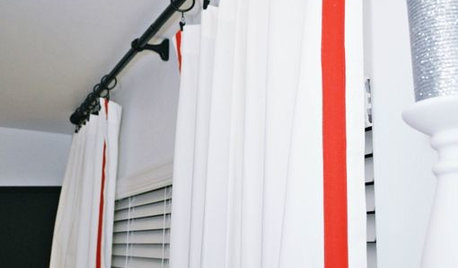
WINDOW TREATMENTSEmbellishing Tricks for Cost-Effective Custom Curtains
Get curtains that look high end — even if you don't sew — with just a little trim here or a little banding there
Full Story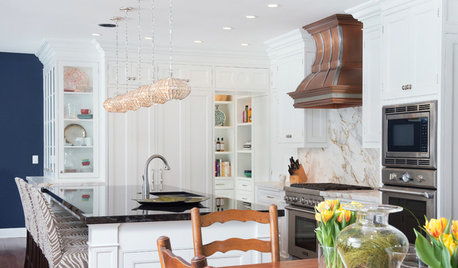
KITCHEN DESIGNWhat to Know When Choosing a Range Hood
Find out the types of kitchen range hoods available and the options for customized units
Full Story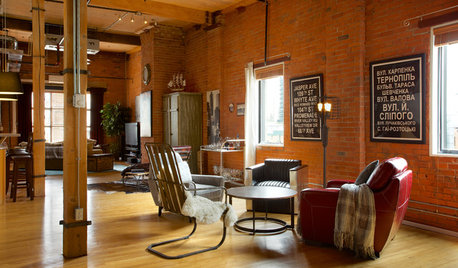
LOFTSDIY Spirit Reinvents an Industrial Home
Armed with a detailed plan from a designer, this homeowner rolled up his sleeves and transformed his Edmonton loft space
Full Story
KITCHEN WORKBOOKNew Ways to Plan Your Kitchen’s Work Zones
The classic work triangle of range, fridge and sink is the best layout for kitchens, right? Not necessarily
Full Story
KITCHEN DESIGNShow Us Your Fabulous DIY Kitchen
Did you do a great job when you did it yourself? We want to see and hear about it
Full Story
DECORATING GUIDES8 Reasons to Jump Off the DIY Bandwagon
You heard right. Stop beating yourself up for not making stuff yourself, and start seeing the bright side of buying from others
Full Story
SMALL KITCHENSThe 100-Square-Foot Kitchen: One Woman’s $4,500 DIY Crusade
Teaching herself how to remodel, Allison Macdonald adds function, smarter storage and snazzier materials
Full Story
KITCHEN DESIGNHome Above the Range: Smart Uses for Cooktop Space
With pot fillers, shelves, racks and more, you can get the most function out of the space above your kitchen range
Full Story
KITCHEN DESIGNHow to Choose the Right Hood Fan for Your Kitchen
Keep your kitchen clean and your home's air fresh by understanding all the options for ventilating via a hood fan
Full Story

mike_in_kc