


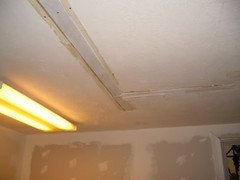
Removing 'Stomp-textured' Ceiling!
Janice
18 years ago
Featured Answer
Sort by:Oldest
Comments (70)

wbgroovy
18 years ago
Janice
18 years agoRelated Discussions
Vaulted ceiling--remove popcorn, texture/paint vs cover in wood planks
Comments (8)No I really don't want to texture the ceiling, but it is my understanding that getting that nice smooth finish on a ceiling adds a lot to the cost if you just remove the popcorn and have to deal with a not so great surface that is left after popcorn removal. So, you are suggesting that we instead just install a new 1/4" layer of sheetrock on top of what is already there. Correct? Do you know approximately what the price differential is to take the cover up approach vs the just start all over with a new topcoat of something?...See MoreRemoving textured/popcorn ceiling
Comments (6)Looks like sand was added to paint or some type of ready made brush on sand texture product was applied. Probably no concern about asbestos but have it checked for your peace of mind. I would investigate sanding the ceiling vs overlaying with more sheetrock. Power drywall pole sanders that hook up to a vacuum are quite inexpensive. South of $200 inexpensive. You can rent a pro-level sander, too. But I would just buy an inexpensive one outright. Sell it when you're finished and recover a good chunk of what you paid for it....See Morenew house…stomp ceiling or not
Comments (28)@jserv13 - I get where you are coming from. I am currently renovating my "forever" home. I am not overly concerned with resale as I intend to leave this home in a box. For me, reality is that I will most likely be dead in less then 25 years. I don't need floors that will last 100 years, I need flooring that will look good for 20 years. I picked LVT. It was less expensive and easy on my joints. My current home has smooth ceilings, but my last home had popcorn ceilings. When we removed the popcorn the seams were horrible so the contractor gave us choices. He could skim coat and sand the entire ceiling or he could spray a light orange peel texture on the ceiling. We opted for the light orange peel texture. Hid the imperfections, didn't cost much and was not all that noticeable when painted with flat paint. Here are a couple of listing photos I might ask the contractor if orange peel is an option. It will hide the imperfections, but will be less obvious than the stomp....See MoreNeed help with removing sand paper textured paint
Comments (10)I have the same problem in the family room. What I decided to do was use a light grit sanding paper & attach the sander exhaust to my shop vac and ran it over the walls once. Then I bought a bag of drywall mud, the kind that sets in 20 minutes. I made it the texture of thin pancake batter and "painted" it on the walls with a wide metal trowel and it filled in all of the tiny crevices caused by the sand and left a smooth finish. Now it's not as smooth as a normal wall, but with satin paint texture, it looks really good and it only cost $20 for the drywall mud & $10 for the package of sanding disks for my sander....See Morebeenie130
18 years agonewhomeownerco
18 years agobeenie130
18 years agoSandys_Garden
18 years agoSandys_Garden
18 years agoJanice
18 years agobeenie130
18 years agobeenie130
18 years agoSandys_Garden
18 years agoJanice
18 years agobeenie130
18 years agoSandys_Garden
18 years agoJanice
18 years agoSandys_Garden
18 years agoJanice
18 years agobeenie130
18 years agoJanice
18 years agonewhomeownerco
18 years agoJanice
18 years agoJanice
18 years agoSandys_Garden
18 years agoJanice
18 years agoSandys_Garden
18 years agobeenie130
18 years agobeenie130
18 years agoSandys_Garden
18 years agoJanice
18 years agobeenie130
18 years agoJanice
18 years agoSandys_Garden
18 years agoJanice
18 years agoSandys_Garden
18 years agobeenie130
18 years agoSandys_Garden
18 years agobeenie130
18 years agoJanice
18 years agobeenie130
18 years agodon_2006
18 years agobeenie130
18 years agoJanice
18 years agodon_2006
18 years agoamandamreid
17 years agopharaoh
17 years agoSandys_Garden
17 years agoneed_it_easy
17 years agohappy_cactus
16 years agolindy_09
15 years agoJanice
15 years ago
Related Stories
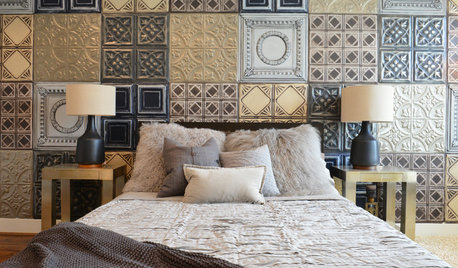
SHOP HOUZZShop Houzz: Clever Ways to Use Textured Ceiling Tiles
Bring the ceiling down with pretty textured tiles
Full Story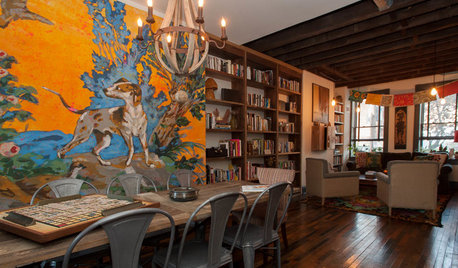
ECLECTIC HOMESMy Houzz: Color and Texture Fill an Eclectic Pittsburgh Row House
Moroccan touches join exposed brick, salvaged materials and scads of books in this home for a creative couple
Full Story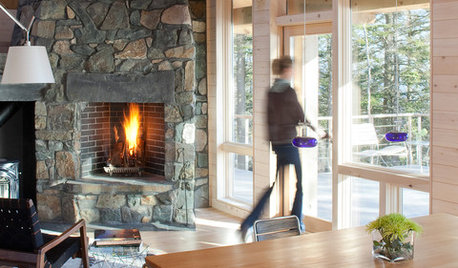
WOODKnotty and Nice: Highly Textured Wood Has a Modern Revival
Whether it's cedar, fir or pine, if a wood has a knot, it's hot
Full Story
BATHROOM WORKBOOKBathroom Workbook: Layer on the Texture for High Bath Style
Make even a modern bath warm and welcoming with these 11 ideas for adding texture
Full Story
REMODELING GUIDESRenovation Detail: Tongue and Groove Ceilings
As camouflage for damaged surfaces or simply for their rich texture and beauty, tongue and groove ceilings create high impact
Full Story
MOST POPULARHeads-Up Hues: 10 Bold Ceiling Colors
Visually raise or lower a ceiling, or just add an eyeful of interest, with paint from splashy to soothing
Full Story
COLOR11 Reasons to Paint Your Ceiling Black
Mask flaws, trick the eye, create drama ... a black ceiling solves a host of design dilemmas while looking smashing
Full Story
ARCHITECTUREAre Vaulted Ceilings Right for Your Next Home?
See the pros and cons of choosing soaring ceilings for rooms large and small
Full Story
DECORATING GUIDES11 Tricks to Make a Ceiling Look Higher
More visual height is no stretch when you pick the right furniture, paint and lighting
Full Story
CEILINGSGreat Ideas for Painted Ceilings
Look up: Your ceiling may be crying out for some color
Full Story


kudzu9