


How did you decide on grout size and color for subway tile?
Lake_Girl
12 years ago
Featured Answer
Sort by:Oldest
Comments (13)

angie_diy
12 years agoRelated Discussions
Tile grout color: subway tile with hex floor grout matching
Comments (6)Should the grout be the same color? Not necessarily. Will it look weird to use a darker gray on the floor and a lighter gray in the shower? Not at all. Any recommended colors for the shower and floor tiles along these lines? I've been getting stuff at Lowe's and they carry MAPEI Warm gray for the subway tile, and silver for the hex, if you lke a darker grey for the hex. Silver is actually a medium grey, but it'll appear alot darker with the white tile. Our bathroom isn't perfectly square. I think a colored grout seam that is uneven will be really obvious(that's my understanding where you would do any flubbing). Can you grout just the seam white? Can you skip grout and caulk it? Any suggestions here? Grout everything on the floor the same color. it'll actually show up more if you try doing what you suggested. It'll literally draw attention to it. What you want to dpo is make sure that you're square to the most obvious walls from the door. Especially with the hex, it won't be quite as obvious as you think, unless it's WAY out, and then nothing you can do will hide it, even using a blending color grout. One other thing-- that joint where the floor hits the walls should be caulked, but still caulk it with a caulking that matches the grout, both color AND texture. Does anyone know what the measure is for hex tile and subway? For subway, use unsanded, and for the hex, use sanded....See Moredid you tile your subway tile backspash? would you do it again?
Comments (22)Ok - another tip - clean up the grout lines the next day if you use thinset to set the tiles. It takes several days for the mortor to fully cure, and it will be quite soft and crumbly the day after - makes cleaning any high spots out of the grout lines rather simple. If you wait several days, it will harden (like cement should) and it will be very difficult to remove. I spent about 30 mn this morning carefully going over the grout lines in my one wall (I have learned to be anal about this so I don't have "spots" when I grout) - I normally end up ruining a fingernail or two in the process but that is normal for me. BTW - here is what I got done yesterday. I mixed up too much thinset the first time, I forgot I was dealing with a small wall area and not a big floor! it looks a lot better after I took down the spacers and cleaned it all up. I had one "sliver" I had to cut for up by the range hood, it was 1/4" wide by 2" long, and the tile saw handled it fine. Ceramic is so much easier to deal with than porceline as it's softer and does not crack as easy when cutting. I used the rotozip for any "U" shaped cuts around the outlets and the tile saw for everything else. Here is an "in process" picture I had boards cut for the area needed for the border. By using them I could get my tile edges very straight - just make sure you don't accidentally cement the boards to the wall. This is what I got done the first "batch" and then I fitted and cut the rest of the perimeter tiles (they are laying on the coutner in this picture - ready to install). I put the border in after all the rest of the tiles were set. Here is my mixing setup. I use our smaller hammer drill (but not hammer mode) and a five gallon bucket so things don't splash. I have a scale (it's a fish scale, I'm not using a good kitchen one on this) to measure the powder and measuring cup for the water. Add the water to the bucket and carefull add the powder - if you simply dump it in, you'll get a plume of cement dust! And I have a timer - you mix for five minutes, wait for ten and mix for two and then use. one wall down - one to go! Now, we'll see if the resident experts come on here and rip me a new one for all the things I've done wrong. I think I'm learning why people rarely show "in progress" pictures on this forum. I'm showing the way I did things, I am not saying that I think this way is the only way to do it....See MoreWhat size grout lines for subway tile?
Comments (4)I really think it is personal preference and the look you are going for. I do not have subways in my kitchen, but did use them in my bathroom remodel for the shower. I really wanted to see the staggered pattern of the subway so we used spacers (can't remember size...maybe 1/4th or it may have been 1/8th? it was more then the nub width) and gray (oyster gray) grout. The grout line does look fairly large but I like it. Funny thing, on the opposite wall we used 6x6 tiles in a staggered pattern with the exact same spacers and the grout line looks smaller. Go figure? I do think in most kitchen backsplash applications people are going for a more clean simple look....white/light grout and small grout lines. I think if you are using white grout and white subways then why have a bigger grout line then what the nubs provide? But if you really have any doubt, do a test board with your tile and grout. That is the only way to know for sure...I did test boards for both my kitchen and bathroom and I am so glad I did....See MoreGrout line size for 4x8 subway tile?
Comments (8)You want a quaility 1/16" microsanded grout for floor. I suggest Laticrete permacolor. I use the same on 99% of my glass tile installs but i do look to the glass MFG for guidance to be safe. and no it will not scratch, still do test ! The point was to take guidance from the MFG not the chatweb in regrards to the specific glass! did you see my post? I think 1/8 a smart choice for expansion contraction alone. -best...See MoreLake_Girl
12 years agoucgal
12 years ago
Bunny
12 years agoigloochic
12 years agoLake_Girl
12 years agoyoung-gardener
12 years agoLake_Girl
12 years agoslonewby
12 years agoleela4
12 years agoLake_Girl
12 years agoleela4
12 years ago
Related Stories
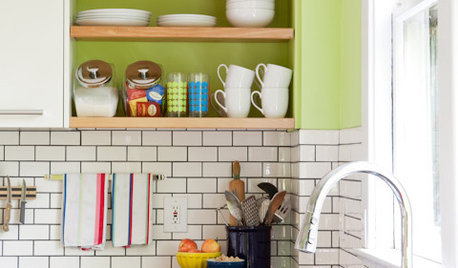
KITCHEN DESIGNSubway Tile Picks Up Gray Grout
Heading into darker territory, subway tile offers a graphic new look for kitchens, bathrooms and more
Full Story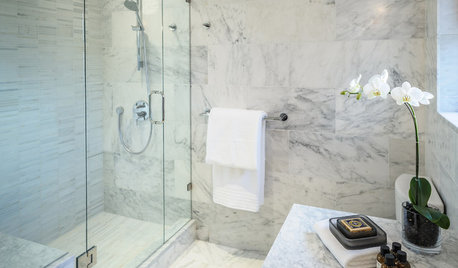
BATHROOM DESIGNConvert Your Tub Space Into a Shower — the Tiling and Grouting Phase
Step 3 in swapping your tub for a sleek new shower: Pick the right tile and test it out, then choose your grout color and type
Full Story
REMODELING GUIDES9 Ways Grout–Yes, Grout–Can Add to Your Design
Choose From a Palette of Grout Colors for a Warm, Unified Look
Full Story
BUDGETING YOUR PROJECTHouzz Call: What Did Your Kitchen Renovation Teach You About Budgeting?
Cost is often the biggest shocker in a home renovation project. Share your wisdom to help your fellow Houzzers
Full Story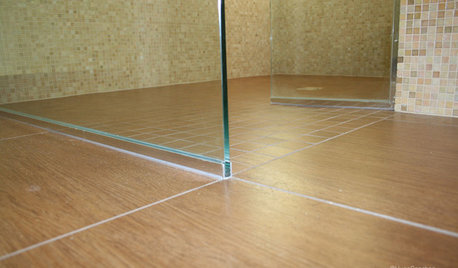
TILEEpoxy vs. Cement Grout — What's the Difference?
Grout is grout, right? Nope. Cement and epoxy versions have different appearances, durability and rules of installation
Full Story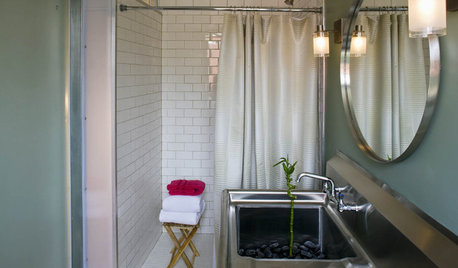
REMODELING GUIDESClassic Subway Tiles Go Uptown
Get a polished, high-end look from subway tiles old and new
Full Story
TILE3 Key Steps for Grouting That Looks Its Best
Get your grout right to keep your tile beautiful and for an installation that will last
Full Story
KITCHEN DESIGN10 Gorgeous Backsplash Alternatives to Subway Tile
Artistic installations, back-painted glass and pivoting windows prove there are backsplash possibilities beyond the platform
Full Story
HOUSEKEEPINGHow to Clean Grout — Stains and All
If your grout is grossing you out, this deep-cleaning method will help it look new again
Full Story
SHOP HOUZZShop Houzz: Our Top Tile in All Styles
From subway tile and river stones to marble and glass, this collection has it covered
Full Story


Bunny