


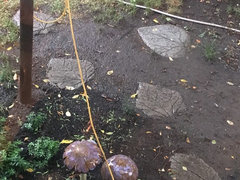
Rhubarb Leaf Stepping Stones
iowagirl2006
15 years ago

Featured Answer
Sort by:Oldest
Comments (42)

Linda Wayman
15 years agolast modified: 9 years agoRelated Discussions
Newbie - What am I doing wrong?
Comments (1)Did you use the 5000 with water and nothing else? Why 5000? Did you work in too cold of an area, like outside or an unheated building? Too wet of a mix can give you crumbly and lots of air bubbles. Weather too cold? I know that 5000 is for working in cold temps but if a frost or freeze get this before it cures it can crumble. It's hard to tell from the pictures but these look a little thin to be stepping stones. You have to watch out when using rhubarb leaves or any thick leaf. The veins can be very large and lead to cracking of your stepping stone if the stones aren't thick enough. Billie...See MoreWhat's unexpected in your garden? Photos please!
Comments (39)The only unexpected thing I can think of in my garden is a metal sculpture. It is made of thick, heavy construction grade rods and wires of various sizes. It is shaped at a twisted made, with large head. Wires make his thinning hair and at one time he had quarters for eyes. It's a very contorted, bizarre looking thing, but everyone who sees it pauses to look at it and smiles. After several years, I finally painted it white so it could be seen better in the garden. It is life size. I need to replace some of his "hair" and the coin eyes. The only problem I have with it is that strong gusts of wind blow him over. I have taken to wiring him to something. The rod was bent using high heat, probably a welding torch into an "S" shape, with the bottom coiled, rather like a snake. The coiled rod acts as the stand. All the rest of the body pieces were welded onto that rod. It was the creation of a former Art student at OSU (Oklahoma State University). I found it in an apartment that my son rented when he started school there. No one came back to claim it after 6 months, so he gave it to me. It did not look right in my house, so I placed it out in the garden. I move him around every couple of years. Currently he is wire to the arch at the entrance to the potager and stands as a sentry overlooking the garden near the entry gate. Very unique looking and quite unexpected to find in a garden, I think....See MoreWhat's Your Favorite Garden Accent/Art?
Comments (46)This is a really fun thread. I like to see what everyone has in their garden and how thoughtful about art and creative you all are. I often think I'm going to "make" some garden art but then never get around to it. I don't decorate the garden with a whole lot of art. I have a few decorative stakes and then a few glazed birdbaths and some copper sprinklers that I use more for decoration than watering. My mom has a very cute piece of garden art. The story behind it is that we were at Hever Castle in England and they were selling all kinds of cement statues. We fell in love with so many of them. My mom couldn't part with this guy. Hever Castle was down a hill so we had to hike back up the hill, carry him on the rest of our tour and then carry him home on the plane. He weighed between 30-35 pounds so it was like carrying a little person around. He was well worth it though!...See MoreHow To Get DH Involved in Tablescapes
Comments (24)Ah-haha (rofl) Oh my gosh this is getting worse!! ha Oh, Jim, too funny. Are you sure that thing's a fern, I'm still concerned that it could be some alien flowerpod that's come to suck out our brains. Looking closer I see those poofballs sticking up and I can feel a Little Shop of Horrors incident coming on! You are sitting there nonchalantly eating your dinner on your slab of concrete and suddenly YOU'RE dinner instead!! :) Luvs~ I didn't even notice the napkin holders. I think you are right. I saw the Trading Spaces with the feathers, did you see the one where they put straw on the walls??? They brought in a bail of hay and put glue on the walls and went to town. I was thinking UGH! I thought the homeowner was going to die! She was sooo disappointed. They also did a grass wall on another one. The HO (that's homeowner btw) didn't like that either. Thanks, bring my allergies right into my bedroom and how the heck am I supposed to get the lawnmower up there? :) ~A...See More
caflowerluver
15 years agolast modified: 9 years ago
alisande
15 years agolast modified: 9 years agomaryanntx
15 years agolast modified: 9 years ago
Chemocurl zn5b/6a Indiana
15 years agolast modified: 9 years agookwriter
15 years agolast modified: 9 years agoiowagirl2006
15 years agolast modified: 9 years agogrammahony
15 years agolast modified: 9 years agonan_ar
15 years agolast modified: 9 years agomcmann
15 years agolast modified: 9 years ago
linnea56 (zone 5b Chicago)
15 years agolast modified: 9 years agoHappy_Go_Lucky_Gayle
15 years agolast modified: 9 years agoivamae
15 years agolast modified: 9 years agomsmarion
15 years agolast modified: 9 years agogoldngirl65
9 years agolast modified: 9 years agoAlice_sj
9 years agolast modified: 9 years agojkayd_il5
9 years agolast modified: 9 years agosusie53_gw
9 years agolast modified: 9 years agojeaninwa
9 years agolast modified: 9 years agojeaninwa
9 years agolast modified: 9 years ago
rob333 (zone 7b)
9 years agolast modified: 9 years agotxblutopaz
9 years agolast modified: 9 years agojuellie1962
9 years agolast modified: 9 years agoUser
9 years agolast modified: 9 years agodittydo2
9 years agolast modified: 9 years ago
ravencajun Zone 8b TX
9 years agolast modified: 9 years agocookie8
9 years agolast modified: 9 years agoChrystalkay
9 years agolast modified: 9 years agopattico_gw
9 years agolast modified: 9 years agojemdandy
9 years agolast modified: 9 years agolukiesyaya
8 years agolukiesyaya
8 years ago
Elaine Tapley
8 years agoCookie8
8 years agomoira168
7 years agoUser
7 years ago
nicole___
7 years agoUser
7 years agoUser
7 years agolast modified: 7 years ago
marylmi
7 years agoUser
7 years ago


Related Stories
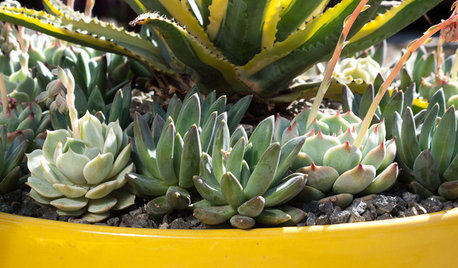
CONTAINER GARDENS3 Steps to Creating Quick, Easy and Colorful Succulent Containers
Take a bright container, add a colorful succulent or two and have a professional, summery design in minutes
Full Story
COFFEE WITH AN ARCHITECT12-Step Program for Architecture
Addicted to architecture? We understand. Here's something that may help ... or not
Full Story
GARDENING AND LANDSCAPING8 Great Ways to Use Landscape Pavers
Today's Stepping Stones Define a Space While Adding Affordable Style
Full Story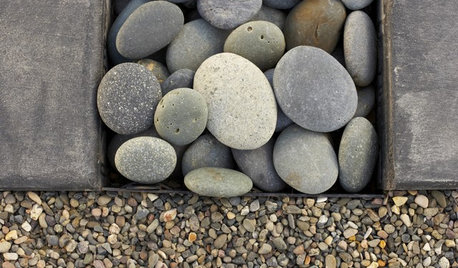
LANDSCAPE DESIGNThe Right Stone for Your Garden Design
Gravel, pebble, cobble and paddle: Stones vary in size and shape, and have different uses in the landscape
Full Story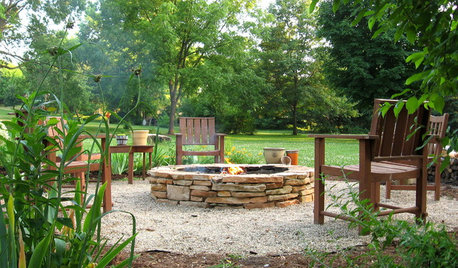
GARDENING AND LANDSCAPINGHow to Make a Stacked Stone Fire Pit
See how to build a cozy outdoor gathering place for less than $500
Full Story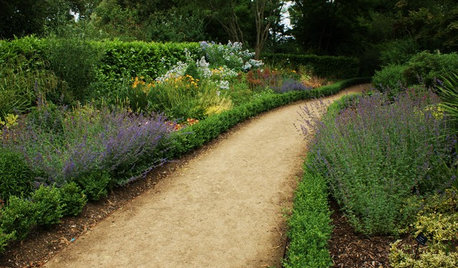
LANDSCAPE DESIGN5 Gravel and Stone Types for a Rockin' Landscape
Give your garden design some textural bam with pebbles, granite, river rocks and other permeable materials
Full Story
PATIOSPatio Details: A Custom Aluminum Arbor Cools Things Down in Texas
Panels in the roof have leaf pattern cutouts that create dappled shade and a calm, relaxed ambience
Full Story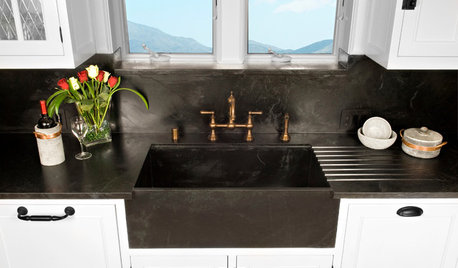
KITCHEN DESIGNKitchen Sinks: Soapstone for Germ-Free Beauty and Durability
Stains and bacteria? Not on soapstone's watch. But this sink material's benefits don't come cheap.
Full Story
GARDENING AND LANDSCAPING6 Ways to Rethink Your Patio Floor
Figure out the right material for your spring patio makeover with this mini guide to concrete, wood, brick and stone
Full Story
GARDENING AND LANDSCAPINGPlant a Pocket Garden
This spring, add a touch of green to garden paths, patios, steps and walls
Full Story

bettyswwa