This is in response to Sandra's urging to post tips.
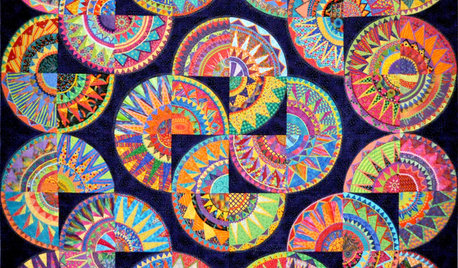
People who have bought a Peek-a-Boo pattern may already be familiar with some of these ideas, but I only had a picture to go by. I am certainly finding making my 3rd P-a-B easier since figuring out a few things.
(1) IF YOU WANT TO SAVE MONEY, don't line the circles with novelty fabric. Use unbleached muslin. I get mine at JoAnn's for $1.99/yd. Then you can use 6" squares you got in a swap, with a slightly smaller piece of batting underneath.
(2) DON'T CUT OUT ANY CIRCLES, to begin with. For both the backing fabrics and their linings, just roughly cut some squares, being sure to leave at least 1/2" margins on all sides to allow for the circle. You could even rip the fabric across. That would mean you may have to factor in extra for the margins in order to avoid the rippled edges, but if you are using unbleached muslin for the linings, you have already saved quite a bit.
Use a template to mark circles on only one of the fabrics--either the one(s) you are using for the backing or else the lining. I prefer to do the lining, because then... (Go to #3.)
You are going to place a marked square on top of an unmarked square and then stitch on the marked line, and it is easier to line up the straight of goods on the two if they are still square. You won't have circles until you trim the seam to 1/8" or a little more.
(3) CUT SLITS IN SEVERAL CIRCLES AT ONCE. If you are lining the circles with the fabric that is going to provide the I-Spy pictures, then you will have to cut a slit inside what will become a flap, or a place that will be covered over by a flap. But if you are using novelty swap squares, the slit can go right in the middle of the lining, so it falls under, and will be hidden by, the picture square.
If you have marked circles on the lining material, you can make a pile of 4~6 of them, trying to roughly match up the lines you have drawn, and then with the rotary cutter, put a slit about 2" long. The slit doesn't have to be pretty or neat, and you can more or less guess at its placement.
Now you won't have to try to cut an individual slit (for turning the piece right-side-out) in each circle after it is sewn, which can be tricky to do because of the danger of cutting into the backing material.
(4) Cut batting squares with a rotary cutter. You want them 1/2~3/4" smaller than the novelty squares, but large enough so that when you fold the circle flaps over the picture square, the stitching you do around the edges of the flaps will be sure to catch and hold the batting in. Now you won't have to stitch an "X" across the picture to hold the batting.
I think, from questions I have been asked, that the commercial patterns don't tell you to stitch an X, anyway, but I had to for my first 2 P-a-B's because I cut the batting carelessly and only pinned the flaps down, with the result that the batting sometimes moved around and didn't get stitched on all sides.
(5)DON'T BASTE OR PIN the circle flaps to the novelty squares. Instead, USE GLUE. I am using Glue-Baste-It for the first time and find it holds things much more securely and it saves time because you don't have to be avoiding the pins or removing them right in the middle of stitching.
Here's how I used the glue (This is after the lined squares have been sewn together to make the foundation of the quilt.):
(a) Put a few dots of glue on a batting square and stick it to the middle of the wrong side of a novelty square.
(b) In the margin of novelty fabric left around the edges of the batting, put a few more dots of glue, both on the sides and in the corners.
(c) Stick the novelty squares along with their batting onto the lining of the circles. Press it down, trying to get the corner of the picture as far into the corners where the lined circles meet. This is especially important if the circles didn't line up well and a corner or two of the square is going to be exposed even after you stitch the flaps down.
(6) Last, but not least, keep some colored permanent markers on hand, and if you see, at stage (5), that the flaps of the circles are not going to come together perfectly and are going to expose part of the (unbleached muslin) lining, just use a color that could belong to the novelty picture and hide the mistake.





rosajoe_gw
love2sew
Related Discussions
Jan 2012 Quilting/Sewing Goals
Q
Free-motion quilting on a standard sewing machine
Q
Note to biwacko re: your I Spy quilt
Q
Official 2013 Quilt Retreat SignUps
Q