


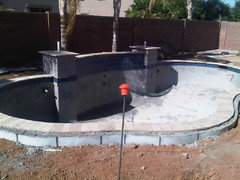
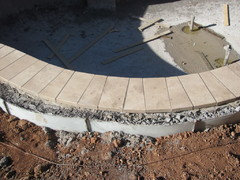
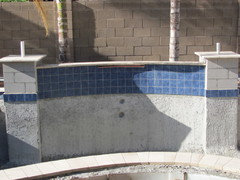
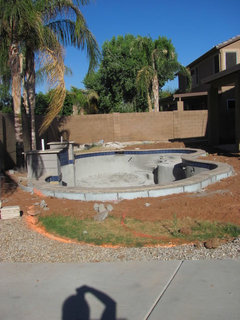
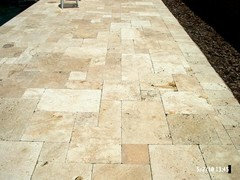
New Pool Project - Travertine Pavers - Color Enhancer? Sealer?
bryanaz
12 years ago
Featured Answer
Sort by:Oldest
Comments (23)

shorelinedesign
12 years agobryanaz
12 years agoRelated Discussions
Pool deck sealer removal and reseal
Comments (3)Jamy, we get at least a big job a month removing and resealing from those big box store products. Our usual routine is pressure wash apply soy gel let sit, repeat 2 or 3 times reseal You may be able to find the soy gel(enviro friendly) if you have a concrete accessories store nearby that sells retail. If you want wet look, after removal, try a color enhancer product(not a big box store item) not a wet look sealer, then seal with a UV stable sealer. Most of the products we buy are not available to the public, but I believe the soy gel you can get at retail. Depends on why you are sealing as to what product to use,but buy at a concrete supplier not a big box. You may be able to get some on line as well, truck shipped of course. Here is one instance where you get what you pay for.....some of our sealers are over $100/gallon our cost. Hope this helps, Barb...See MoreAnother Travertine Marble Paver Question
Comments (3)Our joint were filled with a fine sand....our tumbled marble/travertine patio was installed about a month ago. So far no problems, but I was surprised they didnt use the type of sand that actually locks the pavers into place. Years ago, in NJ, we relaid those 60's sytle pink or gray concrete pavers. We used a product which I believe was called stone dust. Whatever the product was called it was better than sand because it didnt wash away and actually hardened over time. You can not grout the joints, it will crack. However, we are going to grout more of our divits. We filled in a few when the patio was installed. They look fine. We bought a bag of grout similar in color to the stone. There are a few stones who tumbled too long and I plan on grouting the stones edge to form a better corner. We were away last week and green gunk started growing in some of the deeper holes.....I scrubbed them out tonight and plan on filling some areas tomorrow. I would love to know how your situation turns out because I am afraid of the sand washing away....the sand in the seams is disappearing but so far no rocking or loose pavers. Our job was a remodel so our tumbled marble is on top of the existing cool deck with a thin layer of course sand. Then the joints were filled with a fine sand. Best of luck, keep us posted on what works or doesnt:)...See MoreNew Pool Build - The Woodlands, TX
Comments (94)We have been out and around the pool area more the past few weeks as the weather has gotten a bit warmer. Of course with the warming weather in Houston the number of mosquitos as well as annoying gnats greatly increase. We were sitting in the hot tub last week and mosquitoes were landing on our head and biting us. Not good. We decided that with the level of investment made in our backyard that we needed to ensure we could use it without being attacked. As a result, I began looking at options to get rid of the problem. I looked at foggers...I would need to regularly do this to keep mosquitoes and gnats away and I knew I wouldn't keep up with it. That led me to look at automatic mosquito misting systems. As I am fairly handy around the house, I decided to look at Do It Yourself options. The main choices were systems with 55 or 125 gallon tanks or the newer tankless systems that mix the chemicals with water for each application. I decided that I did not not want the large tank in the yard and I had a good location for the small tankless box which had a power outlet and a hose bib nearby. So I focused my internet research on the tankless systems. The tankless option adds about $400-$500 to the base system cost. I will start this out by saying I am a consumer only and do not represent any company or in any way benefit from what I am writing below. I have no connection to the industry. I have just found very limited information from other consumers on the internet other than " We bought one and love it" and so I decided to write about my experience and will document what I see in the way of results over time. I will also comment on installation and if there are any lessons learned for others. RESEARCH AND PURCHASE The main options that I considered were the Mist Away Gen 3 and the Mosquito Max Series 2 tankless system as both were readily available on the internet for Do It Yourself installers and also available at stores in the Houston area for purchase and service. I could not find a lot of consumer reviews on either system, but the Mist Away Gen 3 did seem to be the more prevalent unit with more dealers/installers nationally. Base features seemed to be similar, although the Mist Away looked to offer a few more options, such as a wind sensor, etc. When I compared prices on the internet, the best I could find on the base Mist Away Gen 3 was $1,645 and the 30 nozzle complete DIY install kit put the final price typically in the $2,400 range. The Mosquito Max system base price was $1,395 and their 25 nozzle complete DIY install kit was $1,725. Adding another 5 nozzles to get to 30 would bring the price up to $1,775 at $10 per nozzle assembly. I looked out on You Tube and found several videos from mosquito system installers with tips and tricks for installation. After watching a few of these I became confident that I could indeed install my own system and would be aware of the typical installation methods and pitfalls. Generally, installation is fairly simple and there are sites that have go-bys to help you design your system. I used a plot plan of my house with measurements to determine the best path for the nylon tubing and the spacing (every 8-12 feet) so that I could add up all the parts needed in advance to see if I should buy a system "kit" or buy parts individually. For me buying a 25 nozzle kit and adding a few nozzles worked out best. I ended up purchasing the Mosquito Max system and picked the unit up from their main office in Katy, Texas with is where the units are made. The unit has a one year warranty and all parts are available from this location should I need them after the warranty period expires. Another plus with a tankless system is that I can easily load it into the trunk of my car and take it to the shop if I need it repaired as opposed to paying for a service call should it be an item I don't feel comfortable trying to fix on my own. SYSTEM DESIGN AND INSTALLATION General installation advice was to create a "perimeter" around the back yard and then add some additional lines as needed that "T" off the main line using a 3 way connector called a "union tee" to cover interior flower beds with shrubs and trees. Tubing can be attached to fence lines with clips or many installers used a combination of clips and a staple gun. In my case the pool and paved areas take up most of the center of the yard (see plot plan at top of blog), which makes for a simple installation. I installed the base unit on the wall just beyond where the pool equipment is located on the plot plan. I bought some 1/2" outdoor rated PVC from our local home improvement store as well as some 90deg. elbows and ran the tubing through the PVC down the wall from the main unit used a 90deg fitting and ran another piece under ground across the small 6' wide small yard and then another 90deg fitting and a PVC piece to go up the fence to just underneath the top cap of the fence which was the starting point for my perimeter backyard installation. I followed a similar process with the water supply tubing that runs from the base unit to the hose bib to protect it from the lawn crew / week whackers. The installation of the tubing and nozzles was so simple that my kids could have done it...and I enlisted the help of my 14 year old to make things go faster. Of course you could do a more elaborate installation than I chose to do, and I am sure many professional installers would have ran the lines inside our fence where it is double sided. However, I chose to attach the tubing just under the top cap on the fence using a combination of staples and plastic clamps that screw in and were supplied in the install kit by the manufacturer. If you keep the lines very straight and choose a tubing color to match your fence the install becomes nearly invisible. As you move along the perimeter you install "T" fittings by pushing one end of the tubing inside the fitting until it locks, then you push in a nozzle until it locks in place via quick connect type mechanism, then you push the next section of 8-10' of tubing in the other side and then keep going and do it again. I used a "C" clamp on each side of the "T" connection to tightly secure it to the fence and this allows me to aim the nozzle in the direction up/down that I wanted it. These "C" clamps are just small plastic fittings that go around the tubing or fitting and have a hole that allows you to screw them into the fence or wall to hold the line/fitting secure. You can use 90deg. fittings in corners so that you do not kink the nylon tubing. Generally I found these to be unnecessary and used "C" clamps to hold the line in corners to ensure it stayed in a smooth curve and did not kink. When you need to branch off the main perimeter line, you just install another "T" fitting, but rather than installing a nozzle in one of the openings, you just insert the nylon tubing for the branch line and then continue down that line adding "T"connections and nozzles as needed. At the end of that line you would install an Elbow fitting and nozzle instead of a "T". Very simple. Each system will have a maximum number of nozzles it can support (80 in my case) and recommendations on how many "branches" they support. Both systems I researched offered a zoning system for purchase that could expand the capacity by sending pressure to one zone at a time similar to an automatic sprinkler system. So I could install a zone for my front yard at a later date and control misting times and durations separately from the back yard. Or I could just choose to install a small valve to turn on/off the front yard if I had enough remaining nozzle capacity on my system (I can still add 50 more nozzles to my machine). All the manufacturers also offer riser assemblies for use in flower beds as well as ways to attach nozzles to trees. These riser assemblies also offer easy push-in connections and copper risers for durability. These are a bit pricey, but would make the install faster and neater. SYSTEM STARTUP Once I had all the tubing installed and the water line connected, I read through the instructions to ensure I had everything correctly connected. I then filled the chemical tank with water to test the unit. After plugging in and setting the spray time to the maximum setting, I did a test spray. We noticed that some of the nozzles were not spraying and adjusted the pressure up to 100lbs per the directions given by the folks when I purchased the unit. This increased the mist near the unit and we immediately noticed that one of the push in connections at one of the "T" locations was leaking. I pushed that tube in firmly and all nozzles began to spray a fine mist as intended. I had no other leaks or issues. I then spent some time aiming nozzles to ensure I had good coverage of each area. After that I poured the selected chemical (Riptide) into the Chemical tank inside the main control box and secured the lid, finished the programming and then tested again. Everything worked perfectly! I did see a few areas that did not have as much mist coverage as I would have preferred. But since adding nozzles is as easy as cutting the line and inserting a new "T" fitting / nozzle, I plan to add several more over time to improve the coverage. Overall, it took me about 5-6 hours to install my simple system around the perimeter of the back yard with some of that time spent reading instructions, digging a small trench (4-5' deep across 6' wide side yard) and hanging the unit on the brick wall. I would estimate I saved between $1,000 and $1,500 on installation fees as most systems installed that I read about were in the $3,000-$3,500 range. SETTINGS I used the system's "SUMMER" setting initially which sprays 4 times a day for 45 seconds. Twice in the early AM and twice in the evening. Once I have the mosquitoes under control I will likely change to once in the AM and once at dusk. CHEMICAL SELECTION As I noted above I chose Riptide initially, but I read that many people rotate between Riptide and Sector. Riptide generally had higher ratings and I liked that it was water based and does not leave an oily residue and was safety for plants (some will burn plants so read labels closely). It also works on many other pest insects such as ants, gnats, fleas, moths, etc... RESULTS I will come back to the site after some time to report on results as most manufacturers say it takes 2-3 weeks to eradicate the mosquito population in your yard. What I did notice immediatly was that the number of small flying insects under our covered patio lights was down significantly by the second night the system had been in operation. I will also post some pictures of the unit and infall....See MoreTumbled Travertine Pavers .. to Seal, Enhance, or Leave Alone!
Comments (19)I too have tumbled travertine pavers (walnut color) and live in much too sunny Florida. I enhanced my pavers. The StoneTech enhancer is also a sealer. I love the way the true beautiful colors come out when its enhanced....its what sold me on travertine. I don't prefer the chalky look. The enhancer/sealer does not make the tumbled travertine slippery. The water will bead when it rains. I am in the Tampa area and the sun fades out the enhancer in less than a year. I re-enhance every October/November. Since the sun is less strong in our winter months, it lasts nicely thru to June. Then starts to look more chalky in the hot summer months. Chalky is the best word to describe it since the stone is not faded. The surface must be dry for a few days, so its impossible to enhance it in the summer when it rains daily. I wait for 5-7 days of no rain on the surface. I do a small area 10x10 at a time. You put a light coat on with a paintbrush (thats what I use so as not to waste it), let it sit for 20 minutes and wipe off the excess. I do not recommend doing it in the middle of the day in the hot sun. You don't want the enhancer to actually dry, it becomes harder to wipe off. Its like you buff it. I just use an old towel and toss it when I am done. The enhancer lasts for several years in the areas that are not touched by the sun, so I only re-enhance the area not covered by the lanii roof. In 5 years I have only done the lanii covered area twice. I just redid it because we had to have new drains put in and i really had to scrub the stone to clean up after the workers. I use to post several years ago, I am not sure if my pool pictures are still on these threads. I love the enhanced look and it gives it a little protection....See Morepoolguynj
12 years agobryanaz
12 years agonielsens2001
12 years agobryanaz
12 years agonielsens2001
12 years agobryanaz
12 years agonielsens2001
12 years agobryanaz
12 years agobryanaz
12 years agobryanaz
12 years agovabeachdesigner
12 years agoneilaz
12 years agormrc12
12 years agobryanaz
12 years agormrc12
12 years agochulaman
12 years agoPanaGringo
10 years agopamela928
10 years agolilsophie
10 years ago PRO
PROPellini Stone Design
8 years agolast modified: 8 years ago


Related Stories
PATIOSLandscape Paving 101: Travertine Keeps Its Cool in Warm Climates
Travertine is a gorgeous paver for a pool surround
Full Story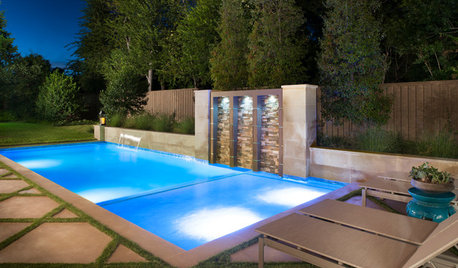
GREAT HOME PROJECTSHow to Replaster (or Remodel) Your Pool
Have an old pool? It could be time to update the plaster, landscaping and more for a pool that works swimmingly with your current style
Full Story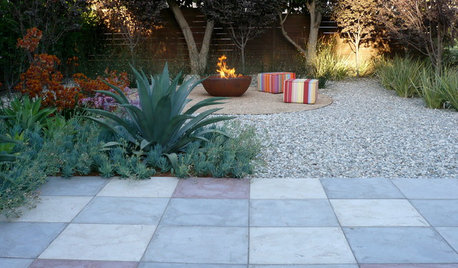
MATERIALSPrecast Concrete Pavers Make a Versatile Surface in the Garden
You can use concrete pavers in a variety of shapes and colors for your patio, walkway, driveway and more
Full Story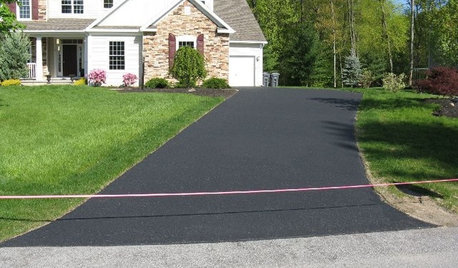
CURB APPEALHow to Reseal Your Asphalt Driveway
Protect your driveway and keep it looking great by applying new sealer every couple of years. Get the details here
Full Story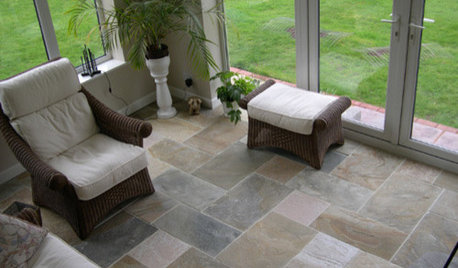
REMODELING GUIDESYour Floor: How to Find Right Stone Tile
Get the Pros and Cons of Slate, Travertine, Sandstone, Marble and Granite
Full Story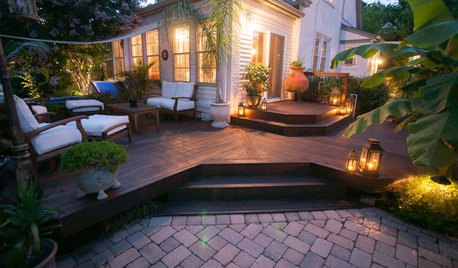
MOST POPULARWhat to Know About Adding a Deck
Want to increase your living space outside? Learn the requirements, costs and other considerations for building a deck
Full Story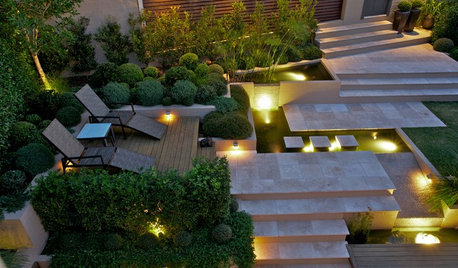
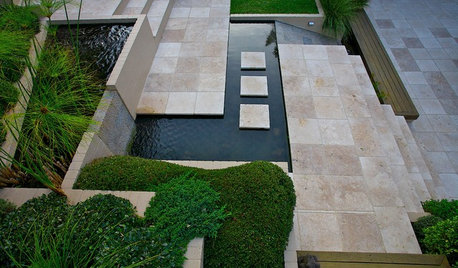
LANDSCAPE DESIGNGarden Levels Transform a Steep Slope in Australia
From unusable to incredible, this outdoor area now has tumbled travertine, water features and mod greenery
Full Story
GARDENING AND LANDSCAPINGPool-Friendly Patio Materials
Get a pool patio to match your style at a price that doesn't leave you high and dry
Full Story
LIFEReluctant DIYer’s Diary of a Dresser Makeover
Weekend project: Glossy new black-and-white dresser, hold the sandpaper
Full Story
GREAT HOME PROJECTSHow to Give Your Driveway and Front Walk More Curb Appeal
Prevent injuries and tire damage while making a great first impression by replacing or repairing front paths
Full Story

neilaz