


how did you plan a kitchen diy or kd
mscarol
16 years ago
Featured Answer
Sort by:Oldest
Comments (16)

remodelfla
16 years agolast modified: 9 years agopcjs
16 years agolast modified: 9 years agoRelated Discussions
Do-It-Yourself Wall-O-Water
Comments (29)For a couple of years I had a garden spot away from my house, with no water supply available so if I wanted to supplement rainfall I had to haul gallon jugs of water. To make my watering efficient, when I planted my peppers & tomatoes in the spring, I dug down and buried empty gallon plastic jugs, one between each plant. I had poked 4-5 holes in the bottom of each, of course, and left the caps on until later in the summer. Once the weather warmed, and after a good soaking rain, I mulched the beds 4-6" deep with chopped leaves, being sure to cover the tops of the (so far empty and still capped) bottles to protect them from the sun since I had found that the plastic degrades and becomes brittle when exposed to the sun. (In previous years, just cultivating around the bottles inevitably resulted in my breaking the tops off by midsummer.) When the weather reached a point where I actually needed to water, I cleared the mulch away for the moment and poured a gallon of water into each buried bottle. I set the cap loosely back atop each bottle to keep the leaf debris from falling in and clogging the exit holes in the bottom, then pulled the mulch back up to protect the plastic. I did not care about how long it took for the bottle to empty-- it seemed like a gallon or two a week per plant was sufficient, and the best part is that by burying the bottles the water went right down to the root zone where it was most effective. As for using wall-o-waters, since I had gotten some free from a friend, I tried them last year with 3 really early tomato plants I started specifically to experiment with. While they survived a good bit of frosty weather, in the end the plants I had started weeks later and planted out a month after the first ones when the weather had warmed quickly caught up to the wall-o-water ones and all the tomatoes pretty much bloomed & set fruit at the same time & rate. So my conclusion is that it was satisfying to my eager gardener's soul to be out planting early, but it really made no difference in overall plant performance. I have found the same to be true with early plantings of such things as peas and salad crops, too. Early plantings may survive, but later plantings quickly catch up and may even surpass earlier ones that have been stressed by the weather....See MoreFinalizing Plans - Tell me how it worked with you and your KD
Comments (1)I'm going through the process - but yes my KD expects both my husband and I to sign off on the final design. My designs are CAD and ready for the city for permits. Yes of course we have a copy which includes elevations, spells out where everything will be placed, and size of each cabinet. The drawings are very detailed. We also have a copy of the structural engineer's cad drawings too. Hope the info helps!...See MoreKD consult by phone--who did you use?
Comments (24)Update. I finally decided that I needed an expert to give my layout a look after feeling like I still wouldn't be completely happy with the new layout I've drawn. I feel like I'm getting closer, but still stuck. I e-mailed her my drawings and a long narrative about my priorities, usage, etc. (All the stuff you'd put in a layout thread suggested in "Read Me".) I described my sticking points with current layout. She got back to me in a couple of days and we spoke the next day. I could tell she had studied my plan and e-mail. We spoke for just over an hour, and it only took me a couple of minutes to get over her east coast accent. ;) She suggested a couple of changes that others here have suggested to me, but somehow when she said them they clicked differently. Maybe it was different because she suggested them in combination with each other and had some answers for my concerns about the changes. Also for me, speaking to someone rather than communicating through writing makes a difference. I'm still in the process of reviewing my storage situation after her suggestions to see if they will really work for me. For instance, she suggested replacing the double wall ovens with undercounter ovens. Moving one of the ovens to a spot where I was planning drawers makes me have to move those items to be stored in the drawers someplace else. One of the other storage suggestions she made will probably help offset that drawer loss. I think I can make it all work, but I need more time to fiddle it. I really wanted wall ovens, but I NEED two ovens. I may have to give up a want to fulfill a need, if that makes sense. We also spoke about my idea of moving the kitchen to another part of the house and how I could lay that out. Even though we had been speaking for close to an hour, she kept asking me, "what else can I help you with?" I asked a couple of appliance and knob/pull questions. She also offered some decorating advice for the new space. I would recommend Susan. She knows how to ask the right questions, communicates well, and gave good advice. It was worth the $200, which is a drop in the bucket compared to how much the entire project will cost. And getting it right is priceless....See MoreKitchen Floorplan - Comments Wanted - Plan from KD
Comments (29)Hi folks....thanks for the kind thoughts about the view. It is one of the things that ultimately sold us on the house (despite its dated, worn out feeling). plllog - yeah, my sketching ability is HORRIBLE, HORRIBLE, HORRIBLE. So, at any rate we met with the KD again tonight and settled on a door style/stain which is a huge accomplishment, but maybe that's another thread....but the short of it is, the Liberty doorstlye from Ultracraft in a Natural Cherry stain. We'll save money by dumping the glazing on either a wood door, or a painted white finish we had been planning on. Ultracraft changed how they're doing the glazing and its much heavier than a few years ago. The white doors are a much less "matte" finish and had a sheen that we didn't like. We also elimiated dentil molding we didn't like and a lot of fluted trims that while they were nice cost $$$$ and are not really our taste. One of the things the KD immediately pointed out about this is that its big island and cleaning the center would be a chore. He's right, and I joked that I'd have to hang from the ceiling a la Tom Cruise in the first Mission: Impossible move. So, we discussed some changes and it looks like we're going to wind up with an island that's sort of shaped like a grand piano where the "keys" would be is the prep area and the island is shaped like the body of the piano. We'll still have some shallow depth cabinets underneath for all the occassional use items we have. We also changed the layout of the "arm of the island. The beverage fridge will now go on the north (top) wall where the 33" base cabinet is (by the door to the yard) with the remaining cabinet a narrow 9" door for bag storage (the reusable grocert type, etc). The MW drawer will go where the beverage fridge was and we'll replace the MW base and 15" cabinet with a 36" wide drawer base for plates and utensils. The remaining 24" space will be left open as a push in spot for a stool where my wife can sit at meals while the kids and I sit on the curve of the piano. This arrangement also puts a stool nearer the prep area for a helper or guest. So, it feels good to get something accomplished including starting to determine where everything will have a home in the new space. I should have the new drawings next week and will post...here is a reminder of the layout (sans changes from today) and a grand piano from above to imagine the island shape....See Morecoffeebreak
16 years agolast modified: 9 years agoberryberry
16 years agolast modified: 9 years agodeedee-2008
16 years agolast modified: 9 years agoboxiebabe
16 years agolast modified: 9 years ago
Tom Pultz
16 years agolast modified: 9 years agojanwad
16 years agolast modified: 9 years agoraehelen
16 years agolast modified: 9 years agobethv
16 years agolast modified: 9 years agodivamum
16 years agolast modified: 9 years agoholligator
16 years agolast modified: 9 years agoboxiebabe
16 years agolast modified: 9 years agomls99
16 years agolast modified: 9 years agolynninnewmexico
16 years agolast modified: 9 years ago
Related Stories
BUDGETING YOUR PROJECTHouzz Call: What Did Your Kitchen Renovation Teach You About Budgeting?
Cost is often the biggest shocker in a home renovation project. Share your wisdom to help your fellow Houzzers
Full Story
DISASTER PREP & RECOVERYRemodeling After Water Damage: Tips From a Homeowner Who Did It
Learn the crucial steps and coping mechanisms that can help when flooding strikes your home
Full Story
KITCHEN DESIGNShow Us Your Fabulous DIY Kitchen
Did you do a great job when you did it yourself? We want to see and hear about it
Full Story
SMALL KITCHENSThe 100-Square-Foot Kitchen: One Woman’s $4,500 DIY Crusade
Teaching herself how to remodel, Allison Macdonald adds function, smarter storage and snazzier materials
Full Story
LOFTSDIY Spirit Reinvents an Industrial Home
Armed with a detailed plan from a designer, this homeowner rolled up his sleeves and transformed his Edmonton loft space
Full Story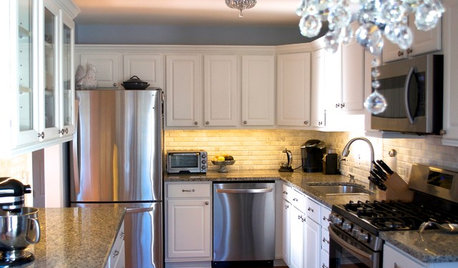
KITCHEN DESIGNDIY Spirit and $8,700 Transform a Townhouse Kitchen
The Spanos taught themselves some remodeling tricks, created a Houzz ideabook and then got to work on their kitchen makeover
Full Story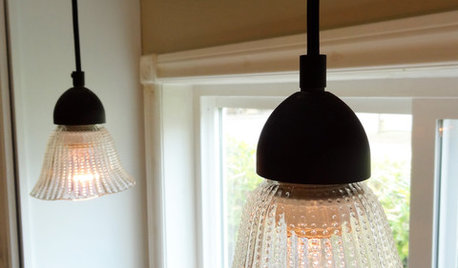
LIGHTINGLift a Room's Look With a DIY Pendant Light
Help your kitchen hang with the best of 'em with a pendant light kit and a salvaged glass shade
Full Story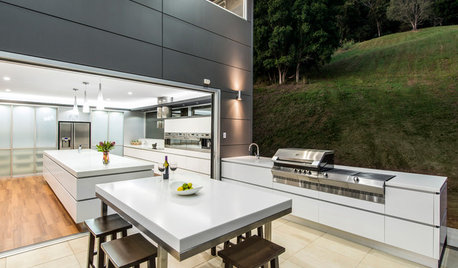
KITCHEN DESIGNHow to Plan a Kitchen That Extends Outside
Indoor-outdoor living gets easier with kitchen designs that bridge the divide
Full Story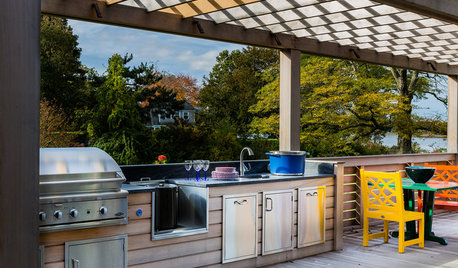
OUTDOOR KITCHENSHow to Cook Up Plans for a Deluxe Outdoor Kitchen
Here’s what to think about when designing your ultimate alfresco culinary space
Full Story
HOUZZ TOURSHouzz Tour: Industrial DIY Farmhouse in Ohio
With hard work, a can-do attitude and lots of help from family and friends, a rural couple builds a home that reflects their values
Full Story


footballmom