Brisket question
13 years ago
Featured Answer
Sort by:Oldest
Comments (89)
- 13 years agolast modified: 10 years ago
Related Discussions
Brisket?
Comments (18)I use Cook's Illustrated recipe for brisket with some personal modifications. I trim ALL the fat off the top 'cuz I don't like the texture of fat at all. I find that browning the meat for 6 minutes per side adds more flavor. I do this recipe in a LC 6-3/4 qt oval and it's perfect. Goes really nice with mashed potatos or over soft polenta. I also prepare this through step 4 and let the whole thing cool, storing it overnight in the fridge. Next day, defat (if any) and throw it in a low oven (300) for an hour or so. It has more flavor the next day. 1 beef brisket, about 3 pounds (CI recomments the point cut trimmed; I use the flat cut trimmed and don't care too much about weight. Typically 4 pounds.) 2 tablespoons vegetable oil 3 pounds yellow onions, sliced thin (I also add about a pound or more of mushrooms) 2 tablespoons brown sugar 6 medium garlic cloves, minced or pressed through a garlic press 1 teaspoon tomato paste 1/4 cup all-purpose flour 1/2 cup dry red wine 1 cup low-sodium beef broth 1 cup low-sodium chicken broth 4 bay leaves 4 springs fresh thyme 1 tablespoon cider vinegar 1- Heat over to 300 degrees and adjust racks so your cooking vessel is somewhat centered in the oven. 2-Sprinkle the brisket generously with salt and pepper to taste. Heat the oil in a large ovenproof Dutch oven over high heat until smoking. Cook the brisket until dark brown on the first side, about 5 minutes. Turn and repeat. Transfer the brisket to a large plate; set aside. 3-Reduce the heat to medium. Add the onions, brown sugar and 1/2 teaspoon of salt. Using a wooden spoon, scrapte the browned bits from the pan bottom. Cook, stirring frequently until the onions are softened and lightly browned, about 10 minutes. (I add the mushrooms at about 7 minutes and cook until their liquid has evaporated.) Stir in the garlic and tomato paste and cook until fragrant, about 30 seconds. Stir in the flour and cook for 1 minute. Slowly stir in the wine to dissolve the flour and cook until almost dry, about 1 minute. Stir in the beef broth, chicken broth, bay leaves and thyme. Return the meat to the pot, nestling it in the liquid, and bring to a simmer. Cover the pot, transfer it to the oven and cook until a fork slides easily in and out of the center of the roast, 2-1/2 to 3 hours. 4-Transfer the brisket to a cutting board, tent with foil, and let rest for 15 minutes. Remove and discard the bay leaves and thyme from the sauce, stir in the vinegar, and adjust the seasonings with salt and pepper to taste. Slice the brisket thinly across the grain, arrange on a warmed platter and spoon some of the sauce over it. Serve, passing the remaining sauce at the table....See MoreQuestion about browning brisket
Comments (8)I agree with skipping the browning. I used to, but what a pain! Especially if the brisket is really big, as in, too big to fit in a skillet to brown so that you have to brown it in stages. I finally just quit browning and found that the results were just dandy. Whew! One less step....See Morequestion about beef brisket
Comments (15)I just cooked one Sunday and it was delicious! I use to do the marinade and barbecue sauce and all that junk.I prefer serving my homemade barbecue sauce on the side.Liquid smoke is very strong so if you have never used it be careful.My DS used a whole bottle of it once for marinading one and it was so strong I couldn't eat it. For the past couple of years the only seasoning I use is salt,pepper and garlic powder.Sprinkle all three liberally over both sides of the brisket.Cut a large onion in quarters and place on top.Wrap tightly in a double layer of heavy duty aluminum foil,(or if you have a big enough slow cooker or electric roaster,use that on low heat),fat side down and place in a large baking pan.The pan should be deep enough to catch any juices that might "accidentally" seep out.Trust me,I know this from experience.LOL Briskets produce a lot of juice. Preheat oven to 400* and place the pan in the middle rack.Let it cook for about 30 minutes then turn the oven down to 300* and cook for about 6 hours for a 7-8 lb. brisket.I usually put it in the oven before I go to bed around midnight.After the 400* temp bake,I turn the oven to 200* and let it cook all night and turn off the oven around 7-8 AM.After it is done you can pour off the juice and add barbecue sauce or anything else you like or make gravy from the liquid.Let it stand for at least 30 minutes before slicing.Slice against the grain. Lately I have been buying the trimmed briskets.They are a little more expensive per pound but in the long run it is a bargain because you aren't paying for 3 pounds of fat.The ones I buy have just enough fat on the bottom to keep them tender and juicy.I cook them the same way as the whole ones. Briskets are one of the easiest cuts to cook in my opinion.Very little preparation and no watching! Leftovers,if you have any,can be made into sandwiches. Enjoy your brisket! Here is a link that might be useful: Cooking times for Brisket...See MoreCooking Brisket in pressure cooker???
Comments (20)fawnridge, would you mind posting the recipe for the brisket you grew up with. The way I've always prepared brisket is below, but I sure would like to try your growing up recipe. Brisket Woody's Concentrated BBQ Cooking Sauce* Dried Onions Pepper Salt Garlic Salt Oregano Seasoning Salt Cumin START THIS 2-3 DAYS (BETTER IF IT MARINATES FOR 3 DAYS) BEFORE YOU PLAN TO COOK IT. THEN YOU HAVE TO ALLOW 7-8 (OR 12) HOURS TIME TO COOK IT. Before buying brisket, look at the bottom -- the more meat you see the better. Buy the one with the most meat visible from the bottom. Tear off piece of heavy duty aluminum foil large enough to completely enclose the brisket. Place brisket on the foil. Brush (I just pour about 1/2 jar of Woody's on brisket and spread evenly with hand) one side of brisket with Woody's -- be liberal. Then sprinkle on the garlic salt, oregano, seasoning salt, salt, pepper, dried onion, and cumin -- be liberal with the seasoning too. Turn brisket over and repeat this on the other side. (I like to start with the bottom side of the brisket then turn it over and finish the top side. That way it is ready to put in refrigerator when I am finished.) Wrap the heavy duty aluminum foil and place on a large platter, a roaster, whatever will fit the brisket. Marinate in refrigerator for 2 or 3 days. When ready to bake, leave in foil and do not open it up. Put in 300 degree oven and cook for 7-8 hours. (I put in 250-275 degree oven and cook for 12 hours.) You can bake this overnight; for cooking 7-8 hours just turn oven on before you go to bed, put the brisket in the oven and it is ready in the morning. (I put in oven at 6:00 p.m. and take out at 6:00 a.m.) Remove from oven and unwrap foil (be careful, there are lots of juices in the foil so open the foil carefully and leave cupped so the juice does not run out). After cooking, you may take the fat off or leave it on. (I also like to drain off the juices and put the meat on a large platter.) This has an incredible flavor and is extremely tender. IT IS WONDERFUL! You can slice and serve on plates. You can use for sandwiches. It is great served on hamburger buns with a slice of onion as a sandwich, served with pepperoncini and cherry peppers and either French fries, potato salad, or potato chips. *Can purchase at Kroger's; it is with BBQ sauces. Italicized remarks are my additions....See More- 13 years agolast modified: 10 years ago
- 13 years agolast modified: 10 years ago
Related Stories

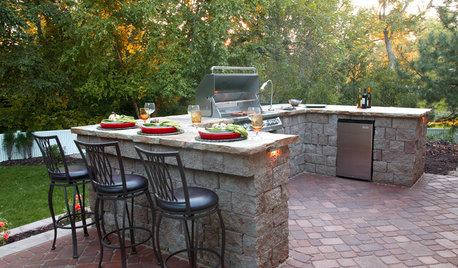
OUTDOOR KITCHENSYour Guide to Grills and More for Great Outdoor Cooking
Learn the pros and cons of gas versus charcoal grills, and about neat add-ons that let you do more
Full Story
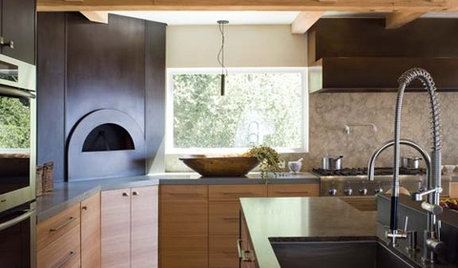
KITCHEN DESIGNKitchen Luxuries: The Wood-Fired Pizza Oven
If you love homemade pizza and are (ahem) rolling in dough, a wood-burning oven may be just the right kitchen investment
Full Story
dedtired