


How do you store your plastic and glass storage containers? pics?
shelly_k
15 years ago
Featured Answer
Sort by:Oldest
Comments (11)

gizmonike
15 years agoRelated Discussions
Show me how you store your plastic containers
Comments (5)Since we got rid of our wall oven in favor of a range, we gained a bank of four deep drawers in it's place. The top one, just below the microwave is a little higher than the average drawer, (39"-49") but works out well for the lightweight stuff. We used to keep all this above the old refer, but the new refer is so tall, that the cabinet above now is better for seldom used items. This post was edited by ctycdm on Sun, Apr 7, 13 at 19:01...See MoreHow do you store your paint containers?
Comments (16)Here is the directions for my shelving units, might sound difficult but it is really simple but take time. Here is a not so quick idea of how my paint storage shelves were made. All wood is ¼" wood stock, we used some old paneling & other scraps, but any wood would work. Measurement need to figure the sizes you needed. Back height: mine is 23" wide by 22" high and it holds 135 bottles. To find height: The distance between the bottom of the first shelf and the top of the next shelf is 2 ½" and each shelf is the same ending with the bottom shelf ¼" up from the bottom of the back, 2 ½" times the number of shelves you need plus ¼ equals the back height. Back width: Each bottle fit into a 1" "U" shape with ½" spacer area between where one "U" ends and the next begins. Beginning at one side measure and place a mark at ½" From that mark measure & mark in 1," then ½" then at 1" and continue ending with ½" My row of 15 bottles = 15"+ 8" (16 spacers @1/2" each) equals 23" per shelf. Ex: 20 bottles = 20" + 21 spacers@ ½" each for 10 ½," or 20" + 10 1/2"= 30 ½." Cuts: Back and 2 sides, using your measurements. Shelf bracing: cut strips ¼ x ¼ wide x width of the back. ex. mine is 23" wide so we cut ¼" X 23" cut as many as the number of shelves you are using. Shelves: Cut ¼" X 4" deep X width. Neck holders: ¼" x 1 ½" x desired width. Using the entire length, find and mark the center (3/4) at both ends and several more time if necessary. Draw a line from one end to the other. Using this center line and beginning at either end place a mark at ½," from this mark measure in 1" and mark, continue the ½" then 1" then ½" across the board ending with ½" Find the center of each 1" area, and using a 1" hole saw, cut out a circle. Repeat to the end. When done cut the board down the middle, you now have two scalloped boards. Repeat as needed. DH cheated here and taped two boards together and cut two at a time. He then used one as a template for the rest, cutting two at a time. Glue one straight edge of the neck piece to each shelf edge. We used contact cement, but any good wood glue would work but watch for movement of the pieces. Let dry. Back & bracing pieces piece: measure down from the top of the back and place a line at 2 ½" on both right and left sides. From this mark go down 2 ½," repeat the 2 ½" to the bottom, be sure to leave ¼" at the bottom. This is a good time to check to see if this is the correct size and make any adjustments as needed. Extend these marks to the inside and outside of both side pieces. Glue a shelf brace below all the marks you have made on the back of the unit. Let dry. Assembly: We placed the back piece on a scrap piece of plywood just bigger than the back. Glue and nail the sides to the back. To help keep the shape correct we taped a shelf inside the top and the bottom side pieces. Once the sides were in place we placed a long strip of wood along the outside of the side and secured them to the plywood, thus keeping the side tight to the back. Let dry. Starting at the bottom, add glue to the back and sides of each shelf and place them inside the frame and on top of the braces. Then add finishing nails along the line on the outside of each side piece. Repeat until you finish at the top of the unit. Again let dry. We then attached the unit to the wall and were luck enough to have two studs right where we need them, but you might have to use molly screw if you cant find stud. We used 9 screws in all. The unit is very solid and survived all of the abuse it received during the flood, being shoved from here to there before again claiming space in my craft/panty. If you have any questions I hopefully, can answer them. Belle...See MoreFew upper cabs- where do you store your glasses?
Comments (14)Bdaykitchen, because doing without uppers meant a lack of concentrated storage in any particular counter area, I decided to do point-of-use storage for the dishes and split them off to different areas (fanned out from DW but mostly pretty close). Cups and cereal bowls over by the coffeemaker and refrigerator/pantry wall, water glasses close to the prep sink because no good space for them by the main one. Our island has 12" deep cabinets on its traffic side and the pantry wall is 12" deep, BTW, and those shallow shelves lend themselves nicely to dish and glass storage, although our everyday plates and hot-stuff bowls go in a drawer by the stove and table--the only ones I actually have to walk across the kitchen to put away. Hope there's an idea in there somewhere for your situation. I do love not having uppers....See MoreStorage containers- Glass or Plastic?
Comments (23)I use both plastic and glass. I recently bought a bunch of the Premier storage containers by Rubbermaid, see the link. These are great, the plastic is hard and very clear so it's easy to see what's inside. The lids snap onto the bottom so when you store them empty, the lids are right there. I use the biggest one for a compost container on the counter, near the sink. The tight fitting lid keeps me from having any fruit fly problems. And the lids are flexible, that seems to make using them easier. I still have all my other assorted containers, too, but I ought to donate half of them to the thrift shop as I don't use but a few at a time. I also buy those shower cap type covers whenever I see them, we use those a lot to just save leftovers in the serving bowl. Here is a link that might be useful: Premier by Rubbermaid...See Morezelmar
15 years agoclaybabe
15 years agoshelly_k
15 years ago
lowspark
15 years agobdaykitchen
15 years agotimberframe4us
15 years ago
plllog
15 years agoBuehl
15 years agotimberframe4us
15 years ago
Related Stories
ORGANIZINGPre-Storage Checklist: 10 Questions to Ask Yourself Before You Store
Wait, stop. Do you really need to keep that item you’re about to put into storage?
Full Story
DECORATING GUIDESSuper-Versatile Storage: Lidded Glass Jars
See-Through Containers for Kitchen, Bathroom, Laundry Room and Beyond
Full Story
MATERIALSA Hard Look at Recycled Plastic for the Home
It's durable and versatile, but processing takes a lot of energy. We sort through the facts on recycled plastic so you can choose wisely
Full Story
ORGANIZINGHow to Store Your Stuff in Plain Sight
Keep open storage looking smart with the right arrangements and containers
Full Story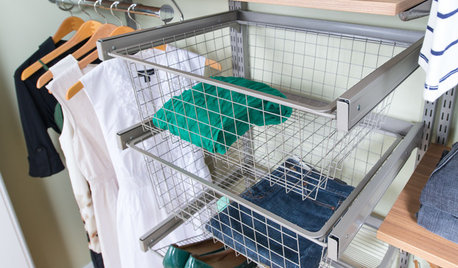
CLOSETSHow to Store Your Clothes to Keep Them Looking Good Longer
Here’s what clothes to fold, what to hang and how to stash your off-season stuff
Full Story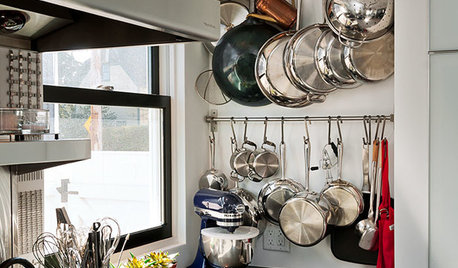
KITCHEN DESIGNHang 'Em or Hide 'Em: 10 Stylish Ways to Store Pots and Pans
Keep cookware neat and at the ready with racks, drawers and creative storage solutions
Full Story
CLOSETS8 Dream Closets Go Beyond Storing Clothes
Yes, they've still got hangers and drawers. But these luxurious dressing rooms also have views, artwork or an added purpose
Full Story
ECLECTIC STYLE5 Reasons to Hit That Secondhand Store
New things have their place, but old things have a history and beauty all their own
Full Story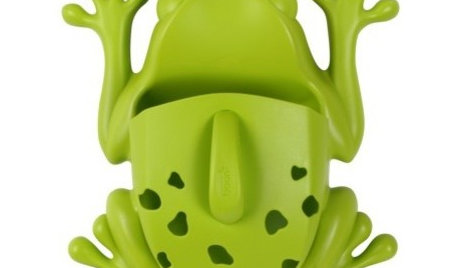
PRODUCT PICKSGuest Picks: 20 Fun Ways to Store Bath Toys
Keep bathroom clutter in check with kid-friendly containers, pouches and shelves for bath-time playthings
Full Story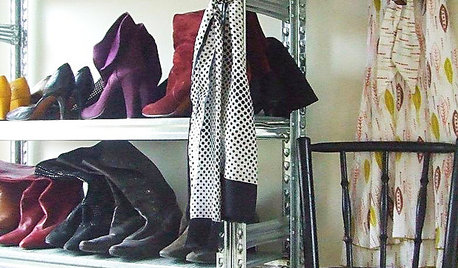


User