


How do you make a fluorescent light stand?
taliabob
13 years ago
Sort by:Oldest
Comments (35)
Related Stories

HOUSEPLANTSMeet a Palm That's Fine With Fluorescent Light
Get the look of the tropics without the full-on sun and high humidity — parlor palm tolerates regular indoor conditions with aplomb
Full Story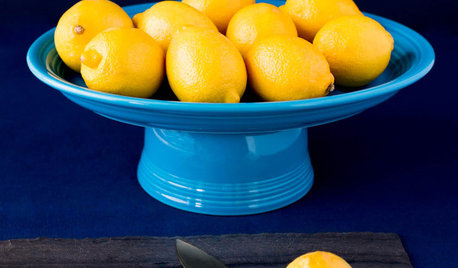
MOST POPULARThe Easiest, Most Versatile Cake Stand You'll Ever Make
Show off sweet somethings and your own impressive handiwork — just don't let on how little effort it took
Full Story
TILESource List: 20 Tiles That Make a Statement
Learn about the tiles that make these popular rooms stand out
Full Story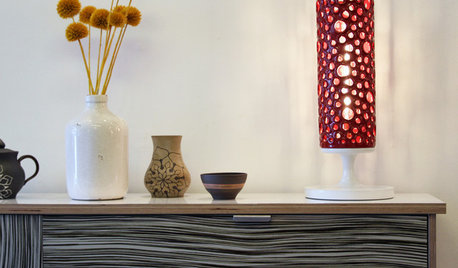
TASTEMAKERSShop Talk: Peek in on Brandon Morrison's Lamp-Making Process
Get an up-close and personal view of a Los Angeles lighting designer as he crafts one of his artful table lamps
Full Story
REMODELING GUIDESHow Small Windows Help Modern Homes Stand Out
Amid expansive panes of glass and unbroken light, smaller windows can provide relief and focus for modern homes inside and out
Full Story
MOST POPULAR8 Little Remodeling Touches That Make a Big Difference
Make your life easier while making your home nicer, with these design details you'll really appreciate
Full Story
HOME OFFICES7 Ways to Make Your Home Office Work Better for You
Have more energy, be more productive and feel better while working at home with these ideas based on science
Full Story
VACATION HOMESMake Your Vacation Home Pay Off
Renting your vacation house when you're not using it makes good financial sense. These tips can help
Full Story
REMODELING GUIDESOld and New Make for a Jolly Good Mix in England
Give an 18th-century country cottage a contemporary addition, and what do you get? A surprisingly cohesive-looking home
Full StorySponsored
suburbangreen
taliabobOriginal Author
Related Discussions
How do you make a lawn Xmas tree shape with lights?
Q
Where do you guys get or how do you guys make...
Q
looking for plans for a make-it-yourself light stand; please help
Q
? about lighting/do you hate fluorescent light?
Q
suburbangreen
Bets
Bets
Bets
ribsyhuggins
taz6122
cybrczch
taz6122
taliabobOriginal Author
barrie2m_(6a, central PA)
plantslayer
taz6122
pineapple_sage
californian
springlift34
mulio
hemnancy
kevinrs
taliabobOriginal Author
shoontok
ditnc
californian
tomncath
woodcutter2008
winnie850
sneezer2
taz6122
taz6122
sneezer2
taz6122
southernorchidlover
taz6122
johnnyrazbrix