


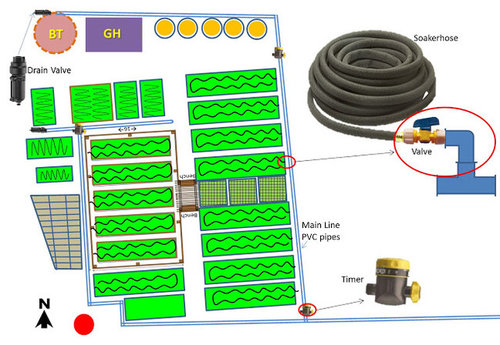
Irrigation System for Raised Beds
biradarcm
12 years ago
Sort by:Oldest
Comments (46)
Related Stories
GARDENING GUIDESHow to Install a Drip Irrigation System
Save time and water with a drip watering system in your vegetable garden — a little patience now will pay off later
Full Story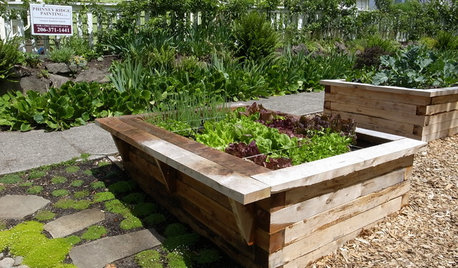
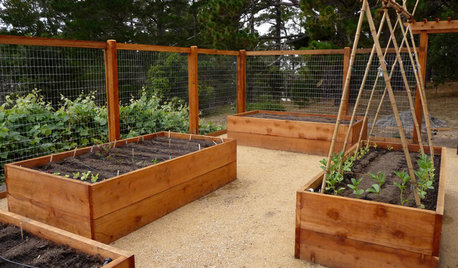
FARM YOUR YARDHow to Build a Raised Bed for Your Veggies and Plants
Whether you’re farming your parking strip or beautifying your backyard, a planting box you make yourself can come in mighty handy
Full Story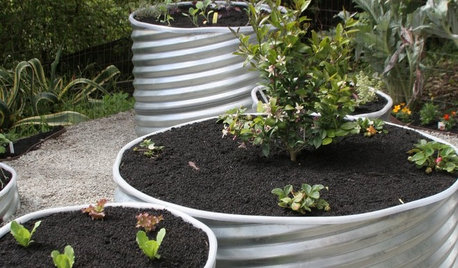
GARDENING GUIDES8 Materials for Raised Garden Beds
Get the dirt on classic and new options for raised vegetable and plant beds, to get the most from your year-round garden
Full Story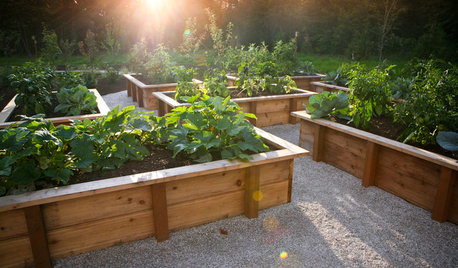
GARDENING AND LANDSCAPINGRaised Beds Lift Any Garden
From good old-fashioned wood garden boxes to modern metal troughs, raised beds can make any landscape space look great
Full Story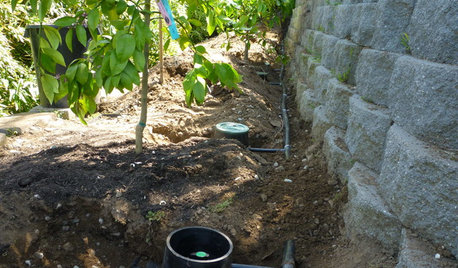
EARTH DAYGrow a Beautiful Garden With Ecofriendly Greywater
Reducing home water waste means lower bills and a healthier planet. Here's how to set up a greywater home irrigation system that can help
Full Story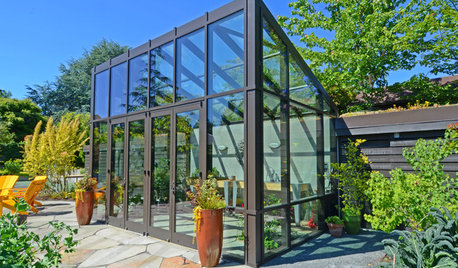
PATIO OF THE WEEKA Cozy Backyard Escape Warms Seattle Gardeners
Bold hues, a green roof, a functional greenhouse, a fire pit, an arbor and raised beds create a harmonious modern garden
Full Story
BARN HOMES12 Bar-Raising Barns
Homeowners make hay out of renovated, reclaimed and newly raised outbuildings
Full Story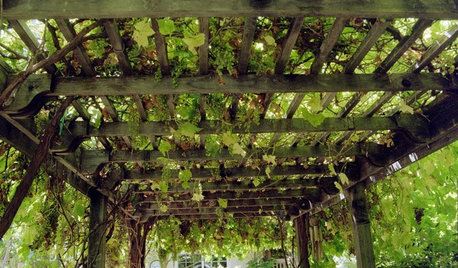
GARDENING AND LANDSCAPINGVertical Gardens Raise the Limits for Landscapes
Turn a small garden space into a towering success with an upward-bound collection of edible delights
Full Story
LANDSCAPE DESIGNLandscaping Tricks to Manage Stormwater Runoff
Help rainwater absorb slowly back into the earth with paving grids, gravel beds and other porous systems
Full Story
MONTHLY HOME CHECKLISTSTo-Dos: Your April Home Checklist
Kick spring cleaning into high gear, and troubleshoot cooling and irrigation systems for the warmer months ahead
Full Story
miraje
joellenh
Related Discussions
Need advice for raised garden bed irrigation
Q
drip irrigation installation
Q
Irrigating raised beds
Q
Irrigation to raised elevated garden bed?
Q
biradarcmOriginal Author
redding
miraje
slowpoke_gardener
biradarcmOriginal Author
biradarcmOriginal Author
slowpoke_gardener
soonergrandmom
redding
joellenh
JamesY40
slowpoke_gardener
redding
biradarcmOriginal Author
grn_grl
redding
JamesY40
slowpoke_gardener
slowpoke_gardener
redding
redding
slowpoke_gardener
JamesY40
redding
slowpoke_gardener
biradarcmOriginal Author
slowpoke_gardener
redding
biradarcmOriginal Author
slowpoke_gardener
biradarcmOriginal Author
biradarcmOriginal Author
ezzirah011
slowpoke_gardener
biradarcmOriginal Author
biradarcmOriginal Author
miraje
biradarcmOriginal Author
slowpoke_gardener
slowpoke_gardener
biradarcmOriginal Author
slowpoke_gardener
biradarcmOriginal Author
slowpoke_gardener