The first part of this series on custom settings established the overall options for focus and exposure only. The remaining options are primarily those that I consider "influencing" settings...but they have tremendous effect on your final results.
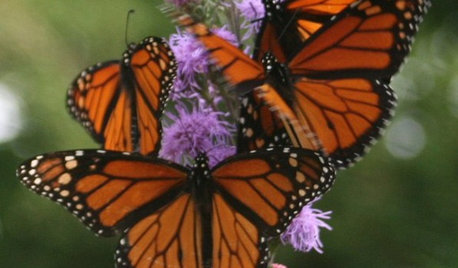
The first of these, and perhaps one of the most important is EXPOSURE VALUE. The software that operates your camera had "optimal" exposure values assigned by the writers. Software values will vary from manufacturer to manufacturer, but they are ideally, right in the middle-of-the-road...not too bright and not too dark. Every camera usually has a slider-type indicator that is scaled from zero in the middle with (-) settings to the left (these leftward settings will make the overall exposures darker than the original camera settings) and (+) settings to the right (rightward movements make the exposures lighter). You are not, in fact, altering the cameras exposure function...you are merely "influencing" the camera to change the aim-point. This will be essential to you in butterfly photography because almost all your photos will occur in abnormally bright situations. Equally important is that photos which are underexposed, intentionally or unintentionally can be corrected after the fact, in almost every software program existing...such is not usually the case with overexposed shots. They are mainly beyond redemption. The corrections that you make to these settings are usually in increments of 1/3 f/stops. The setting for EV that I use is (-)2 increments or (-)2/3 f/stops. I keep it there at all times unless, in reviewing the image on the monitor after it is shot, I feel that it might be a little better with more (or less) exposure. When I do, I shoot another exposure with more correction and a third with less correction (considered as bracketing the exposure). I then return immediately to my standard setting (-2/3).
MY EXPOSURE VALUE SETTING stays on -2/3 f/stops at all times, shooting butterflies or anything else.
Most of the other image-related settings are a matter of taste...
My settings for SHARPNESS, SATURATION and CONTRAST are all +1. I set 'em and forget 'em.
At this point, I have the camera primed to operate as a legitimate point-and-shoot camera. When I come out to shoot some photos, I need to determine if there is enough wind to effect my results...if there is, I select SHUTTER PRIORITY with a shutter speed of 1/400. If the wind is not a factor, I leave it in my normal mode...APERTURE PRIORITY with my preferred aperture setting of f/5.6. I might have to up that setting to f/8 if it is really bright. After I make that initial decision, it is not necessary to make changes...the settings, along with the astounding capabilities of your digital camera WILL DO THE WORK FOR YOU and, yes, some of them will be National Geographic quality!
ISO settings are settings that control the light-sensitivity of your sensor. When the ISO is increased, it enables the camera to record an adequately exposed image in low-light situations. Upping the ISO carries some negative "payback" features. The characteristic known in digital photography as "noise" was better known as "grain" in film cameras. It is a profusion of tiny specks that increase in size as the ISO increases. Noise is a feature that can be detected with the naked eye and becomes glaringly noticeable when large prints are made. Since low light situations will not be the normal setting for butterflies, it will not be a consideration for my standard settings. Instead, I select the lowest ISO number (such as ISO-80 or ISO-100) and leave it alone. All things being equal, the best image will come with the lowest ISO.
WHITE BALANCE refers to corrections that can be made to offset the additive colors created by various light sources. When absolute-spot-on color is required it can be captured by your camera when you use "custom settings" for white balance. It is based on using a pure white subject, such as a large sheet of art paper and shooting a photo of it from a point close enough to the camera to fill the full frame. From this, the camera has a program that allows the camera to evaluate this "white" image for any color that does not belong and it, in turn, corrects its color software program to get it back to pure white. Effective?...yes!...cumbersome?...yes!...something I'd like to do often?...absolutely not! These young folks who engineer these cameras astound me! Just a few short years ago, they had difficulty capturing and recording some colors such as vivid reds and purples...in my opinion, that is history. I use AUTO at all times with my camera and rarely have to make any color corrections. Poor color is much more often a result of poor exposure than of tainted light sources.
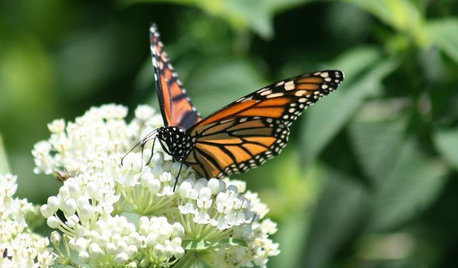
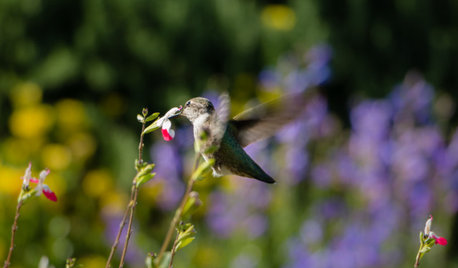
This photo of a Red Spotted Purple was shot using my camera with the above settings and in the point-and-shoot manner described above and with no color corrections.
{{gwi:450868}}
I have a couple more parts for this mini-tutorial that I will submit as new posts to keep the downloading burden down.
Thanks for staying with me.
Bob


minrose
KC Clark - Zone 2012-6a OH
Related Discussions
For Cindee II - Blooms and Scenes to Heal By
Q
Camera settings for butterflies...part III
Q
Warning! Pic-Heavy lumps! Lopsided Garden Part II
Q
any opinions on these digital cameras
Q
msmorningsong
larry_gene
msmorningsong