


craftsman wont move
ncgrass
14 years ago
Sort by:Oldest
Comments (33)
Related Stories

REMODELING GUIDESYou Won't Believe What These Homeowners Found in Their Walls
From the banal to the downright bizarre, these uncovered artifacts may get you wondering what may be hidden in your own home
Full Story
SMALL SPACESHouzz TV: You Won’t Believe Everything This Tiny Loft Can Do
Looking for more floor space, a San Francisco couple hires architects to design a unit that includes beds, storage and workspace
Full Story

SMALL SPACES10 Tiny Kitchens Whose Usefulness You Won't Believe
Ingenious solutions from simple tricks to high design make this roundup of small kitchens an inspiring sight to see
Full Story
HOME TECH3 Kitchen Contraptions You Won’t Believe
Pizza hot from the printer, anyone? These cooking gadgets harness imagination and high tech — and have price tags to match
Full Story
FURNITURE12 Sofa Colors That Won't Box You In
With any of these colors as a base, you can change your decor as often as you change your mind
Full Story
LIFEYou Said It: ‘Put It Back’ If It Won’t Help Your House, and More Wisdom
Highlights from the week include stopping clutter from getting past the door, fall planting ideas and a grandfather’s gift of love
Full Story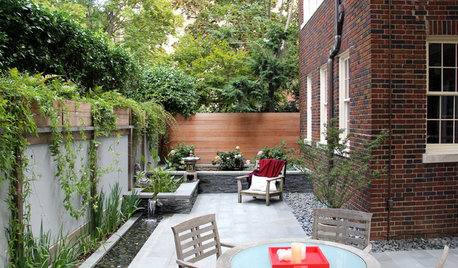
PATIOSPatio Details: Dog Won’t Trample the Plants With This Design
An Asian-inspired backyard redo adds clean lines, a new water feature and a sense of spaciousness — with room for a large beloved dog
Full Story
BUDGET DECORATING15 Summery Decorating Ideas That Won't Break the Bank
Transport yourself seaside with a bit of paint or a few airy accessories
Full Story
KIDS’ SPACES7 Kids’ Bedroom Decor Ideas That Won’t Break the Bank
Take an economical approach to decorating your child’s room with these DIY ideas
Full StorySponsored
More Discussions
tomplum
mownie
Related Discussions
Craftsman Kohler 20hp mower won't start
Q
Craftsman Riding Mower blades won't engage
Q
Craftsman 20HP Mower won't start
Q
Craftsman riding mower won't turn over
Q
rcmoser
ncgrassOriginal Author
tomplum
rustyj14
ncgrassOriginal Author
mownie
ncgrassOriginal Author
mownie
ncgrassOriginal Author
mownie
tomplum
rustyj14
trobinett
mownie
rcmoser
ncgrassOriginal Author
rustyj14
mownie
ncgrassOriginal Author
mownie
ncgrassOriginal Author
mownie
ncgrassOriginal Author
mownie
montanastang
mownie
montanastang
montanastang
mownie
montanastang
tomplum