


Harbor Freight Club 2
milwdave
18 years ago
Sort by:Oldest
Comments (81)
Related Stories

DENS AND LIBRARIESHow to Care for Your Home Library
Increase your enjoyment of books with these ideas for storing, stacking and displaying them
Full Story
HOUZZ TOURSMy Houzz: Step Inside a Converted Medieval Priory
The owners of this historical property have used vintage finds and a playful style to create a welcoming family home
Full Story
KITCHEN BACKSPLASHESHow to Install a Tile Backsplash
If you've got a steady hand, a few easy-to-find supplies and patience, you can install a tile backsplash in a kitchen or bathroom
Full Story
HOUZZ TOURSHouzz Tour: Creative Resourcefulness in a 1970s Ranch
Combine design dexterity and abundant creativity with patience, and what do you get? A home awash in personality and style
Full Story
KITCHEN DESIGNNot a Big Cook? These Fun Kitchen Ideas Are for You
Would you rather sip wine and read than cook every night? Consider these kitchen amenities
Full Story
DECORATING GUIDESTextile Textbook: The Velvet Revolution
This classic fabric oozes style. Discover all of its varieties
Full Story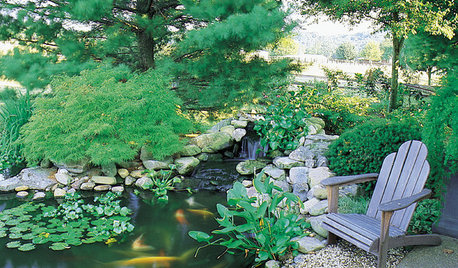
LANDSCAPE DESIGNKoi Find Friendly Shores in Any Garden Style
A pond full of colorful koi can be a delightful addition to just about any landscape or garden
Full Story
KITCHEN ISLANDSWhat to Consider With an Extra-Long Kitchen Island
More prep, seating and storage space? Check. But you’ll need to factor in traffic flow, seams and more when designing a long island
Full Story
GREAT HOME PROJECTSHow to Make Your Garage a Storage Powerhouse
New project for a new year: Add shelving and containers to get your stuff off the garage floor — and still have room for the car
Full Story
MOST POPULAR8 Little Remodeling Touches That Make a Big Difference
Make your life easier while making your home nicer, with these design details you'll really appreciate
Full Story
consultant
weebus
Related Discussions
SHCS for a Pre-Fab (Harbor Freight) Greenhouse?
Q
Harbor Freight Trailer Okay?
Q
Great video of Harbor Freight build
Q
Harbor Freight 800w Generator - No Start - No Spark
Q
consultant
morrowsmowers
CarolynA
conifers
stressbaby
conifers
conifers
milwdaveOriginal Author
stressbaby
Vamptoo
conifers
conifers
conifers
milwdaveOriginal Author
conifers
milwdaveOriginal Author
consultant
conifers
stressbaby
stressbaby
milwdaveOriginal Author
conifers
nightbloomincereus 7A noVA
stressbaby
conifers
milwdaveOriginal Author
conifers
charlottea
conifers
javan
milwdaveOriginal Author
charlottea
milwdaveOriginal Author
charlottea
milwdaveOriginal Author
agardenstateof_mind
milwdaveOriginal Author
agardenstateof_mind
milwdaveOriginal Author
agardenstateof_mind
john13
charlottea
birdhope
agardenstateof_mind
weebus
agardenstateof_mind
agardenstateof_mind
milwdaveOriginal Author