


Laying stepping stones on non-flat surface
well_drained
18 years ago
Featured Answer
Sort by:Oldest
Comments (15)

gottagarden
18 years agowell_drained
18 years agoRelated Discussions
Stone dust vs sand for laying pavers? Help!
Comments (41)25 years ago I had to choose between stone dust and sand when laying a brick patio using standard sized bricks. The underlying ground here in Virginia is fairly high content clay, I can absolutely state that stone dust is the way to go.... here are a few pointers; 1. Use a rigid but moderately flexible edge guard to define the area. I used aluminum about 4 inches tall. Don's use something softer like plastic or nylon as it will flex and your bricks will start to migrate all over the place no matter whether you use sand or stone dust. 2 . Use 4 inches of stone dust, but apply 2 inches first...then compact it with a manual or mechanical tamper....then thoroughly soak with water and wait a couple of days before applying the 2nd layer of stone dust and tamping and watering again. (BTW, I really don't understand the comments about stone dust not draining well....you will see the water soak quickly through the stone dust.) 3. Make the area as level as possible using a screed (look it up :) 4. Install some water permeable landscaping membrane on a fairly well leveled area. This will promote drainage and stop weeds from infiltrating from below. I will also make it easier to slide the bricks into place. 5. Install the brick. Either full size bricks or the thinner pavers. I used full size bricks which are more stable. To ensure that the bricks are level with one another, place a piece of piece of wood (approx 3" x 8" by 3/4" ) across the surfaces of the brick you are working on and its adjoining bricks...then hammer it with a large mallet until they all the bricks are even. Give then some good wacks...full-sized bricks can take it so long as you use wood as a buffer. Be gentler with the thinner pavers. 6. Depending upon your personal preference, you can butt the bricks directly up against one another or place a think spacer between them. I use pieces of asphalt roofing shingles to maintain uniform spacing. I like the look and using spacers allowed me to adjust the alignment for bricks which may not be uniform size. 7. Regardless of which way you go on item 6, sweep stone dust into the joints between the bricks. Wet the area, let it dry and repeat again. The irregular shapes of the stone dust will lock the bricks into position much better than sand, which is more round. Sand will not get into some of the smaller joints between bricks. 28 years later I am still VERY happy with my results. Occasionally a nearby tree root will distort things a bit but that will happen with either sand or stone dust. I just remove a few bricks and cut out the root. The only periodic maintenance I need to do is sweep new stone dust in the spaces between the bricks one ever 4-5 years. Good luck....See MoreSize of stepping stones
Comments (23)Actually, the Pbase path in the lower right hand corner is the closest to what I have been imagining -- only with rock edging instead of wood, and fewer stones in the middle. And soil on the surface instead of gravel. So I guess it's not very similar at all, when you think about it. Here is the question then. Let's assume I trash the idea of stone edging, but I still fill in the trench with 5 inches of gravel (and tamp it down) and two inches of sand (and tamp it down). Let's say my stepping stones are laid in a row, usually one at a time, but maybe two at a time for smaller ones. Let's say the stones are 18-24 inches wide and 12-18 inches long, and 3-4 inches thick. Let's say there is a distance of at least one foot on either side of each stone that has a base of gravel and sand. Let's assume I put an inch of soil down around the stones to bring everything to grade, tamp that down and plant moss on it. Is it OK to just let the path abut the garden beds on either side, with nothing in between? Not just aesthetics, which are in the eyes of the be-boulder, but engineering -- I read a lot in my how-to guides about path base materials spilling out onto the garden beds, especially dry laid stone paths. (Sorry, I just can't do the mortar, even subterranean mortar -- maybe this is a prejudice, but I don't want cement in my yard (except the house foundation -- it's ugly, but it seems to work pretty well)). The comments about huge 200 pound stepping stones are fascinating, but I'm not about to attempt anything like that. I've walked on many stepping stone paths and seen many more in books and on web sites, and I would guess that very few of the stones in those paths weigh as much as the people walking on them. I will have to settle (pun?) for less weighty stones and hope that they will find comfortable resting spots. (Those adorably cute little round do-it-yourself stepping stones with amusing little sayings look to be about 12 inches in diameter, if that, yet some people seem to be able to make stepping stone paths with them.) (I didn't say good stepping stone paths.) Finally, if I decide to take your advice and get rid of the edging, what the heck should I do with all these thousands of rocks? Dozens of piles of them all over my tiny 1/8 acre yard just isn't working for me. (I haven't been able to move several of the larger ones out of the 9X8 area I've dug into the slope to make a small patio. It looks like a dinosaur nest.) Thanks for taking the time to ponder these practical and ethereal questions with me, -- wd...See Moremy own octagon stepping stone mold!
Comments (14)Hey, JANIE BO! Glad you're up to posting! The inside measure is 13" (ok, 12 3/4" to 13", depending on where you you measure! But it's close enough to symmetrical for a stepping stone!) Yeah, I have some of that "other" kind of mold around here too. Just never have been able to figure out how to make concrete stick to it! MANGO: "Toss it out"??? Are you crazy? I don't toss hardly anything that might live to see another day or use somewhere! Actually I hope to make a bunch of stones to sell also, so it should get a lot of use. GREY: Oh, I betcha could do it if you have the tools available. I just had to go online and find out what angle the cut had to be to come out right, that's where I got the 22.5 degrees. Which I think was a bit inconsistent with our table saw, but it worked good enough....See MorePainting Help - Charging for non-paintable surfaces?
Comments (24)You have very right to educate yourself and ask questions regarding an estimate. A contractor/painter should be able to explain to you their charges. Yes, if you see a $25 roll of tape you should ask why? Older contractors are set in their ways but today anybody can research pricing as you are very quickly. What would be wrong with a client seeing a mis charge and it being corrected? What I dont like is somone telling me what or how to do something as if they are not comfortable with the work they should be using some one else. I see the who cares attitude and will tell you that will only get worse when issues have to be corrected. Just think how they will be to deal with if the work hasn't even started yet and they are being confrontational. I am shocked that people promote themselves like that on here with the high flow of traffic. Nobody is that good and there is always better. Aura is a waste of money. Ask the painter what they recommend. Also do not nickel and dime a painter just use somone else. I really ever negotiate a sub because i make it 100% clear that i am not and i expect perfection. This way they can never say well I cut this or that. Go see their work in person not pictures and then decide what price you like and don't worry about every line entry. Seeing their work and work ethic might more than justify the higher price. Getting paint on new floors, tile, etc can cost a lot more in the end....See Morelisa03
18 years agokarinl
18 years agolisa03
18 years agoFrankie_in_zone_7
18 years agogottagarden
18 years agolisa03
18 years agoFrankie_in_zone_7
18 years agowell_drained
18 years agoL A
8 years agoMike McGarvey
7 years agoM J
4 years agoHU-228724000
3 years ago
Related Stories
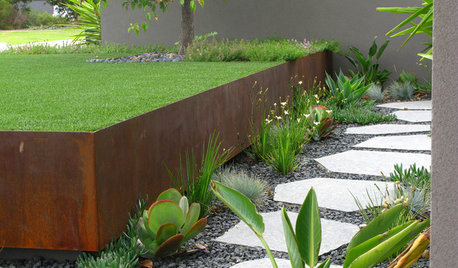
LANDSCAPE DESIGN7 Questions to Ask Before Laying Stepping Stones
These broken-up pathways invite you to put a spring in your step — while adding functionality to the garden
Full Story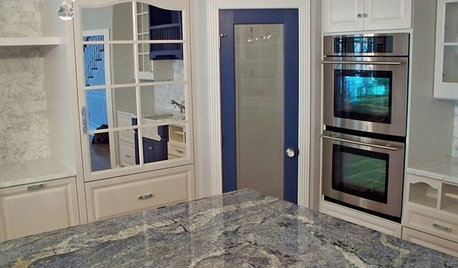
KITCHEN COUNTERTOPSKitchen Counters: Granite, Still a Go-to Surface Choice
Every slab of this natural stone is one of a kind — but there are things to watch for while you're admiring its unique beauty
Full Story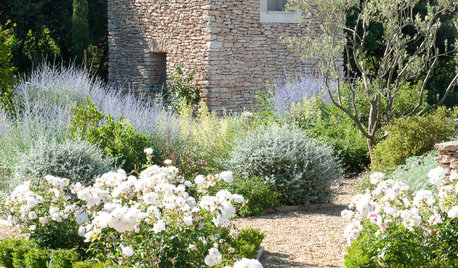
GARDEN STYLESLay of the Landscape: 12 Elements of Provence Garden Style
With their lavender fields, stone walls and meandering pathways, the gardens of Provence brim with charm and beauty
Full Story
MOST POPULAR10 Strategies for Keeping Surfaces Clutter-Free
The universe wants your coffee table to become a clutter magnet — but you can fight back
Full Story
MATERIALSShape Up Your Surfaces With New Tile Textures and Forms
Take your walls and floors to a different dimension with innovative sculptural tiles, as shown at the 2013 Coverings expo
Full Story
KITCHEN DESIGNKitchen Countertops 101: Choosing a Surface Material
Explore the pros and cons of 11 kitchen countertop materials. The options may surprise you
Full Story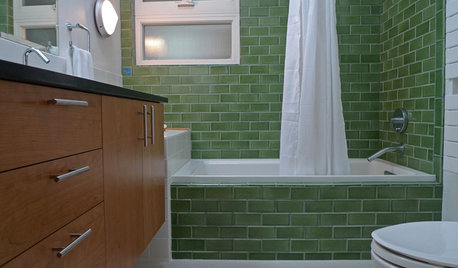
BATHROOM DESIGNBathroom Surfaces: Ceramic Tile Pros and Cons
Learn the facts on this popular material for bathroom walls and floors, including costs and maintenance needs, before you commit
Full Story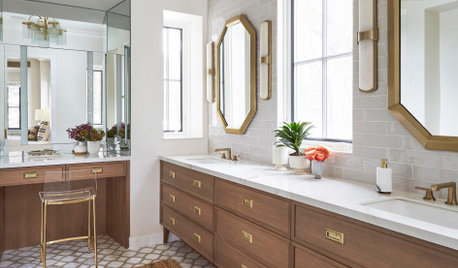
BATHROOM WORKBOOKA Step-by-Step Guide to Designing Your Bathroom Vanity
Here are six decisions to make with your pro to get the best vanity layout, look and features for your needs
Full Story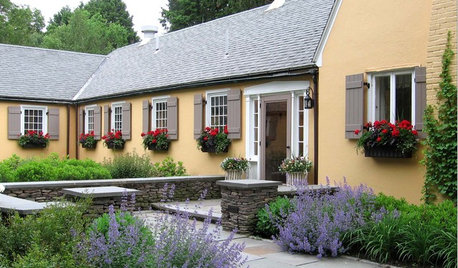
LANDSCAPE DESIGNLay of the Landscape: French Garden Style
Symmetry and geometry define this decorous landscape style, appropriate for both grand gardens and intimate spaces
Full Story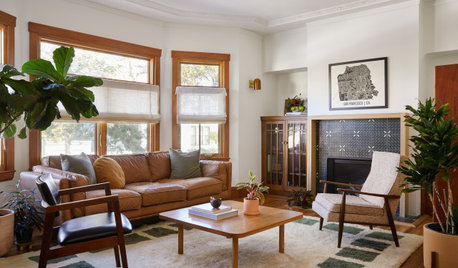
LIVING ROOMSHow to Decorate a Small Living Room
Arrange your compact living room to get the comfort, seating and style you need
Full StorySponsored
More Discussions

Tim Holloway