


Size of stepping stones
well_drained
19 years ago
Featured Answer
Sort by:Oldest
Comments (23)

edzard
19 years agolast modified: 9 years agoRelated Discussions
Gravel Pathway w/part slight slope - How to add steps??
Comments (20)My mental picture was stone framing. one or several uniform pieces of managable size fronting each step and cut into the soil for stability. By this I mean that the bottom of the stone at the front of the step should be burried below the dirt of the next lower step by several inches. The gravel would have to be level with the top of the stone. I think wood would clash as much as brick with the upper portion. I also recomend some of the little solar lights next to each step to call attention to it and illuminate it at night. Cement can be used as mortar to hold it together better. Since you said it is only about 10' in length, get a level, a straight board longer than 10', and a tape measure. A partner would help too. place one end of the board at the point where you want the uphill end of the steps to begin. set the level on top of the board and lift the lower end until level. Measure the distance between the board and the ground at the low end. mark the board at this point where you measured. Then measure the length along the board to this mark. now you have the length and height of the entire set of steps and can divide it evenly, instead of "eyeballing it". Even height is safer, though eyeballing it may be more natural looking. The stone should be no more uneven than rough cut stone for the same reason. I also suggest keeping extra gravel to maintain the levelness of the steps to avoid that tripping lip effect as the gravel settles, compacts, and vanishes over time. You may also wish to get LOCAL advise on stability issues with the soil. You may need to place gravel under the stone framing, or use concrete to stabilize it due to climate and soil conditions. Ziggy...See MoreBIG stepping stones
Comments (10)Suggestion: I decided to make a hypertufa canopy for a faux bois tree trunk I made. I excavated an inverse dome into my kid's sandbox...final dimensions were 4' wide and 3' tall at the center. I used puffed rice mixed with wood glue to make surface 'imperfections' in the canopy so it wouldn't be too regular. I watered it for days...and when I wanted to remove it I realized it must weigh in the order of many hundreds of pounds. Laughing...I couldn't pry it out of the ground and now I have a bizarre buried sculpture in my kids sandbox that will be there forever. Oh...my suggestion...if you're going to have to move the large stepping stones lay out some ropes or straps to be able to carry or move the end product....See MorePuzzle Piece Stepping Stone Help
Comments (3)I did something similar a few yrs ago. I had the same concerns about the smaller pieces breaking off so instead of using a mold and placing them in the ground when done, I cut the mold shape directly into the ground. I put a couple inches of hypertufa in, then layed chicken wire on top and put a couple more inches of hypertufa on top. You really have to keep it moist for awhile and I suppose it does dry out faster being in the ground. I just had a spray bottle and doused them a few times a day and covered them with plastic. My biggest problem was keeping the dogs off of them! Good luck, I love the puzzle piece idea and I bet it will look awesome....See MoreMy First Attempt At Mosaic Stepping Stones
Comments (15)You did a really great job. They look beautiful! Here is how I handle stepping stones with a lot of blank space....I actually make my own stepping stones so that the mosaic design is imbedded in the concrete. I lay the pieces out on a piece of contact paper that is the same size as the stepping stone mold I am using. I gently pour the concrete on top of the design and let it set up. When that is done, the contact paper will peal right off. I brush any excess concrete off the mosaic pieces, wipe off with a damp sponge and then I'm done. If you go this route, you can't seal them for 30 days. You can also pour your stepping stone in the mold and then press in each individual piece, but I found this works better for me. When I use pre-made stepping stones, I just fill in the bare spaces with one color, so it becomes the background....See Moreinkognito
19 years agolast modified: 9 years agoedzard
19 years agolast modified: 9 years agowell_drained
19 years agolast modified: 9 years agowell_drained
19 years agolast modified: 9 years agojeepster
19 years agolast modified: 9 years agoedzard
19 years agolast modified: 9 years agoinkognito
19 years agolast modified: 9 years agoGorfram
19 years agolast modified: 9 years agoHerb
19 years agolast modified: 9 years agoHerb
19 years agolast modified: 9 years agoGorfram
19 years agolast modified: 9 years agoedzard
19 years agolast modified: 9 years agoHerb
19 years agolast modified: 9 years agoedzard
19 years agolast modified: 9 years agoHerb
19 years agolast modified: 9 years agowell_drained
19 years agolast modified: 9 years agoedzard
19 years agolast modified: 9 years agoGorfram
19 years agolast modified: 9 years agowell_drained
19 years agolast modified: 9 years agoHerb
19 years agolast modified: 9 years agojanepa
19 years agolast modified: 9 years ago
Related Stories
LANDSCAPE DESIGN7 Questions to Ask Before Laying Stepping Stones
These broken-up pathways invite you to put a spring in your step — while adding functionality to the garden
Full Story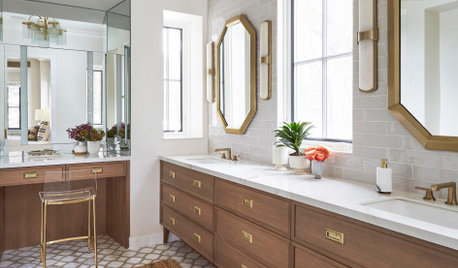
BATHROOM WORKBOOKA Step-by-Step Guide to Designing Your Bathroom Vanity
Here are six decisions to make with your pro to get the best vanity layout, look and features for your needs
Full Story
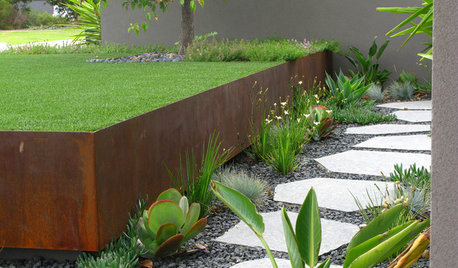
GARDENING AND LANDSCAPING8 Great Ways to Use Landscape Pavers
Today's Stepping Stones Define a Space While Adding Affordable Style
Full Story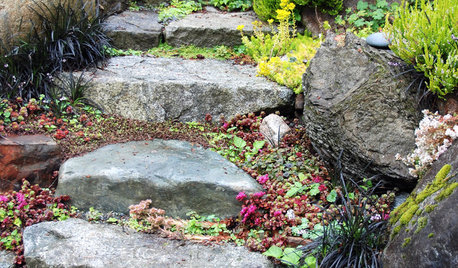
LANDSCAPE DESIGNPlant Your Steps for a Great Garden Look
There are benefits to allowing plants to invade your garden stairs
Full Story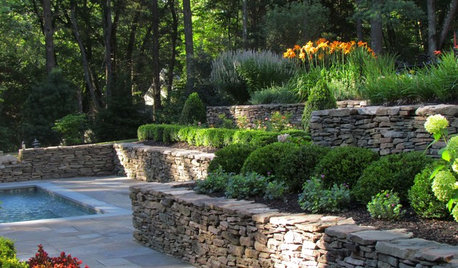
GARDENING AND LANDSCAPINGStep Up Your Garden Game With Terraced Plantings
We're going to level with you: Slopes in the landscape can be tricky. Use these ideas to create balance and harmony in your terraced beds
Full Story
GARDENING AND LANDSCAPINGNo Fall Guys, Please: Ideas for Lighting Your Outdoor Steps
Safety and beauty go hand in hand when you light landscape stairways and steps with just the right mix
Full Story
REMODELING GUIDESSo You Want to Build: 7 Steps to Creating a New Home
Get the house you envision — and even enjoy the process — by following this architect's guide to building a new home
Full Story
TILE3 Key Steps for Grouting That Looks Its Best
Get your grout right to keep your tile beautiful and for an installation that will last
Full Story
KITCHEN DESIGN3 Steps to Choosing Kitchen Finishes Wisely
Lost your way in the field of options for countertop and cabinet finishes? This advice will put your kitchen renovation back on track
Full Story
DECORATING GUIDESStep Away From the Wallpaper: Why Decorating Risks Are Overrated
Want to find your signature style? Try staying inside your comfort zone
Full StorySponsored
well_drainedOriginal Author