


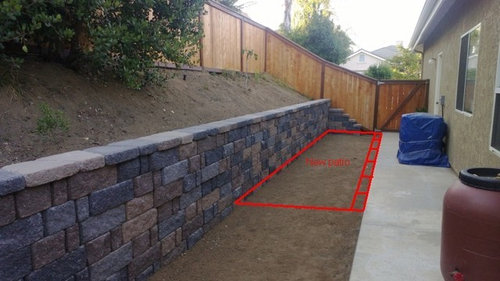
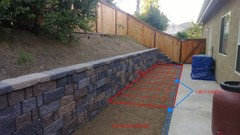
Side yard drainage issue
abufish
10 years ago
Featured Answer
Sort by:Oldest
Comments (8)

marcinde
10 years agoRelated Discussions
Yard Drainage Issues - RDU area
Comments (14)I'm not surprised your neighbors yard is a problem source of water given his drainage pipes end at the inside of your rear fence. That is wrong. His piping shouldn't enter your yard. It might be that yours was one of the last homes built on a lot with water drainage issues aggrevated by drainage off lots with higher elevations. Unless your proposal shows where the excess water is to go (which it doesn't) other than catch basins, I'd take the effected trees out and bring in more soil to build up the rear corners so you can plant trees that are more water tolerant. You have a unique situation of excess water that can be used to your benefit when others are suffering during drought. You have to get your plantings up higher and that means bringing in a lot more dirt, planning retention walls and selecting appropriate plant materials. First thing I'd do, after cutting down the big 40 footers and grinding the stumps is to get that neighbors drainage piping out of your yard. Get a good blend of top and subsurface soil for your fill. Subsurface fill soil is low oxygen/high mineral/compacted junk that needs blending with an adequate amount of topsoil and some good old red clay so your plantings can grow and thrive....See MoreDrainage issue in yard... need ideas
Comments (19)If you have a yard out back that slopes away from the patio, consider installing dry well(s) to carry the water away and dump it in the back yard at an elevation that is lower than the patio. Scout you problem area and decide where you want to place the collection well(s). You could create a minor depression that is lower than the surroundings. What I propose does require some digging. Basically, a dry well will be buried flush to the ground, water will run into it, and near the bottom of this well, a drainage tube will be attached, laid in a ditch which has some pitch toward the back. Carry this ditch back until it is exits at lawn level. I used a plastic sump well. It is easily cut with hand tools and is low cost. Near the bottom of the well, cut a hole to receive the drain pipe (tubing). This should be a snug fit, but does not have to be water tight. I used standard thin wall drain tubing, but a littlier heavier wall is recommended to guard against collasping. However, I have a 25 yr success with my thin wall. Various fittings are available for the tubing, for example, a Y connector. I plumbed 2 wells together using a Y-connector and then drained both wells out a single pipe. Its ok to let the drain tubing extend a bit into the dry well, say 2 to 3 inches. Once everything is in place a test made to insure that it will drain properly, back fill the ditch and around the dry well. Fill the dry well with fist sized stone for the first 2/3 of depth. We want to create a permeable filter that will support your weight if you step on it, and to keep debris out of the drainage system. Full the top layer with smaller stones until flush with the top of the well. Over time, leaves, sticks, and other stuff may collect on top of the stone fill. Periodically, brush this stuff away. Any small particles that get through the filter will flush on out the tubing. This well will accept a good flow rate and remain clog free for many years. You will need to pay attention to the exit end of the drain tube. Here, it is desireable to spread the stream to slow it down and to counter errosion. If you can establish a good sod layer for the exit, that may be all you need to do. Otherwise, you may need to provide a gravel bed to spread the streasm. If the slope is steep at the exit end of the drain, install some flat rocks to create a tumbling water fall and stream spreader. The hardest part of this project is digging the ditch in which to lay the drain pipe. My soil contained 30% glacial till and that was tough - keep finding stones. To cut down the labor, I used a garden roto-tiller to cut the ditch. I unbolted the outer tines so the the cut width was no wider than the machine. I used the tiller to loosen the soil and I periodically shoveled the loosed soil to one side of the ditch. I carefully piled the dirt in a compact ridge near the edge of the ditch because it was going back into the ditch and it was desired to minimize effort. Mine was an old fashioned tiller with the tines running at slow speed. If one of the tines hit a rock, it merely lifted the machine without breaking any thing. My ditch was 3 ft deep at the dry well. Your installation can be more shallow if you are in a low frost depth zone. You can adjust the well depth by cutting off its top. having the drain pipe buried at least 12 to 18 inches deep tends to hide it presence in very dry weather. In dry weather, grass may brown out sooner above the pipe where it is shallow....See MoreMajor Yard Drainage Issue...
Comments (4)Fortunately, I'm surrounded by a lot of stormwater engineers at work. Looks like either way, I'm going to need to talk to the county about tying into the stormwater drain in my front yard. Here is a scanned image of the backyard with new ideas on how to curtail the yard. Each red circle is an drop inlet for water (also where the river entering my yard starts) and the little black circle are river rocks to prevent erosion and filter other peoples' yard debris from slowing down water flow. Red arrows are slopes. The green line is likely going to be an 8" smooth storm water pipe (corrugated, would likely be too turbulent for the amount of flow I have). The green line going down would connect into the county storm water drain in the front of my house....See MoreDrainage Issues in Back Yard - French Drain
Comments (81)Dead branches on the Japanese maples. indicate that they were unhappy sometime in the past. No way, without a complete history, to know why. When arb foliage thins, it's not coming back. Doesn't matter at the bottom, back sides ... where it can't be seen. I've not heard of that artillery fungus before. Plants are phenomenal! I think from a ladder, using the pole saw, you can remove 1/3 of the limb at a time. If you used the pole chain saw, you'd cut through too quickly and instead of folding, it would drop wherever and whenever. You'll need to call a pro if you gauge it be too risky. The two Jap. maples in the recent pictures look like they may not be getting enough light. One looks like it suffered from the transplant operation. In transplant, there is always some risk. One just tries to do the best they can and hope for the best. For a transplant to elsewhere in the yard, first dig the receiving planting hole. At the plant to be moved, use a drain spade (long straight shovel -- I'm sure you have one :-) to cut around the tree/shrub, with it ending up as if you've cut it out of the ground using a cookie cutter. I usually go completely around 3 times, trying to make sure that all roots are cut. You'll want the cut line to be a circle that is enough distance from the trunk(s) that the resulting rootball is large enough to hold enough roots that the plant can live ... but not so large that it is too heavy and unmanageable, as soil is very heavy. You'll also want the shovel to be at an angle so the rootball can be extricated and is not so heavy. After you've used a drain spade to cut the sides of the rootball, you'll want to use a shovel, possibly two located at opposite sides of the circle, to gently pry the rootball from the surrounding soil. There may be roots connected at the bottom center. You'd need pry up with one shovel, while using the drain spade to stab under the rootball, trying to sever the roots. The main objective while performing the aforementioned operation is to NOT break up the rootball that is being removed from the ground. You want it to come out of the ground in one whole chunk, with the plant in it. Have a tarp or old sheet ready next to the hole to set the plant on, being careful not to break the rootball. It could either be carried by two people or set in a wheelbarrow and given a ride to the new location. I wouldn't drag it on the ground unless going slow and careful to a destination that was very close, as moving across bumpy ground will usually shake the rootball apart. When you get it to the new location, adjust the soil level of the planting hole to bring the thickness of the rootball to the right height (same as it was growing before or slightly higher, as there may be a little settlement.) Before backfilling, rotate the rootball for the tree's best appearance. If this is done during the growing season, I would add a handful or two of fertilizer to the planting hole/backfill soil. And trim the tree trying to reduce its foliage (so as to balance with the roots that have been removed. This would be removing any bottom branches that don't need to be there anyway, and as an overall haircut of the top portion....See Moreabufish
10 years agobahia
10 years agoabufish
10 years ago PRO
PROYardvaark
10 years agobahia
10 years agomarcinde
10 years ago
Related Stories

COLORColor Commitment Issues? Just Throw In a Pillow
You don't need to go big or permanent to go bold with color in your rooms; you only need to master the easy art of the toss
Full Story
You Said It: Hot-Button Issues Fired Up the Comments This Week
Dust, window coverings, contemporary designs and more are inspiring lively conversations on Houzz
Full Story
GARDENING GUIDESHow to Turn a Side Yard Into a Glorious Garden Room
With just 8 feet or so, you can turn a plain side yard into a garden that lets you get carried away
Full Story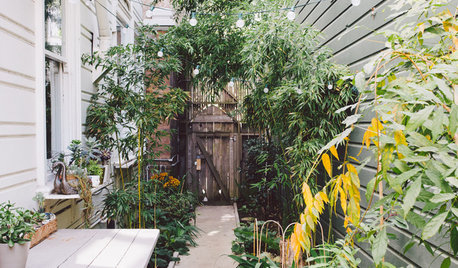
GARDENING AND LANDSCAPING10 Ways to Make the Most of Your Side Yard
Don’t overlook the possibilities for this often-forgotten space
Full Story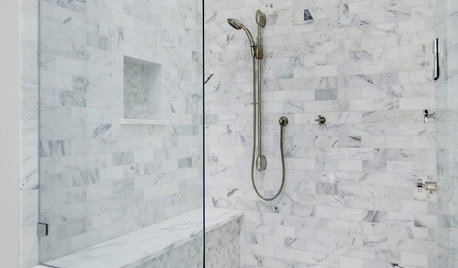
BATHROOM DESIGNConvert Your Tub Space Into a Shower — Waterproofing and Drainage
Step 4 in swapping your tub for a sleek new shower: Pick your waterproofing materials and drain, and don't forget to test
Full Story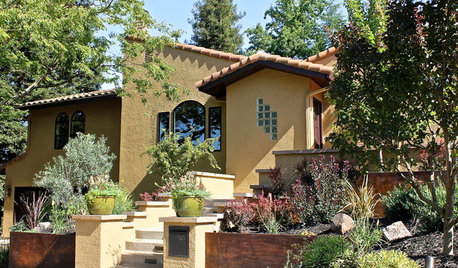
LANDSCAPE DESIGNLandscaping Magic Fixes a Dangerous Sloped Yard
It had scary parking, a confusing entry and erosion issues. See how this steep California landscape gained safety, beauty and clarity
Full Story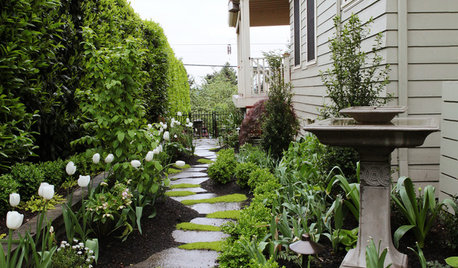
MOST POPULAR25 Ideas to Perk Up Your Side Yard
Turn this often overlooked area into an enticing and useful outdoor space
Full Story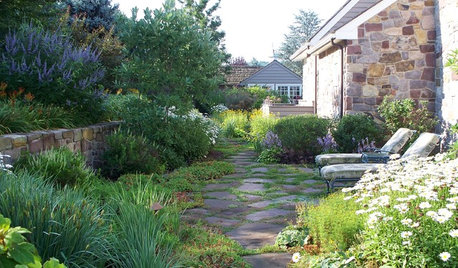
PATIO OF THE WEEKKeep a Secret Garden on the Side
Privacy and plantings are the focus of this Philadelphia side yard, offering a respite from a busy backyard
Full Story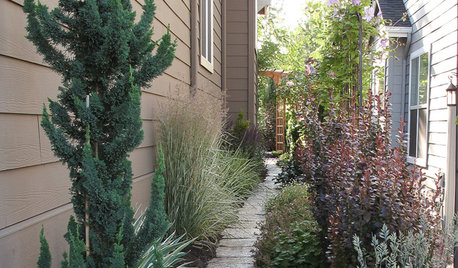
SIDE YARD IDEASNarrow Trees for Tight Garden Spaces
Boost interest in a side yard or another space-challenged area with the fragrance and color of these columnar trees
Full Story
LANDSCAPE DESIGNYour Mini Guide to Great Garden Edges
Get the scoop on trenches to the skinny on bender board, to help keep your garden beds as tidy as you like
Full Story

Yardvaark