


diy poured wall - diyers only
grish
13 years ago
Featured Answer
Sort by:Oldest
Comments (30)

pls8xx
13 years agolast modified: 9 years ago
gardengal48 (PNW Z8/9)
13 years agolast modified: 9 years agoRelated Discussions
DIYer wakin up from winter What? We're not done yet?
Comments (17)Yes! I was really freaked out when I first noticed it! My heart just sunk. I had worked for weeks getting the bottom on this pool perfect, just perfect. I wanted those expensive ColorLogicLEDs to look perfect when reflecting across this glassy smooth pool bottom (OK, maybe it wasn't glassy smooth, but those lights were all I could think about when I was troweling it on!) This pool bottom was really really smooth. But unfortunately I couldn't drop the liner in immediately due to the irregular pool shape. The liner had to be custom measured (using point-to-point) and custom made. It was supposed to take 2 weeks to get here, but the manufacturer ended up taking nearly 2 months!! By then the weather had turned cold. We left standing water in the pool bottom and around the pool itself. The water was freezing and thawing (both on top of, and underneath the surface) which cracked the pool bottom. We never even realized it until it was too late. However just before we drop in the liner, we are going to COMPLETELY remove those "cracked" sections with a sledge hammer, and totally replace it with a new bottom in those places. Can anyone think of anything better to do? (short of demolishing the whole thing) What would you do if this was a liner replacement? My biggest concern with the moving sections was not just to repair them, but to determine what caused them in the first place. The "Good News" was that I'm fairly certain that it was the standing water/freeze/thaw conditions that created the problem. By knowing that, I can redirect the water, let the soil dry out, and then feel confident that repairing the section will work. I'm just a simple DIYer, so I may be missing something here. That's one of the reasons that I'm posting it. Can anyone think of a better way to handle it? Would it be helpful to add rebar in those sections? (I wouldn't think so, as the rest of the pool doesn't have it.) This pool bottom seems really fragile. The directions for the installation say to only walk on it with soft bottomed shoes, don't spray water from a hose directly on it, etc. When I work with the portland cement/sand mix, I feel like I'm building a giant sandcastle! It's not at all strong like cement or even mortar. My personal feeling is that the sooner the liner is on it the better. My mistake seems to be letting Old Man Winter get here in between finishing the bottom, and dropping in that liner! Please keep the suggestions comin'!! -Renee...See MoreBuild a wall to close off basement from house?
Comments (23)That makes sense the water is going to the sewer drain and not a sewer line! I'm surprised the concrete is the expensive part--- maybe you're in a difficult location where it would be hard to get the concrete there? In our case the expensive part is the sheer overwhelming physical labor of it all. The contractor came back today and I had done some digging above the old coal on the outside as well as inside it (in the basement) and had an unpleasant surprise (are there any pleasant surprises with this house?). Apparently, like everything else with this house, they cob-jobbed the coal chute closed by throwing bricks into it and pouring a thin slab on top. I don't know what caused the avalanche of dirt (and insulation) on the bottom inside the basement, but I do know that there is no concrete floor under it like there is in the rest of the basement! We assumed it was concrete and that the dirt avalanche could just be shoveled out. Course not. We had a lot of rain a few days ago and as I shoveled up some dirt inside the basement, expecting to see a concrete floor, instead it was just more dirt and a growing pool of water. The contractor thinks there is water coming up from the ground as well as through the wall. So that changed our plan a bit since they're going to have to excavate down outside the house to the basement floor level, pour a footer, build a cinderblock wall to properly seal off the stupid coal chute, and then do some waterproofing inside (clean out dirt, install drain in floor into sump pump which is fortunately only about a foot away, pour clean gravel on top, cover with encapsulating material). On the exterior he thinks it should just be graded away with dirt and with a hardscape/mulch/rocks/something, no plantings. The total is now up to $8500. I'm a little shocked that it's that inexpensive, for all the work they'd be doing (pouring a footer sounds like it would be exorbitantly expensive, right?). He also isn't going to be doing the concrete on the other side of the deck (under the kitchen window) since he thinks the water on that side is also coming up from the ground (sheesh) and it wouldn't do much good. So they're just going to grade the ground there with dirt. I asked him about a door at the bottom of the stairs and he said he could put up some of that encapsulating material and have it hang down over the opening, which would be better than nothing since an actual door isn't feasible. It sounds like you did more than your due diligence with getting bids and planning, so I really hope it works out for you! It's got to help somewhat, at least, if not get rid of the water 100%. If your water table is high (like it is here, apparently) then the french drains won't be 100%, but you'd probably know that by now. My husband is still digesting all this information, but if all goes well we'll be having it done early September probably. Good luck with everything!!...See MoreAdvice needed on constructing a small perimeter foundation
Comments (3)The crew that formed and poured for an outbuilding on our property framed 2x4's 16" o.c. and skinned with 1/2"osb. The ties were placed 6"from the corners and where the forms butted, and every 16" in the field of the forms.They used 3/8" rebar. After the footings were poured, they formed the whole stemwall and poured the stemwall complete.If you can do this, it would probably be a better pour, as pouring sections might result in weak joints where the existing and new come together. Have you considered block foundation? Looks great,you can work it at your leisure, and will support the weight of your structure easily, although i would still fill each cavity with crete.Jon's advise of getting ready mixed is great advise as a stemwall would be hard to keep up with using a mixer ,especially if your flying solo!...See MoreDIYers- would you do it again?
Comments (22)We started the demo on our DIY kitchen renovation on November 6th. The existing ktichen was removed the following weekend, so I've been kitchen-less for a month and the cabinets aren't going to be ready until the week after new years. We foolishly thought is we started before Thanksgiving we'd be done by Christmas - that was our biggest mistake. But really, that's the only one I can think of so far. We removed a load bearing wall and a 5' wide sunporch and completly rebuilt it (with a header in place of the wall), new windows, new doors, new floor. We had a crew of 5-6 friends over the course of a weekend for that part. Everything else we've done ourselves so far except my cousin had to help DH hold up the drywall for the ceiling in the back room area b/c I'm too short. This weekend DH is working on replacing the water heater and installing a new oil burner/tank so we can get rid of the chimney, then we can remove the old subfloor and level the floor before installing the radiant heat. Because we're DIY-ing everything (except the installation of the cabinets and granite) it's definitely taking longer but we're able to do some moderate upgrades that we otherwise wouldn't have been able to afford. But in all honesty, not diy-ing wasn't really an option for us. we're both in our early 30s and have no kids and no major commitments other than our jobs. House projects are DH's hobby and he can do just about everything, from framing to wiring to plumbing to flooring to drywall, etc...and if he has questions or runs into an issue he has a boatload of friends who have the knowledge to help us out. I trust him and I trust our friends to help us out and make the right decisions and so far I have not been disappointed. I'm good at picking out the details and thinking of things he hasn't thought of to make the prcoess go a bit smoother, but we're a good team. We had one minor spat so far about what to eat for dinner since going out to eat gets old really fast. But we got over it quick, came up with an agreement and moved on. I'm a good helper/assistant. I'm not the strongest woman on the planet but I can help with most things and I know what tools are what and I can usually anticipate what he needs so he doesn't often get too aggrevated with me. I don't compalin, I don't nag and I don't ask 1 million questions when he's in the middle of trying to contort his body to get that last nail in. We've done plenty of small projects over the course of the 3 years we've been in the house but this is definitely the biggest/most time intensive project yet. But I knew based on the other projects we could handle this and it would be so worth it. Even though the project isn't over I know we'd do it again ourselves as long as we had the time and the energy. Good luck!...See Morepls8xx
13 years agolast modified: 9 years agogrish
13 years agolast modified: 9 years agogrish
13 years agolast modified: 9 years agopls8xx
13 years agolast modified: 9 years agogrish
13 years agolast modified: 9 years agoinkognito
13 years agolast modified: 9 years agoinkognito
13 years agolast modified: 9 years agomarcinde
13 years agolast modified: 9 years agobotann
13 years agolast modified: 9 years agopls8xx
13 years agolast modified: 9 years agoinkognito
13 years agolast modified: 9 years agogrish
13 years agolast modified: 9 years agogrish
13 years agolast modified: 9 years agogardengal48 (PNW Z8/9)
13 years agolast modified: 9 years agopls8xx
13 years agolast modified: 9 years agogardengal48 (PNW Z8/9)
13 years agolast modified: 9 years agokarinl
13 years agolast modified: 9 years agogrish
13 years agolast modified: 9 years agopls8xx
13 years agolast modified: 9 years agogrish
13 years agolast modified: 9 years agogardengal48 (PNW Z8/9)
13 years agolast modified: 9 years agomissingtheobvious
13 years agolast modified: 9 years agogrish
13 years agolast modified: 9 years agogrish
13 years agolast modified: 9 years agogardengal48 (PNW Z8/9)
13 years agolast modified: 9 years agokarinl
13 years agolast modified: 9 years agogrish
13 years agolast modified: 9 years ago
Related Stories
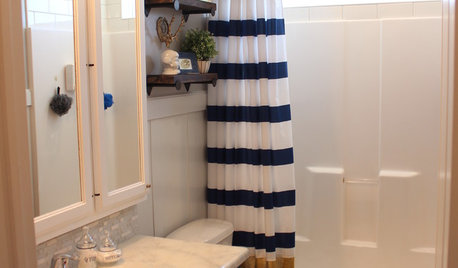
MOST POPULARShe’s Baaack! See a Savvy DIYer’s Dramatic $400 Bathroom Makeover
You’ve already seen her dramatic laundry room makeover. Now check out super budget remodeler Ronda Batchelor’s stunning bathroom update
Full Story
LIFEReluctant DIYer’s Diary of a Dresser Makeover
Weekend project: Glossy new black-and-white dresser, hold the sandpaper
Full Story
PRODUCT PICKSGuest Picks: Indispensable Tools for DIYers
Build your tool arsenal with these, and you’ll have the right equipment for any home project you take on
Full Story
LIFE21 Things Only People Living With Kids Will Understand
Strange smells, crowded beds, ruined furniture — here’s what cohabiting with little monsters really feels like
Full Story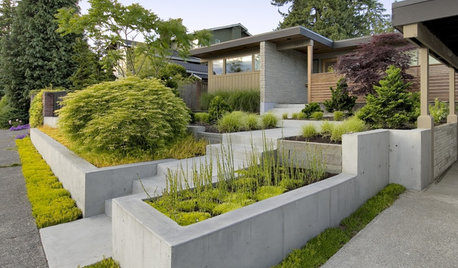
LANDSCAPE DESIGNGarden Walls: Pour On the Style With Concrete
There's no end to what you — make that your contractor — can create using this strong and low-maintenance material
Full Story
BEFORE AND AFTERSHouzz TV: See Recycled Walls and Cool Cassette Art in a Woodsy DIY Home
Walnut countertops join hardwood floors and pieces made from leftover framing in a bright Spanish colonial
Full Story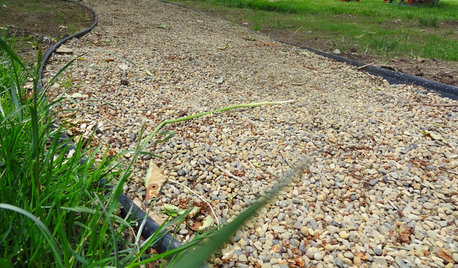
GARDENING AND LANDSCAPINGDIY Pathway Puts Landscapes on the Right Track
Create a road more traveled in your backyard, and save your lawn from foot traffic, with this easy, affordable gravel path
Full StoryBEFORE AND AFTERSSee a DIY Powder Room Transformation for $1,100
Determination, DIY skill and a stunning tile feature wall helped make this formerly dark and gloomy powder room feel spacious
Full Story
KITCHEN DESIGNShow Us Your Fabulous DIY Kitchen
Did you do a great job when you did it yourself? We want to see and hear about it
Full Story
KITCHEN DESIGNDIY Spirit and $8,700 Transform a Townhouse Kitchen
The Spanos taught themselves some remodeling tricks, created a Houzz ideabook and then got to work on their kitchen makeover
Full Story


pls8xx