


Recipe--bought the wrong kind of yogurt...
Annegriet
3 months ago
Featured Answer
Sort by:Oldest
Comments (25)
Related Discussions
Making yogurt at home-any hints?
Comments (9)1. If you haven't checked out the information found at Cultures For Health, that is a great place (link below). 2. Check your local library for some "yogurt" books. A good book on the subject will give you all kinds of recipes, hints, tips, and should have a chart for troubleshooting, so you know what went wrong. I'm not sure what you mean by "stove-top" method, but you do need to heat the liquid, and you can do that on a stove or in the microwave to 190-210-degrees F. That's the first stage. Second stage is cooling the mixture (place it in a container in a cold water bath in your sink (add some ice or blue-ice blocks to chill it quickly) and adding the starter/culture. The third stage is incubating. Temperatures over 120-degrees F will kill the bacteria. A temperature cooler than 105-degrees F and it won't ferment, or will take much longer. 3. I prefer plain Stonyfield Farm yogurt for a starter (aka culture) because it has six live cultures (bacteria), where most other brands of yogurt only have two live cultures (bacteria). You can freeze the Stonyfield Farm yogurt (or any brand for that matter) in 1-2 T. amounts in an ice cube tray, pop them out when completely frozen and store in the freezer. When you need a new culture, defrost the amount you need in the refrigerator and then bring it to room temperature before adding to the liquid mixture. You can use a portion of yogurt from a previous batch as a starter, but eventually you will need a new culture when you notice your yogurt isn't getting as thick, or taking much longer to develop the curd. 4. Get a good instant-read thermometer or a yogurt thermometer. A yogurt thermometer (mine is a Yogourmet and came with my Yogourmet Yogurt Maker) will have the temperature window for when to add the culture highlighted so it's easy to read. If you add the culture at the cooler end of the "temperature window" (110-120-degrees F / 43-48-degrees C) the yogurt will be more mild - the warmer it is, the more tart it will be. 5. Whichever method you choose to use (I prefer an electric yogurt maker, but I've used any number of other methods), once you have everything ready to ferment, DON'T move/knock/disturb the yogurt while it is fermenting because it will break the curd and you might end up with less-than-perfect yogurt. 6. Don't stir your yogurt once it's done fermenting or it will turn to liquid yogurt. If you do stir it and it turns to liquid, it will remain liquid (use in a smoothie ;-). 7. Once it's done fermenting, it will thicken even more as it cools in the refrigerator. 8. Draining Yogurt: You can use any number of gadgets to drain your yogurt, and yogurt strainers/yogurt cheese makers (they go by various names) are available. Among the things I use is a permanent coffee filter, which fits nicely in my 2-cup Pyrex measuring to catch the whey. I found it on a clearance table for $3 and have used it for draining yogurt (or kefir curd) for many yeas. You can line a colander with clean muslin, several layers of cheese cloth, etc. As the whey drains out of the curd, the curd gets thicker. Don't throw the liquid (whey) away, that's where the highest amount of protein is. I use whey in many things, such as lacto-fermentation - and you'll find many uses for it by doing a search on-line. Now that it's getting hot and we are working outdoors more, I add it to lemonade. It's a great thirst quencher full of nutrients and probiotics. Add it to a smoothie..... The greatest portion of whey drains off in the first hour. If you let yogurt drain for only 5-10 minutes, you will remove a surprising amount of whey. A cup of yogurt gives up approx. 25% of its volume in 5-minutes; a pint 18% of it's volume, and a quart only 12% (source: "The Yogurt Gourmet" by Anne Lanigan). Also from "The Yogurt Gourmet": -Drained Yogurt - drained for about 10-minutes. -Thick Yogurt - drained at least 30-minutes (thick but still soft, will not retain its shape on a flat surface). One hour's draining is "ideal". -Yogurt Cheese - drained for 8-hours or longer. Consistency of cream cheese, will hold its shape and retain the mark of a finger indentation. -Yogurt Cream - heavy cream made into yogurt. Note: One quart of yogurt will yield approximately 1-1/3 c. of yogurt cheese (about 2 c. of whey is drained off). -Grainlady Here is a link that might be useful: Cultures For Health...See MoreYogurt-making question
Comments (17)Yogurt sieves? I'll have to look about. I'm intrigued by the yogurt cheese cheesecake. A bit off topic, but since yogurt cheese has been mentioned, I'm posting the recipe for one of my favorite party nibbles. You gotta love hors d'oeuvres that you can make days or weeks ahead of time and just whip out on 5 minutes notice and still impress people. I'm including my yogurt recipe 'cause it was attached for the sake of anyone who hasn't made it yet: Yogurt Heat 1 quart of milk to the boiling point for just 1 minute. Cool to 115 degrees (lukewarm to the touch). Pour into a heavy ceramic bowl. Mix in 2 T of fresh, plain yogurt (must have active cultures). Cover tightly with plastic wrap and set in a warm place. An oven with a pilot light is good, I use a goose-neck desk lamp bent low over the bowl. I know some people who use a heating pad set on low under the bowl. According to the recipe, 110 is the ideal temperature, but remember that people have been making yogurt for thousands of years without benefit of thermometers. Essentially, it should be warmer than youd like a bath to be if you were going to spend a half an hour in it, but as warm as youd like a bath to be if you came home on a cold winter night and wanted to warm up. The yogurt should be ready in about 5 to 8 hours. Tilt the bowl to see if it holds together. The longer you allow the yogurt to sit, the more sour it will be. Line a colander with a thin cloth, such as a dish towel or muslin. Pour the yogurt into the colander and allow it to drain for at least an hour. Refrigerate. Note: It does not help speed or improve the process to add extra yogurt starterin fact, it can make for a lower quality product. The cultures have to have enough food to poop enough yogurtsorry, I couldnt help myself. You can make yogurt with 2 % milk if you like, but it takes longer and you need to strain it more. Yogurt Cheese in Olive Oil Pour home made yogurt into a sieve lined with a thin cloth, such as a dish towel or muslin. Fold the ends of the cloth over the top of the yogurt, top with a plate big enough to mostly cover the yogurt but small enough that it wont get hung up on the sides of the strainer as the yogurt gets pressed down. Weigh the plate down with a large jar or lidded tupperware bowl full of water and set the sieve over a bowl to drain. Be sure and empty the bowl from time to time so that the yogurt isnt sitting in its own whey. I generally do this overnight, but times can vary depending on the weight etc. You want a product about the texture of cream cheese. Form the yogurt cheese into balls about 1 " in size, rolling them in your hands. Pack the balls into sterilized jars with an herb mix sprinkled over each layer. Fill the jar with extra virgin olive oil. Store for at least 2 days to moogle the flavors, and up to about 3 weeks in the fridge. For the herb mix, I usually use dried red chilli pepper flakes, fresh rosemary & oregano (minced), fresh garlic sliced paper thin and salt. Then I add other things to suit my fancy. Herbs, minced onions, spices etc. Get playful. I dont know how to measure amounts, but remember that only a bit of the flavored oil will make it onto the cracker or bread with the cheese, so you almost cant put too much "stuff" in the oil. The "cheese" balls should be served with their spiced oil....See MoreVet has no idea whats wrong
Comments (17)Thank you everyone for your sympathy. My mom's dog is who made me fall in love with the breed. I got my first Bulldog shortly after she got hers. I was away at college and leaving the dog was the hardest part about going away. I'll never forget we got her over the summer, and I had to leave in about a month to go back to school. I came back home for Thanksgiving and the puppy I had left turned into a big fat whale of a dog. She was the sweetest, wiggly dog I had ever met. Well as soon as I got my own place, I also got an english bully. She stayed with me for 10 great years. After we had to put her to sleep, I had to get another dog immediately as the house was too empty without one....See MoreWill I ever figure out chicken breast?...What am I doing wrong?
Comments (43)I just cooked chicken breasts to take to our church to be made into pounds and pounds of chicken salad for our Christmas fundraiser. Here's the method I used...it worked perfectly. How To Cook Moist & Tender Chicken Breasts Every Time What You Need Ingredients 1 to 4 boneless skinless chicken breasts, of similar size Salt and freshly ground black pepper 1 tablespoon olive oil, unsalted butter, or combination of both Equipment Heavy Mason jar or wide drinking glass Wide (10-inch) sauté pan with lid Tongs or spatula Instructions Flatten the chicken breasts: Pound the chicken breasts to an even thickness with the bottom of a wide jar or glass. You can also (carefully!) use the handle of a heavy chef's knife. Season the chicken breasts: Lightly salt and pepper the chicken breasts. Prepare the pan: Heat the sauté pan over medium-high heat. When it is quite hot, add the olive oil (or butter, if using). Swirl the pan so it is lightly covered with the olive oil. Cook the chicken breasts for 1 minute without moving: Turn the heat to medium. Add the chicken breasts. Cook for just about 1 minute to help them get a little golden on one side (you are not actually searing or browning them). Flip the chicken breasts: Then flip each chicken breast over. Turn the heat down to low: Turn the heat to low. Cover the pan and cook on low for 10 minutes. Cover with a tight-fitting lid. Set a timer for 10 minutes, and walk away. Do not lift the lid; do not peek. Turn off the heat and let sit for an additional 10 minutes: After 10 minutes have elapsed, turn off the heat. (If you have an electric stove, remove the pan from the heat.) Reset the timer for 10 minutes and leave the chicken breasts in the pan. Again, do not lift the lid; do not peek. Remove lid and take temperature: After the 10 minutes are up, take the lid off, and your chicken is done. Make sure there is no pink in the middle of the chicken breasts. If you want to be absolutely sure it is cooked, you can use an instant-read thermometer to check (the chicken should be at least 165°F). Slice and eat. Store any leftovers in a covered container in the refrigerator. Here is a link that might be useful: How to cook moist, tender chicken breasts every time...See More
Annegriet
3 months ago
carolb_w_fl_coastal_9b
3 months agolast modified: 3 months agoAnnegriet thanked carolb_w_fl_coastal_9bblfenton
3 months ago
morz8 - Washington Coast
3 months ago
arkansas girl
3 months agoarcy_gw
3 months agocarolb_w_fl_coastal_9b
3 months agoHU-787167202
3 months ago
plllog
3 months agocarolb_w_fl_coastal_9b
3 months agolast modified: 3 months agoJay Foursee
3 months ago
Related Stories
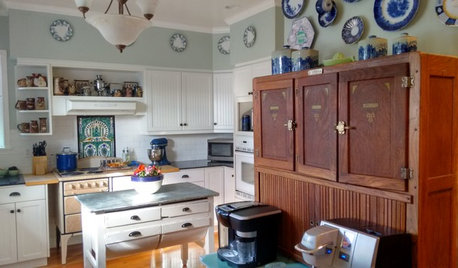
KITCHEN DESIGNKitchen Recipes: Secret Ingredients of 5 One-of-a-Kind Cooking Spaces
Learn what went into these cooks’ kitchens — and what comes out of them
Full Story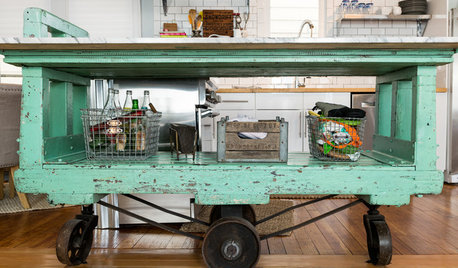
KITCHEN DESIGNKitchen Recipes: Factory Cart Inspires a Dream Cooking Space
These homeowners' kitchen was almost nonexistent, so they whipped it up from scratch. See what they cook there and get the recipe too
Full Story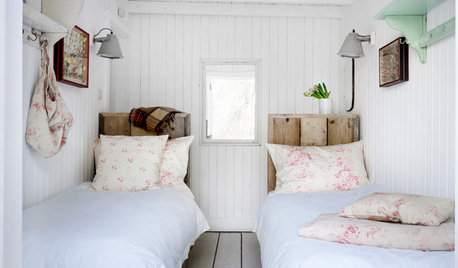
DECORATING GUIDES10 Recipes for Shabby Chic Style
Rustic furniture, floral fabrics, sparkling chandeliers. Here are 10 easy ways to bring the romantic cottage look into your home
Full Story
HOUSEKEEPING7 Chores You May Be Doing Wrong
Find out the best way to clean glass and change a duvet cover — and why you should remember to look up
Full Story
LIFEPortrait of a Terribly Good Neighbor
Sometimes the best kind of neighbor isn't the kind you'd expect
Full Story
MOST POPULARTrending: 13 Warm, Inviting Kitchens You’d Want to Wake Up To
Some of the most popular kitchen photos uploaded to Houzz in summer 2018 offer a recipe for creating a welcoming design
Full Story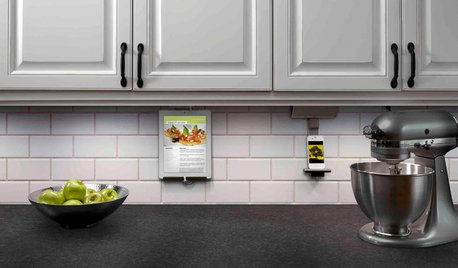
KITCHEN DESIGNHouzz Call: What’s Cooking in Your Kitchen?
Most of us turn to recipes, videos and culinary shows when we cook. Where do you set your cookbook, tablet or TV screen?
Full Story
SMALL HOMESHouzz Tour: Sustainable, Comfy Living in 196 Square Feet
Solar panels, ship-inspired features and minimal possessions make this tiny Washington home kind to the earth and cozy for the owners
Full Story
LIFEHow to Get Along With the Neighbors — and Live Happier at Home
Everyone wins when neighbors treat one another with kindness, consideration and respect
Full Story
MOST POPULARKitchen of the Week: Broken China Makes a Splash in This Kitchen
When life handed this homeowner a smashed plate, her designer delivered a one-of-a-kind wall covering to fit the cheerful new room
Full Story
colleenoz