


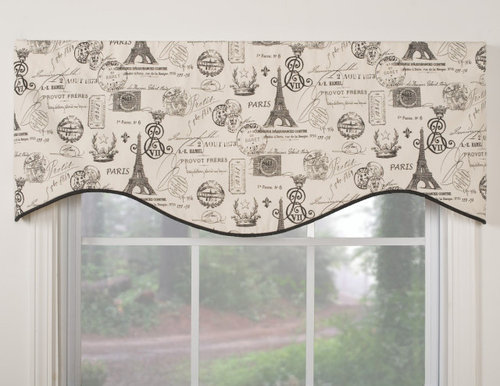
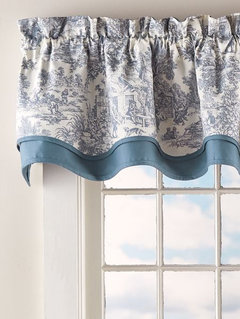
How to finish top of double layered, lined flat valance
brenda_md
3 years ago
last modified: 3 years ago

Featured Answer
Sort by:Oldest
Comments (24)

erinsean
3 years agobrenda_md
3 years agolast modified: 3 years agoRelated Discussions
Flat top electric stove
Comments (29)I'm on my 2nd glass top. The first was kind of gray with speckles and I LOVED not having to clean coil burners, nor have things boil over and run down into the top of the stove. Where I ran into problems was canning..I have an aluminum steam canner and for some reason it caused the top of the stove to discolor. Also, boil-over of sugary food (jam) that I couldn't remove from the burner until it was finished cooking, which burned on in the process, also was impossible to remove. It wasn't dirty, it just burned up the gray speckles which made it look darker than the rest of the stove, thus looked dirty. I considered induction, but wasn't sure I had the wiring capabilities in my home, plus I have collected 40 years worth of my favorite pans, some of them not compatible with induction. So I got another glass top. This one is shiny black and I am determined to keep it looking new. It is a pain! Not really a pain to clean, but the fact that I have to clean it EVERY time I cook something. It never looks good just wiping it down, so I use the ceramabrite cleaner, which takes a fair amt of time to get wiped down to the nice shiny glass look with no streaks. I also bought a countertop burner to use for canning. If I live long enough, I'll get an induction next time and just pay for new wiring and new pans. I grew up cooking with gas and I'd choose it over any other, but it's not available in my area. This post was edited by olychick on Wed, Nov 20, 13 at 1:39...See MoreHelp! Curtain brain teaser!
Comments (16)Rnmomof2, in lieu of graph paper, I did a mockup in my photo program because I don't have a drawing program... and if I did it right I can get that long left side panel out of two pieces, totalling about three yards, maybe 4 to be safe. That means that panel on the left would require a whopping 6+ yards! I should double-check that on paper, though. At work we used to have huge rolls of graph paper on vellum, which would have been perfect. But in the real world those are very hard to find and cost a ridiculous amount. But I do have big plain paper and a ruler. I'll just have to figure out a scale. If I did it right, that would mean one diagonal seam in each of the sides of that panel and the entire panel would take six yards. There would be a lot of "waste" on that and I'm hoping I could get out at least some of those upper pointies out of that. Clt3 -- Thanks about the needle! You're right, the ideal and easy solution would be to find fabric that was printed with diagonal stripes. I looked on both eBay and Fabric Guru sites tonight, plus just tried to Google it. Does anyone have any other suggestions for good places to look online? Sherrmann, thanks for letting me know you appreciate that treatment like I do. I agree, it's stunning. I'm going with you and Sippi on that the panel is a rectangle. Good point about puddling -- I can just see the vacuum sucking those babies up! I found a double rod that is long enough here: http://www5.jcpenney.com/jcp/ProductsHOM.aspx?GrpTyp=SIZ&ItemID=117adfc&RefPage=ProductsHOM&CmCatId=25437:28415:50246&cmOrigID=104f2d9&cmPosID=1 Your tip about sewing natural fabrics prompted me to look up sewing on the bias and the fabrics I found recommended were "cotton, linen, silk broadcloth, and wool challis." EBay does have some striped linens. They won't shine, but I think it could still be pretty. I'm thinking about it. The article I read said stay away from "most rayons (stretches like crazy), silkies and polyester (slippery and hard to handle), twills (lose definition), and fabrics that are heavy or stiff, like duck or poplin. Silks and sheers like crepe de chine, charmeuse, and georgette are beautiful on the bias, but these hard-to-handle fabrics aren't a good place to begin. Move up to silky fabrics once you've conquered the stable ones." No particular fabric in mind yet. I've determined that it must be a symmetrical stripe -- otherwise if you turn it the other direction your stripes can't match up. I'm a little tight on color selection to go with my furniture, too. My couch and chair should return from the upholsterer in a couple of days (we held off today because of incessant heavy rain) and then I'll get a better feel for if I have to re-cover another piece (I can do that one myself), and if I want to use what I've already got or find something else... and I'm a bit limited there too, as it needs to warm the wood, not chill it. Anyway, that's why no I haven't zeroed in on a fabric yet. I wish you lived nearby too! Are you in the Seattle area? Daisyadair, thanks for the link. It won't help me on yardage, because of the bias, but I did determine from reading it that 5 pointies is a good ballpark for what would look good in the valance. Now I have to see if I can make that work out aesthetically. Sippi, you're right, it would not be hard to just make the valance parts, and it would be much easier to cop out on the panels, and cheaper too. But I personally think the charm is in the entire look of it, not particularly in the valances. I have a favorite site for valance patterns and I think some of those are much prettier. (Southern Living) So depending on what I find out are the yardage requirements, this is still an option... another treatment entirely. I'll be looking those over again before I make a final decision. That's an interesting theory about seaming the two 54" pieces together -- but don't I end up with an extra seam in the panels that way? I don't know if this will make sense to anyone else, but here is what I made in my photo program. I left a wee bit of the red corners (the red being the 1/2 of the entire panel shape including seam allowances) sticking out just so I could see where they were, then added the dotted lines, and here's what I came up with: The blue edged white squares represent the yardage (54" square, IOW 1 yard). The arrows show which direction the fabric could be longer and also indicate the direction of the stripes. The 1/2 yard was just a visual guess -- seems it would be less on the lower piece and more on the higher piece. Naturally, when I'm done ballparking the entire yardage I'll add some just to be safe. I've tackled a lot of tough sewing projects too, and I think this is doable. But the burning question is how bad would that diagonal seam look in the panel? In its defense, it does travel the same way as the stripes, which might make it harder for the eye to pick up... but it's easy to imagine hitting it with an iron and having it define itself. If it wouldn't look good, the only answers are either hold out for a piece of fabric printed on the diagonal that is the right color and pattern (good luck!) or give it up, at least somewhat smug that I've mostly figured it out. lol! I did see one piece on eBay that was tons of yardage and 54" wide, but the color was wrong for my living room unless I change the color of my fainting couch to something I haven't yet found. I'm hemmed in by two things: 1.) The couch and chair are about to return from the upholsterer all rebuilt and covered in deep tomato red mohair velvet, and 2.) the fainting couch wood sings with warm earth tones, but dies with blues and greens or grey tones on it. Bringing a room together sure is a bear in the planning stages, isn't it? Again, thanks everyone! If I build these I will for sure post a picture here for you all to see. At this point my next plan is to mock this out on paper, and try to get the remainer of it included so I can make an educated guestimate at the amount of yardage I need. But I'm still interested in everyone's opinion on if that seam could be pulled off in each half of the panel without looking crummy. I'd hate to go to all that expense and work and then have a bad result. What do you think? I'm thinking it might depend on the type of fabric I use, but I don't know which type would be better or worse. If nothing else, if I cop out and do a different valance and plain panels, I'll be appreciating how easy it is compared to this! :-)...See Morehelp with calculations for a lined valance
Comments (7)Hi Cat11, I am a professional drapery designer/workroom. I would put in 1.5" double hem on the sides, hand stitched or using a blindstitch [ or even very good iron on adhesive]. I would put a 1/2" seam at the bottom, lining---face fabric right sides together, then when that is done, slide the lining up to create about a 1-1.5" hem of the face fabric showing on the reverse side. Then cut the excess lining even with the face fabric at the top. ` put the bottom hem/seam in first `then the side hems ` then finish off the top rod pocket or what ever Hope this helps. email me whenever you have any ?'s.... joanbauer@verizon.net Joan...See MoreDoes this Karndean Van Gogh LVP texture layer look smudgy to you?
Comments (13)Hello ishop19, We've successfully installed the Van Gogh line in many homes, and have never come across the point of the "texture" looking like smudges. I do see what you're referring to in your photos, and I'd have to say that it must part of the top layers' added "texture." It's definitely not a mallet mark. Mallet marks do make distinct marks, (and not generally needed for LVT installation, we time the adhesive to optimal tack, and use weighted rollers) but can easily be removed from vinyl. I would agree with picking up one box, and staggering the seams in an area of your home, just to lay it out a bit ( so you can see how the light hits the flooring on a larger scale). If you still see the "smudges" that you're referring to, and wiping it down with windex doesn't remove them, than I'd say that it's, without a doubt, part of the graining texture pattern. Remember, you did bring home a floor sample, so who knows what those planks have been through. Karndean makes some really beautiful products, and I'm sure that if this particular color will "drive you nuts," you'll be able to find a nice alternative. Good Luck The Flooring Blog...See Morejck910
3 years agobrenda_md
3 years agoRNmomof2 zone 5
3 years agobrenda_md
3 years ago
elcieg
3 years agolast modified: 3 years agobrenda_md
3 years agoRNmomof2 zone 5
3 years agobrenda_md
3 years agoratherbesewing
3 years agolast modified: 3 years agobrenda_md
3 years agolast modified: 3 years agoD M PNW
3 years ago
apple_pie_order
3 years ago
wednesday morning
3 years agowednesday morning
3 years agobrenda_md
3 years agowednesday morning
2 years agoapple_pie_order
2 years agoLaurie
2 years agobrenda_md
2 years agoLaurie
2 years ago


Related Stories
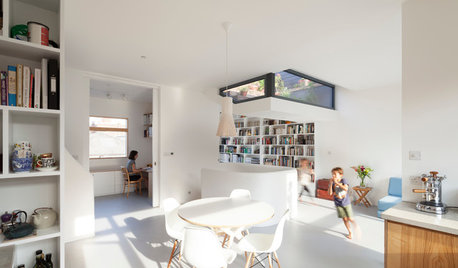
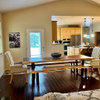
HOMES AROUND THE WORLDHouzz Tour: Radical Renovation Doubles Floor Space
A modern live-work home in London is converted into two flats, with a sunken roof terrace and an open layout for the main residence
Full Story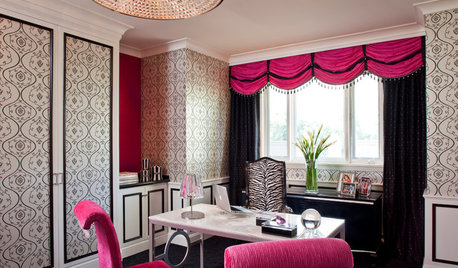
DECORATING GUIDESThe Art of the Window: A Valance for Every Look, from Country to Glam
Which of these 11 top treatments is right for you?
Full Story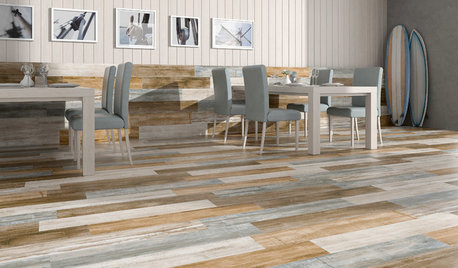
TILETop Tile Trends From the Coverings 2013 Show — the Wood Look
Get the beauty of wood while waving off potential splinters, rotting and long searches, thanks to eye-fooling ceramic and porcelain tiles
Full Story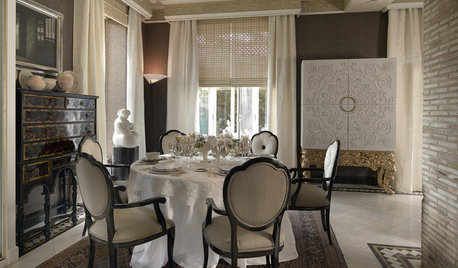
WINDOW TREATMENTSThe Art of the Window: How to Embrace the Layered Look
Here are 12 ideas for using layered window treatments to add warmth, texture and style to your rooms
Full StoryWHITE KITCHENSWhite Cabinets Remain at the Top of Kitchen Wish Lists
Find out the most popular countertop, flooring, cabinet, backsplash and paint picks among homeowners who are renovating
Full Story
KITCHEN CABINETSKitchen Confidential: The Pros and Cons of Double Stacked Cabinets
Does it make sense for you to double up on cabinets? Find out here
Full Story
DECORATING GUIDES13 Ways With Window Valances
A swoop of fabric above the window hides the hardware and frames the view in style
Full Story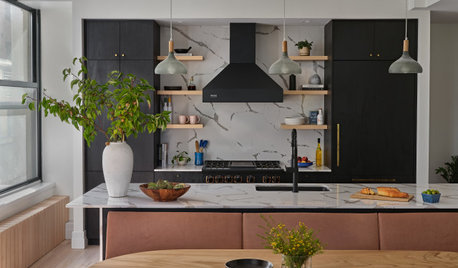
KITCHEN APPLIANCESWhich Appliance Finish Should You Choose for Your Kitchen?
Find out which design situations call for stainless steel, black, paneled, white and colored appliances
Full Story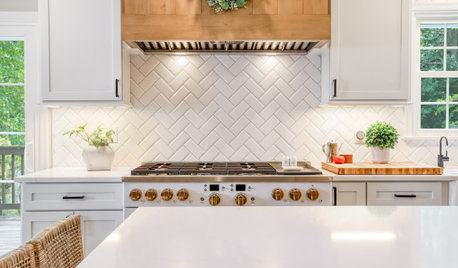
KITCHEN DESIGNThe 5 Layers of a Well-Lit Kitchen
Develop a layered lighting plan to create a functional, adaptable and illuminated kitchen
Full Story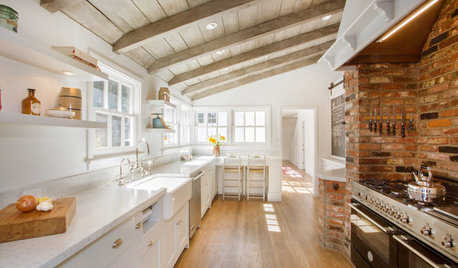
KITCHEN DESIGNKitchen of the Week: Brick, Wood and Clean White Lines
A family kitchen retains its original brick but adds an eat-in area and bright new cabinets
Full Story


brenda_mdOriginal Author