


bathroom remodel plumbing bid - reasonable?
Mountain Remodeler
3 years ago
Featured Answer
Sort by:Oldest
Comments (14)

Helen
3 years agoRelated Discussions
Overwhelmed... Remodeling 3 bathrooms at once
Comments (12)mongoct posted some really helpful info about showers and valves, and that's basically everything I know about that topic! I'll try to paste it here: Let me know if this is the sort of info you're looking for, if it's too basic, or not inclusive enough. It's a rough first draft and can be edited as required: The sort of where, what, and why of pressure-balanced versus thermostatic: Pressure-balanced or thermostatic temperature control valves are code-required in bathroom plumbing because they eliminate potential scalding and cold water shocks that can occur in a shower. If you are using the shower and a toilet is flushed, as the toilet uses cold water to refill the tank, the pressure in the cold water line drops a bit below what it was when just the shower was running. If you had a non-balancing valve, you�d still get the same amount of hot water that you originally were getting, but with the drop in pressure in the cold water line you�d have less cold water coming out of your shower head, creating a potential for scalding. Vice-versa, if someone turns on a hot-water faucet elsewhere in the house, the hot water pressure drops and you get a shower of mostly cold water. A pressure-balanced shower valve is designed to compensate for changes in water pressure. It has a mechanism inside that moves with a change in water pressure to immediately balance the pressure of the hot- and cold-water inputs. These valves keep water temperature within a couple degrees of the initial setting. They do it by reducing water flow through either the hot or cold supply as needed. Because pressure balanced valves control the temp by reducing the flow of water through the valve, if your plumbing supply is already struggling to keep up with the three shower heads and nine body sprays that you have running in your shower, if a pressure balancing valve kicks in and chokes down the water supply to keep you from getting scalded you could end up with insufficient water flow out of the heads in a multiple shower head setup. When it comes to volume control, in terms of being able to turn on the water a little or a lot, for the most part pressure-balanced valves are full-on when water is flowing or full-off when the valve is closed. Flow-wise, think of them as having no middle ground. Where flow and volume control are important, as in a shower that requires a high volume of water, a thermostatic valve may be the better choice. They also control the temperature, but they do not reduce the amount of water flowing through the valve in doing so. Thermostatic valves are also common with 3/4" inlets and outlets, so they can pass more water through the valve than a 1/2" pressure balancing valve. Which should you choose? In a larger multi-outlet master shower, while a 1/2" thermostatic valve may suffice, a 3/4" thermostatic valve might be the better choice. But it does depend on the design of your shower and the volume of water that can be passed through your houses supply lines. In a secondary bathroom, or in a basic master where you have only one head, or the common shower head/tub spout diverter valve, a 1/2" pressure balancing valve would be fine. If you want individual control and wanted multiple valves controlling multiple heads, then you could use multiple 1/2" valves instead of one 3/4" valve and all would be just fine. What do the controls on the valve actually control? While it may vary, a pressure balanced valve is normally an "all in one" valve with only one thing you can adjust�the temperature. The valve usually just has one rotating control (lever or knob) where you turn the water on, and by rotating it you set the water to a certain temperature. Each time you turn the valve on you�ll have to set it to the same spot to set it to your desired temperature. For the most part you really don�t control the volume, just the temperature. With the valve spun a little bit, you'll get 100% flow but it will be all cold water. With the valve spun all the way, you�ll get 100% flow, but it will be all hot water. Somewhere int eh middle you�ll find that Goldilocks "just right" temperature, and it�ll be at�you guessed it�100% flow. So with a pressure balancing valve, you control the temp, but when the valve is open, it�s open. A thermostatic valve can be all inclusive in terms of control (volume and temp) or just be temperature controlling. If it�s just temperature controlling, you will need a separate control for volume or flow. Example, with an all inclusive you�ll have two "controllers" (knobs or levers) on the valve, one to set the temperature and a separate one to set the volume. In this case you can set the temp as you like it, then use the volume control lever to have just a trickle of Goldilocks water come out of the valve, or you can open it up and have full flow of Goldilocks water coming out of the valve. You can leave the temp where you like it when you turn the volume off after you�re done showering. The next time you shower, turn the volume on, the temperature is already set. Some thermostatic valves are just temperature valves with no volume control. You�ll need another valve/control to set the volume. Read the product description carefully to see what you're getting. What size valve should I get? Yes, valves actually come in different sizes. The size refers to the size of the inlet/outlet nipples on the valve. For a basic shower, a 1/2" valve will suffice. For a larger multi-head arrangement, a 3/4" valve would be better. Realize that you�ll need a water heater that can supply the volume of heated water you want coming out of the heads, so don�t forget that when you build or remodel. Also realize that if you�re remodeling and have 1/2" copper running to your shower, capping 1/2" copper supply tubing with a 3/4" valve provide you with much benefit as the 1/2" tubing is the limiting factor. You can, however, cap 3/4" supply tubing with a 1/2" valve or a 3/4" valve. Is one better than another? Thermostatic valves are "better" in that with them you can control both volume of flow and temperature, so you have more control, and they hold the temperature to a closer standard (+/- 1 degree). They also perform better if you are running multiple outlets in the shower, as they do not choke down the amount of water in order to control the temperature. But you pay for that added flow and added control. Pressure balancing valves can be had for about $100-$200, thermostatic valves can be twice that amount. And more. Will I suffer with a pressure-balancing valve? For what it�s worth, when I built my house over 10 years ago I put pressure-balancing valves in my own house. While I have two outlets in my shower (sliding bar mounted hand-held on the wall and an overhead 12" rain shower head on the ceiling), I have a two separate pressure-balancing valves, one valve for each head. With both heads going in the shower, I notice no loss of flow in the shower when the toilet is flushed and the sink faucet is turned on simultaneously. I also notice no change in temperature. So they work for me. If you are remodeling, if you have your existing sink running and you flush the toilet and notice a drop in volume coming out of the sink, then a thermostatic valve might be the better choice even if you're not having a multi-head setup installed. If, as part of the remodel, you plan on running new supply lines through your house to the new bath, then properly sized runs will take care of that flow restriction and you can probably do a pressure balancing valve instead of a thermostatic. So in a house with tricky plumbing, or with a restricted water supply, or with multiple outlets running off of one supply valve, a thermostatic valve might be the safer choice. Mongo -------------------------------------------------------------------------------- Part Deux clip this post email this post what is this? see most clipped and recent clippings Posted by mongoct (My Page) on Thu, Jun 26, 08 at 2:30 Part Deux: Controls and Diverters This may be almost impossible to thoroughly attack because there are so many variations in what people want and in what different manufacturers offer. In general� You need a volume and temperature control. You can buy just the valve body, which is the chunk of expensive brass that gets buried in the wall, and buy a separate trim kit, or you can buy a package that includes the valve body and the trim kit. The trim kit is the bright sparkly metallic knob/lever/escutcheon bling that you overspend for so your friends and neighbors will go "oooooh" and "aaaaah". If you buy a pressure balanced valve, the valve in and of itself will turn on the water and allow you to control the temperature. If you buy a thermostatic valve, most valve bodies have two controllers on them, one to control volume and one to control temperature. Read the fine print though, because some thermostatic bodies just control temperature. You�ll need a separate valve body to provide volume control. Stops. Some valves come with "stops" some do not. What are stops? Stops stop water flow at the valve itself so the valve can be taken apart without having to turn the water off to that branch circuit or to the whole house. They are normally incorporated onto the hot and cold water inlets on the valve body, and they can be opened or closed with a screw driver. While I�m on this, I�ll also mention that some valves might mention having a "stop screw" to limit the maximum temperature. While a pressure balancing or a thermostatic valve will prevent you from being scalded if someone flushes a toilet, there is nothing to prevent someone from being scalded by setting the valve to allow 130 degree water to pass through it. Your first step is to lower the temperature on your water heater to about 120 degrees. For valves that have these stop screws, it�s then a simple matter of setting a screw that limits how far the temperature knob can be rotated. What you do is rotate the knob to set the water to the max temp that you�d ever want out of the shower, then you turn the set screw until it bottoms out. It will now prevent the temperature knob from turning past (hotter than) it�s existing position. Downstream of that volume/temp control is where things get dicey. You can have a simple setup where your V/T control just runs to a single shower head. Easy to do. You can have a standard tub setup with a shower head and a tub spigot, where the diverter can be a lever or push button that sends water either to the tub spigot below or to the shower head above. Also easy to do. If you want to supply water to more than one shower head, to a shower head and body sprays, or to both, either simultaneously or one at a time, then you�ll need more chunks of expensive brass to bury in your wall. If you want separate controls and the ability to have differing temperatures come out of differing fixtures, then it�s easiest to go with multiple V/T controllers. One V/T controller for the shower heads, for example, and a separate V/T controller for the body sprays. This allows you to run different volumes and different temperatures out of the different heads. Your shower head can be 105 degrees and your body sprays 110 degrees. Remember, the more hot water that you want to come out of your shower, the larger your supply tubing and valve bodies need to be, and the larger your water heater has to be. For sizing purposes, most shower heads and body sprays have a gallon per minute rating applied to them. In theory and planning only, if your hand held shower head is, for example, rated at 3gpm, your rain shower head rated at 4gpm, and each of your 8 body spray heads is rated at 1gpm, and you want to run them all at the same time�you�re looking at a flow of 15gpm. You need a water heater that can supply you with 15gpm of hot water, then you need supply tubing that can get 15gpm of hot water from your water heater to your bathroom, and you need valve/diverter bodies that can pass the required amount of water through them so you get decent flow out of each fixture. Typical plumbing is 1/2", typical valves are 1/2". For high volume situations, 3/4" tubing and 3/4" supply valves may be required. Out of the valves you can usually run 1/2" tubing to your shower heads and body spray heads. Back to the hardware. If you want a shower head and body sprays, and want to run either or both off of one valve, then you�ll want a diverter valve. Diverter valves can be anything and everything. They can be simple A/B valves, where you can run the water through the valve to only "A", your shower head, or only to "B", your body spray heads. But not both at the same time. Which leads to the A/B/AB valve, where you can send water only to "A", your shower head, or only to "B", your body spray heads, or to "AB", simultaneously to both. And from here things go wild. There are A/B/C/AB/AC/BC/ABC valves, and things just can go on and on from there. Diverter valves are usually described as having a certain number of "ports". 3-port, 4-port, 5-port, etc. Realize that one port is where the water goes in to the valve, the other ports are where the water comes out. So an A/B/C valve that has three outlets might be listed as a "4-port valve", with the fourth port being the inlet. Not all 4-port valves can do A/B/C/AB/AC/BC/ABC, you�ll need to look through the description to find out where it can send the water to. A 4-port valve might just be an A/B/C valve, or it might be a more versatile A/B/C/AB/AC/BC valve. Read its description. If you can�t get the customization you need from a single volume/temperature controller and a single diverter, you can run multiple diverters off of one V/T controller, or multiple diverters off of multiple V/T controllers. It all depends on how much brass you can afford, how much water you can supply, and if you have the space to hide all that brass in your walls. Diverters can be knobs, levers, push buttons, the choice is yours. But do remember that you need to match up the valve body to the desired trim kit so that the bling that your neighbors can see will fit on the expensive chunk of brass that they can�t see. You don�t want your plumber to bury that expensive chunk of brass in your wall, then tile, then find out later that your bling won�t fit. Very depressing. It�s all about reading the fine print. Mongo -------------------------------------------------------------------------------- RE: FAQ/Answers Bathroom Plumbing for dummies clip this post email this post what is this? see most clipped and recent clippings Posted by mongoct (My Page) on Thu, Jun 26, 08 at 12:51 How to get the water out of your walls: A fixed shower head high on the wall, an adjustable hand held, an overhead rain shower head, or body sprays? Or all of them? Normally 1/2" copper tubing is run from the valve or diverter body to carry the water to the location of the outlet. If you're going to install something permanently, or if you're going to make a connection in a sealed wall, then it�s normally a soldered fitting. For things like showerhead arms, or body sprays, these are normally threaded connections. A threaded connection allows you to change out the shower head and arm for a different one if the old breaks, or for a new style if remodeling. When making up a threaded connection, you'll want to use something on the thread, either teflon tape, teflon pipe dope, or some other sort of thread sealer that will allow you to break the connection at a later date. A common way to connect your outlet to your spray head is to run your copper tubing to the location of the outlet, then solder a 90 degree drop ear fitting to the copper tubing. You can see that the fitting has a smooth inlet for the 1/2" supply tubing to be soldered to, two holes in the "ears" to nail or screw the fitting to the framing, and a threaded outlet where the water will come out of. These fittings are manufactured in different configurations for different applications. That brass drop ear fitting will be buried in the wall or ceiling. If you are connecting a shower head, then the arm of the shower head gets screwed into the drop ear fitting and the shower head gets screwed on the other end of the arm. That works if it is a wall or ceiling mounted shower head. For a body spray, you�ll need a brass nipple like this: One end of the nipple screws into the drop ear fitting, the other end gets screwed into your body spray. Nipples come in various lengths to compensate for varying wall thicknesses. For a hand held shower, the outlet for the hand held is mounted just like a body spray head is mounted. I usually mount the outlet for a hand held down low near the bottom of the bar and offset to one side. That way when the head is hung on the bar, the hose hangs in a graceful "U", right up against the wall. Do a dry run with a piece of rope or string the same length as your hose, you don't want your hose laying on the shower floor. Hand held shower are usually mounted in a vertical bar, the head can be slid up or down the bar to adjust the height of the head. If you don�t want a bar, then there are wall brackets that the hand held head can be set into. You can use multiple bracket, one high for tall people, one lower for shorter folk, even one low on the wall to hold the head for the leg shaving crowd. Both the bar and the brackets are surface mounted in the wall, they are held on the wall with screws. You�ll normally drill a pilot hole, insert a plastic anchor into the pilot hole, then attach the bar or bracket by driving the screw into the plastic anchor. It�s easier to drill a pilot hole through grout than it is to drill through tile. Prior to inserting the anchor or driving the screw, I always squirt a glop of sealer into the hole, it helps prevent water intrusion. As to the hose for the hand held, some are plastic, some are metal. I prefer metal as they lay against the wall more consistently than plastic hoses. One end of the hose screws on to the outlet that you screwed into the wall. The other end snaps or screws onto the hand held shower head. Get a hose long enough so that it can reach all corners of your shower, and then some. It helps with rinsing and cleaning the shower, shaving legs, bathing young kids, or even the family dog. For wall mounted handhelds, you can get everything in one kit, or you can mix and match. Just make sure that everything is compatible so that you don't end up with a head that won't attach to a bracket. A good combination is a "standard" wall mounted shower head, OR a "standard" head as a hand held, combined with an overhead rainshower head. "Standard" heads give that nice spray that is strong enough to easily rinse your body or rinse shampoo out of your hair, they often have multiple spray patterns as well. Rainshower heads give a much gentler flow of water. They provide a different experience than a standard spray head. A rainshower head's flow might not be adequate to quickly rinse shampoo from hair. Some manufacturers have rainshower heads designed to mount on a standard arm that comes out of the wall. Those might not be a good idea, as the rainshower heads work best when they are mounted level, not on a tilt. If the head is mounted on an angle, instead of the shower of raindrops, you might something more like a garden hose effect coming out of one side of the head. Since the water "drops" out of the head instead of spraying our of the head, it's better to not have them too close to the wall. I think rainshower heads work best when plumbed to a central location on the ceiling. If you can only have one head in your shower, than a standard type head with adjustable spray patterns might be your best bet. When I was a kid, most of the hand held shower heads were of very poor quality. Hose fittings leaked or sprayed water everywhere, the multiple spray heads leaked or sprayed water all over. Today's handheld's are of much better construction. Construction note: If in a freezing climate, try to keep supply plumbing tubing out of your exterior walls. And if running plumbing for an overhead rainshower in the ceiling, if it's unheated attic space above then you'll want to insulate above the plumbing in the ceiling. Also, pitch the horizontal run of plumbing downwards a bit as the plumbing goes towards the rainshower head, so that when you turn the water off, the water in horizontal run of tubing will flow out the rainshower head instead of pooling and being captured in that horizontal run of tubing. Mongo...See MorePlanning a bathroom remodel...order of operations?
Comments (8)"never heard of Ditra! glad i'm on here. I expect there is a pine board subfloor under there somewhere. I intend to reuse it. The ditra just goes on top of that, right?" Unfortunately, no. Pine boards, though probably pretty darn stable by now, can still move a bit either through flex or seasonal humidity changes. So you need a transition material between the planks and the cement board or Ditra. That transitional material is usually plywood. If using SLC, a typical flow would be: Your pine planking, fasten it down securely. Then 1/2" plywood over that, then set your heating mats. Then use a garden sprayer to spray the SLC primer on the subfloor and heating wires. You don't need to use a garden sprayer, but it does coat everything very nicely. Then SLC. Then you can tile right over the SLC, or Ditra over the SLC and tile over the Ditra. I do recommend a self-leveling material over the radiant wires. It simply makes it easier to get a nice level surface upon which to tile. Some folks set the wire mats in place then trowel thinset over the mat, trying to get it fairly flat. Sometimes it works, sometimes they end up with incomplete coverage, a honeycomb of voids, and/or a messy and unflat surface. That will frustrate you when it comes time to tile. SLC is not mandatory by any means. But if your ability to trowel thinset into a nice flat surface is somewhat challenged, then using SLC can make your life a little easier. If you use SLC, realize...as the name implies, it is "self-leveling". It will flow wherever you allow it to flow. Through cracks in the floor, down the toilet waste flange, under the baseboards. So you need to contain it from flowing wherever you do not want it to go. And don't forgo a bonding primer for the SLC. The primer helps it adhere to the subfloor. If you do use SLC, have all your ducks in a row. Have a helper. Once you start you don't stop midway through the job. Lastly, whatever method you use: If you use cement board, the cement board gets a coat of thinset between it and whatever it goes over. So many people omit that step and it results in cracked grout and lose tiles a few years down the road. The thinset isn't there to bond the cement board to the plywood beneath it. The fasteners (screws or nails) do that. The thinset simply acts as a setting bed to provide complete contact between the cement board and the plywood underneath it, so there is no vertical movement between the two when the floor is walked upon. I won't really critique your work flow because we all have different methods of working. But how about ventilation? Any bathroom vent?...See MoreBathroom fixtures. Quality, reasonably priced?
Comments (9)As others have posted, Delta and Moen make high quality relatively inexpensive faucets. Personally I would not want to go below their level of quality as they are reputable and have great warranties. This is especially critical for shower and tub fixtures which are not as easily swapped down the line if they fail as might be a sink faucet. In real life, people change kitchen and bathroom faucets but generally don't change bath and shower faucets unless they either fail or they are doing a complete remodel. Delta and Moen also have the benefit of enabling one to know that your rough plumbing will work with future Delta and Moen faucets. When I remodeled, aside from manufacturer, a major cost differential is style and finish - e.g. the same model faucet would be significantly more money in a higher cost finish....See MorePut bid on house, HATE the bathrooms!
Comments (83)Beth I’m sure we will drive past it in the future but we’ll never know if they made changes inside unless there’s a garbage dump in the driveway Right now we live in NYC, wanting to move to Jersey...See MoreMountain Remodeler
3 years agoUser
3 years ago PRO
PROJoseph Corlett, LLC
3 years agoMountain Remodeler
3 years agoMountain Remodeler
3 years ago
millworkman
3 years agoHelen
3 years agoMountain Remodeler
3 years agomillworkman
3 years agolast modified: 3 years agoeinportlandor
3 years agoMountain Remodeler
3 years ago- PRO
Joseph Corlett, LLC
3 years ago
Related Stories
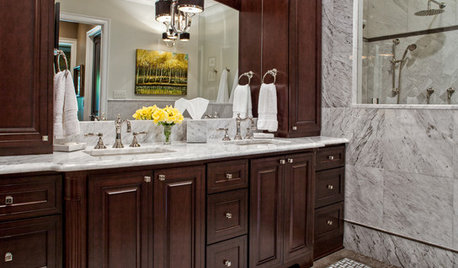
REMODELING GUIDESBathroom Workbook: How Much Does a Bathroom Remodel Cost?
Learn what features to expect for $3,000 to $100,000-plus, to help you plan your bathroom remodel
Full Story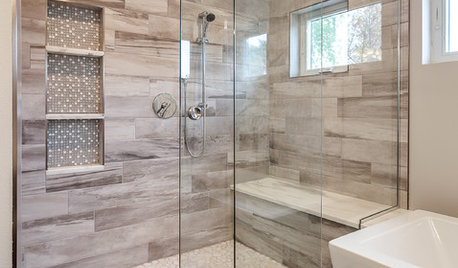
BATHROOM DESIGN10 Things to Consider Before Remodeling Your Bathroom
A designer shares her tips for your bathroom renovation
Full Story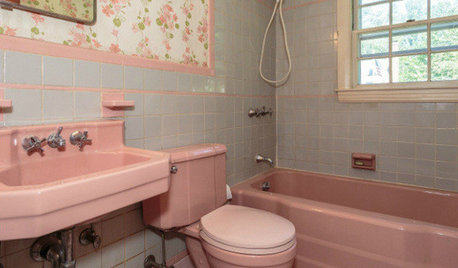
BATHROOM COLOR8 Ways to Spruce Up an Older Bathroom (Without Remodeling)
Mint tiles got you feeling blue? Don’t demolish — distract the eye by updating small details
Full Story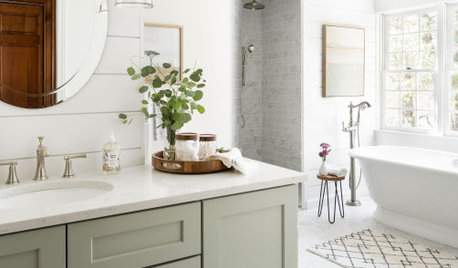
BATHROOM DESIGN14 Design Tips to Know Before Remodeling Your Bathroom
Learn a few tried and true design tricks to prevent headaches during your next bathroom project
Full Story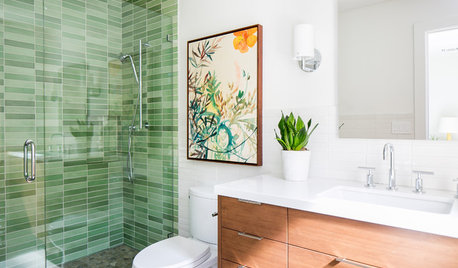
BATHROOM DESIGNTry These Bathroom Remodeling Ideas to Make Cleaning Easier
These fixtures, features and materials will save you time when it comes to keeping your bathroom sparkling
Full Story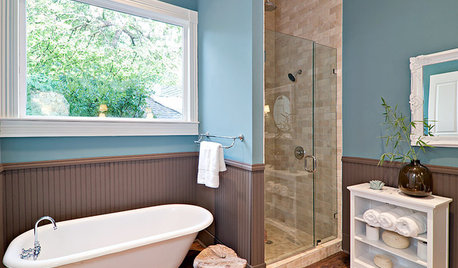
4 Easy Ways to Renew Your Bathroom Without Remodeling
Take your bathroom from drab to fab without getting out the sledgehammer or racking up lots of charges
Full Story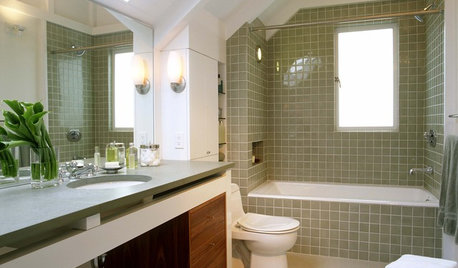
BATHROOM DESIGN12 Things to Consider for Your Bathroom Remodel
Maybe a tub doesn’t float your boat, but having no threshold is a no-brainer. These points to ponder will help you plan
Full Story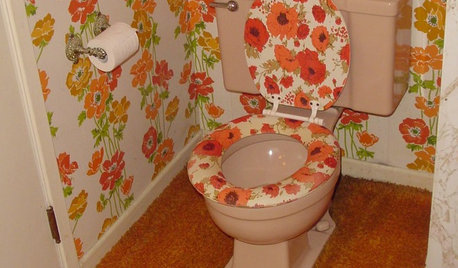
BATHROOM MAKEOVERSReader Bathroom: Owners Bid Farewell to Orange Florals and Shag
These DIY-ing homeowners ditch the 1970s floral toilet seat for more calming neutrals
Full Story
BATHROOM DESIGNWater Damage Spawns a Space-Saving Bathroom Remodel
A game of inches saved this small New York City bathroom from becoming too cramped and limited
Full Story
BATHROOM DESIGNSee 2 DIY Bathroom Remodels for $15,500
A little Internet savvy allowed this couple to remodel 2 bathrooms in their Oregon bungalow
Full Story

User