


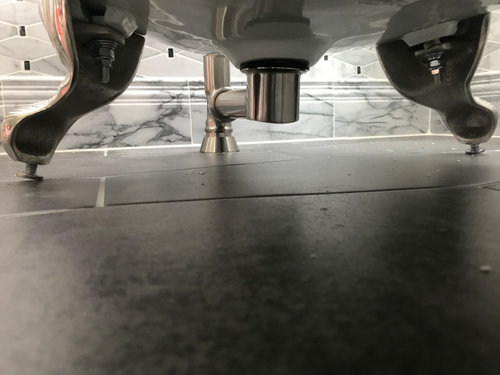
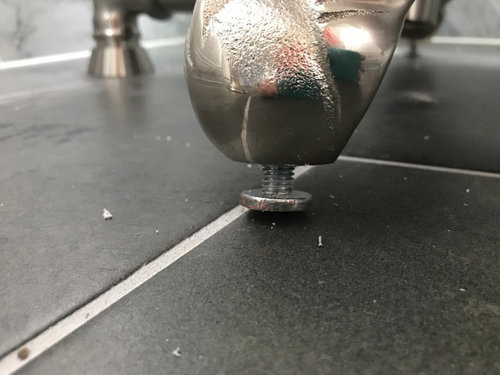
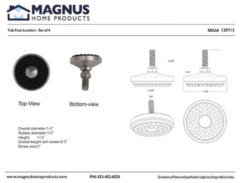
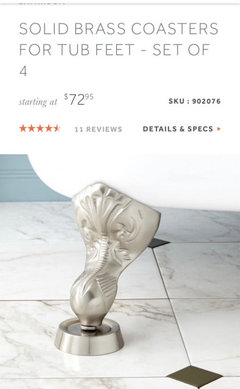
Clawfoot Tub. Drain pitches toward bathtub, not waste pipe
crazy4craftsman
3 years ago
last modified: 3 years ago

Featured Answer
Sort by:Oldest
Comments (13)
 PRO
PROPatricia Colwell Consulting
3 years agocrazy4craftsman
3 years agoRelated Discussions
Kohler Greek tub as tub/shower combo
Comments (18)Wow, thanks bumble doodle! Tt is great to know that the tub works well as a shower. We are tall too--at least most of us (two of my teenage daughters are twins and one is 5'2" and the other is 5'10", so maybe the short one complains a bit but that's ok, since she complains about everything!) We are getting the non-jetted version. Also, I am hoping that building the deck at the front will help with the water spray. I am pushing the tub back into an alcove under the window the long way (so we get into the tub at the 32" side rather than from the 48" side) and we are trying to go without shower doors in order to make the bath feel open. With a deck, we buy a few more inches of length to help avoid water on the floor. We may not succeed and will put a panel on if we have to. Any thoughts on this?...See More2 inch drain for shower, why?
Comments (7)While I am sure that the answer will cause a tirade of argument, the answer is basically simple. Under both the IRC (international Residential Code) and the UPC (Uniform Plumbing Code) the standard size for a tub drain & P-trap is 1-1/2" and under the IRC the tub waste arm (drain line) may be 1-1/2" but under the UPC an 1-1/2" drain line is limited to 1dfu (drainage fixture unit) whereas under the UPC a tub is rated at 2dfu's, therefore under the UPC the tub fixture arm must also be 2". in the case of a tub that has an internal lever waste stopper the drain opening is required to be equipped with a trim cover, which is the little flat metal cover with all the small holes in it. Code requires that the combined cross sectional area of all those little holes must be equal to or greater than the cross sectional area of the tailpiece. Understanding that the tailpiece is 1-1/2" it then stands that the cross sectional area of the tailpiece is 2.25" If we then make a cover with 1/4" diameter holes the we must have a minimum of 36 holes. By carefully arranging those holes in a circular patter they can make the overall diameter of the trim cover 1-3/8" or 1-7/16". The problem is that an adults foot is large enough that if the person taking a shower were to stand directly on the drain opening their foot could effectively cover all the holes and water could not drain out. Fortunately the walls of a tub are high enough that the tub would serve as a reservoir to hold the excess water until the person moves away from the drain, and in a worst case scenario, the tub has an overflow that will prevent water from spilling over the top of the tub. On the other hand, a shower pan is required to have a minimum of a 1/4" per foot pitch towards the drain opening and the threshold is required to be a mere 2" above the finished height of the drain opening. If we had an 1-1/2'drain opening someone could inadvertently stand on the drain opening without realizing it, or perhaps drop a washrag on the drain opening and the water would quickly build up and overflow over the threshold. By requiring a 2" drain it then becomes necessary to have 64 1/4" holes in the trim cover, and allowing for enough metal to provide the necessary strength in the trim cover, the minimum diameter of the trim cover is now 3-1/2" to 4". Now I am sure that someone will come forward and say they have big feet, but on average due to the contours of the bottom of your foot you cannot cover all the holes in the drain opening with your foot....See MoreAre there kitchen drains like these?
Comments (18)davidro1- Just when I was beginning to think you might be a plumber you totally proved me wrong today- 1.- Quote" it was entrapmentt for lazypup to fall into." LazyPup did not fall into any entrapment. That Item is not and cannot be approved because it has the illegal washing machine connection, whether it is used or not. (If you had actually been through an plumbing apprenticeship you would have learned that) 2. QUOTE "Note also that a 1.5 inch drain pipe works well for all US made washing machines, and that washing machine code-spec'd drain sizes were upsized a notch a few decades ago when house sizes were getting bigger (wider pipes are absolutely necessary when horizontal distances are longer), " That is a totally lie. While fixture arms are limited in length, once the line is vented it makes no difference how long the line is. DWV lines are sized by DFU load (drainage fixture unit) and code minimums for certain specified fixtures, but the length of the line has nothing to do with its size. The only thing on a DWV line that is related to length is that a DWV line must have a cleanout for each 100 linear feet. (some local codes reduce that to as little as 60') 3.- Quote-"Any tight elbow may be used." Again, that is not true. Only DWV grade elbows may be used. I specified DWV grade tubular pipes because if they used sched 40 PVC or ABS they would be required to install a cleanout on the end of the fixture arm. Now you may scoff and ridicule the alphabet soup all you want, but for those of us who actually hold a license, We are not about to forfiet our license or pay stiff fines for using materials that are not approved....See MoreDoes a Laundry Tub Addition Require a Vent Line?
Comments (16)I have examined the photo with great interest and from what I can see you need not worry about being grandfathered in. The only code violation that I can see in the picture is the galvanized steel perf strap hanger on the horizontal 3" line. Code now specifically prohibits metal strapping or wire hangers for plastic pipes. The reasoning here is two fold: 1.When liquids flow through pipes there is a slight high resonance vibration in the pipe. As a result, in the course of time a metal hanger will cut through the plastic pipe. 2. When cold water flows through the pipe, the pipe wall cools below the ambient air temperature surrounding the exterior of the pipe, and in some circumstances condensate moisture will collect on the metal hangers. The moisture then leads to rust forming on the hanger and in the course of time the hangers rust through and break. The codes are very explicit on pipe hangers. Plastic pipe should be suspended by means of holes bored through wood, Plastic pipe hangers or plastic perf strapping. When using plastic perf strapping you should install wood blocking down from the joist above the pipe to the top of the pipe. This will prevent the pipe from rising up and ultimately changing the pitch of the run. The perf strapping should then run under the pipe and be attached to the wood blocking on either side or it may be attached directly to the joists from above in the same manner as that metal strapping is now. Steel strapping or steel pipe hangers should be used for galvanized iron, black iron or cast iron pipes and copper or copper clad pipe hangers or strapping should be used for copper pipes. The 3" line running from left to right, which is supported by the galvanized strapping is a Horizontal line. We may attach a branch line to a horizontal line from either side, from the top as shown in the photo or at any angle in between horizontal or vertical however, when attaching a branch line to a horizontal line we are required by code to use a "Wye & 1/8". A sanitary tee is expressly prohibited. here again, the reasoning is simple. If we had a tee where that vertical line ties into the horizontal, as the waste coming down the vertical enters the horizontal it would immediately fall to the bottom of the horizontal, the expand outwards, some flowing downstream, while some of the liquid would immediately back flow upstream. This causes two distinct problems; 1. When the liquid hits the bottom of the line, then changes direction it reduces the velocity of flow. 2. The liquid which immediately back flows upstream could be carrying solid particulates. When that liquid stops its upstream movement then reverses and runs back downstream, there is no longer sufficient velocity to carry the solids and they are left behind. Once the liquid has receded the solids are then left on the bottom of the pipe and they will dry in place forming a clog. To prevent that from happening the codes require that all connections to a horizontal line must be made by means of a Wye. The side inlet of a Wye is configured at a 45deg angle in the direction of flow therefore as the liquid entering through the Wye goes into the horizontal line it is directed downstream thus maintaining the velocity of flow. When making a 90deg tap into a horizontal line we then use a Wye & 1/8 bend. An 1/8 bend is a 45deg sanitary elbow which when attached to the 45deg input of a Wye it completes the required 90deg turn. You could use a common 1/8 bend which has a hub on each end, but when doing so, you would need to cut a short nipple of pipe to connect the Wye & 1/8 bend hub to hub. A simpler method would be to use a "Street 1/8 bend. A Street fitting has a hub on the input end but the output end has a raw pipe size, called a "spigot". The spigot can be inserted directly into the hub of the Wye, thus you would not need a pipe nipple between the two fittings. The Wye shown in the center of your photo is technically not a Wye, it is a "Combo". Understanding that when making a right angle connection to a horizontal line we are required to use a "Wye & 1/8 bend" the fitting manufacturers produce a "Combo" Which is simply a Wye & 1/8 bend made into one fitting. Functionally there is no difference between a Wye & 1/8 bend" or a "Combo" but it is more convenient for the installer because it is one less glue joint to make up and in most instances a Combo is a few pennies cheaper than the cost of a Wye & 1/8 bend. Generally this is not a big deal in single family residential plumbing but believe me, if you were plumbing an apartment complex a couple pennies on the fittings and not having to pay a man to make the extra glue joints can add up very quickly. Now before we get into the final solution for your new drain line, let us take a moment and discuss how Tee's and Wye's are identified. If all three openings on a Tee or Wye are the same size the Tee or Wye is identified by the pipe size, I.E. a 3" Tee however for your application you need to connect a 2" line to a 3" horizontal so the easiest method is to use a Reducing Wye. For a reducing Wye or Tee each opening size is listed in a specific order; 1. The input on the straight through, 2. The output on the straight through and 3. The side opening by example, you will need a 3" wye with a 2" side opening so your Wye would properly be called a 3x3x2 Wye. (you could use a 3" Wye but by using a reducing Wye you save the cost of a reducer for the side input plus you will have one less glue joint to make.) I would recommend a "3x3x2 Combo". I can see that the horizontal 3" is running parallel to the wall, but it is difficult to tell how far away from the wall it is. Here is a tip. When you install the Wye & 1/8bend or combo on the 3" horizontal configure the side opening to rise at a 45deg angle towards the wall, then make your offset with a line running up at a 45deg angle. In this manner your offset will be a vertical offset so the horizontal distance of that offset doesn't count off your 5' maximum fixture arm length. Send me an email so i have your email address and I will return you some illustrations I made for my apprenticeship class that will help you. LazyPup@yahoo.com...See More
Seabornman
3 years agokudzu9
3 years agolast modified: 3 years agoweedmeister
3 years agocrazy4craftsman
3 years ago PRO
PROHALLETT & Co.
3 years agocrazy4craftsman
3 years agolast modified: 3 years agokudzu9
3 years agocrazy4craftsman
3 years ago PRO
PROChange Your Bathroom©
3 years ago
Jessica Sharp
2 years ago

Related Stories

BATHTUBSBefore and After: 6 Dream Bathrooms That Free the Tub
Freestanding tubs replace bulky built-ins in these beautiful bathroom remodels
Full Story
GARDENING AND LANDSCAPINGWhy Is There a Bathtub in the Backyard?
Nope, it's not waiting for bulk trash pickup. These days outdoor tubs are serving soakers, beer drinkers and even the fishes
Full Story
BATHROOM DESIGNWhy You Might Want to Put Your Tub in the Shower
Save space, cleanup time and maybe even a little money with a shower-bathtub combo. These examples show how to do it right
Full Story
MOST POPULARShould You Keep Your Tub?
There are reasons to have a bathtub, and plenty of reasons not to. Here’s how to decide if you should keep yours or pull the plug
Full Story
BATHROOM DESIGNDreaming of a Spa Tub at Home? Read This Pro Advice First
Before you float away on visions of jets and bubbles and the steamiest water around, consider these very real spa tub issues
Full Story
PHOTO FLIP71 Dream Bathtub Views
Soak in the sights with this collection of tantalizing tubs and inspiring vistas
Full Story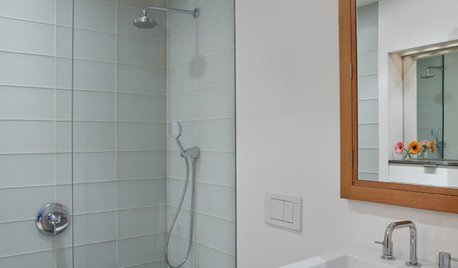
BATHROOM DESIGNConvert Your Tub Space to a Shower — the Planning Phase
Step 1 in swapping your tub for a sleek new shower: Get all the remodel details down on paper
Full Story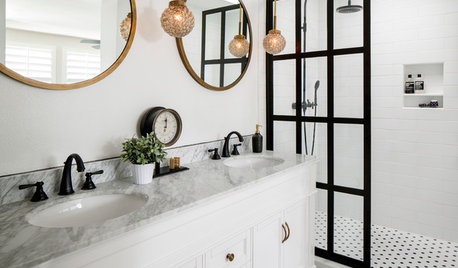
BEFORE AND AFTERSBefore and After: 6 Bathrooms That Said Goodbye to the Tub
Sleek showers replaced tub-shower combos in these bathroom remodels. Could this be an option for you?
Full Story
BATHROOM TRENDSData Watch: Homeowners on Keeping — or Ditching — the Master Tub
Our 2017 U.S. bathroom trends study shows that some owners upgrade their tubs, while a sizable number bid them goodbye
Full Story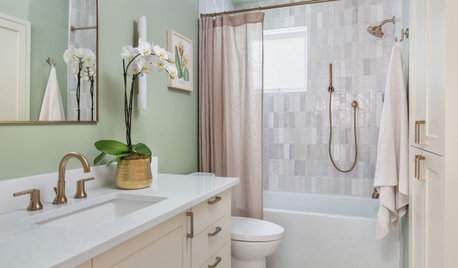
HOUSEKEEPING4 Secrets to a Shiny-Clean Bathtub
Learn how to get your bathtub sparkling clean and keep it that way
Full Story


crazy4craftsmanOriginal Author