


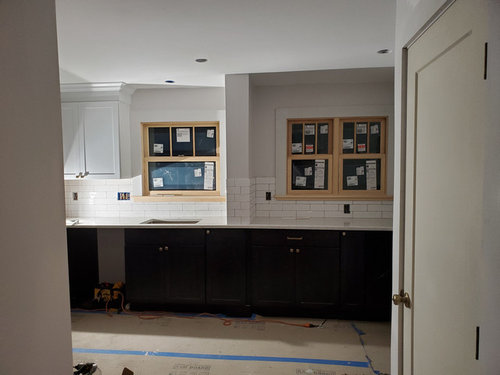
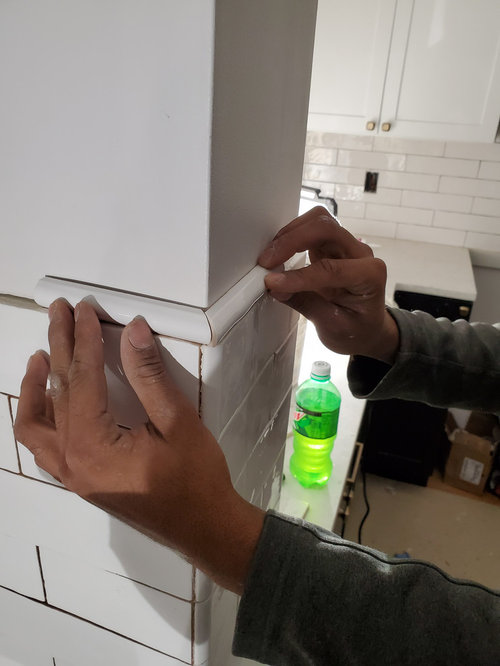
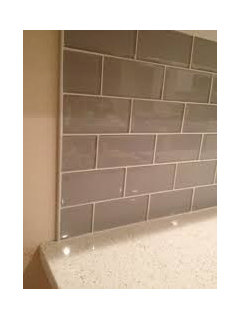
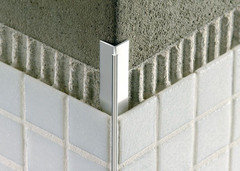
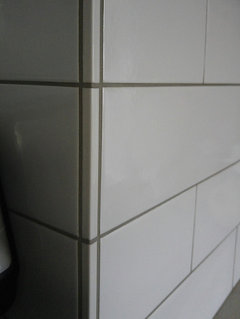
Tile Backsplash- Pencil rail trim corners are off. Alternative ideas?
Rebecca Mauri
4 years ago
last modified: 4 years ago

Featured Answer
Sort by:Oldest
Comments (19)

Hillside House
4 years agoRelated Discussions
tile experts, others, please weigh in / give advice
Comments (6)Clumsy, my patuty!! WOW!! Where do you live??? Can I come out and tile your bathroom??? :-) In all seriousness, that's going to be one sweet masterpiece to put together! Before I get to your questions, though I do see one problem. It's going to be tough to run the chair rail through the shower and have any kind of glass enclosure. Not impossible, but tough. You would have to work together with your glass guy to figure out EXACTLY where the glass would go, so you could leave notches in the chair rail. I can guarantee you-- they're not going to notch the glass for you. :-) Now, on to the questions: #1-6) What you have drawn is excellent. With reference to the subway tile, no, the corner pieces do not need to be mitered. What you can do is cut the pieces, but then turn the cut edge into the field, and use the "factory" edge as the bullnose. Now, I said they don't NEED to be mitered. However, if you'd PREFER to miter them, there's no reason why you couldn't. It's not like it's ceramic where you'd have to worry about a sharp edge. As for the chair rail and liner, you're right. Those WOULD have to be mitered. The biggest tip I could give you about mitering the chair rail would be to have a piece of 2x4 handy with a 45 degree mitered end on it. You can place the mitered side of the 2x4 against the wet saw tray table's edge, and that'll give you the correct angle, and the thickness of the 2x4 will give you something to make sure you're standing the chair rail up straight while you cut it. If you decide that you want to miter all the outside corner tiles, the only advice I can give you is leave a little "meat" on the edge. You don't want to take the miter all the way to the face of the tile. If you do, you'll end up with an extremely ragged edge. Leave 1/16" of meat or so on the front edge. The finished miter will still look just as tight, and it'll be 100% stronger. #7) Don't worry about continuing the cuts. Atleast not on the subway tiles. For the most part, the ONLY time you really need to worry about it is when you use a diagonal layout. With running bond (the brick joint pattern), there's no need to continue it. Take each wall individually. Now, the best thing is to center the walls. However, sometimes that gives you small pieces on each end. With a square layout, moving the layout over half a tile, so the tile is centered instead of the grout joint, the problem is solved. With running bond, if you move it over half a tile, it puts you right back where you started!! So how do you move the layout over and still keep it centered? Move it over a QUARTER of a tile (1 1/2"). What this does is it'll give you equal, but alternating cuts. Lay it out on paper and try it-- You'll see what I mean. #8) Yes, that's normal. #9) Ya had to give me a hard one!! :-) You're right-- this CAN be tricky. But you're dead on the right track. You need to figure out your coursing (each course is one tile and one grout joint). Lets say yout tile is exactly 3" high, and you're using a 1/4" grout joint. Going by your drawing, I come up with a height of 51 1/2" high. You show a 6x12 piece on the bottomwith the 1/4" joint, that's 6 1/4". Next is 12 courses of subway tile. That's 39 inches (with 12- 1/4" joints). Then the pencil liner, which, if it were me, would get an 1/8" joint (to match the joint in the 3 rows of mosaics), so that's another 1 1/8", and then I'm assuming the chair rail is 2", plus another 1/8" joint, 2 1/8". Just a side note-- this would be another reason for NOT using the chair rail, unless you have the shelf come out over the top of the chair rail. With the other three sides, you can either cap the edges of the niche pieces, or you can have the niche pieces cap the edges of the wall. But the shelf MUST come over the edge of the wall tile. You want any water running down the face of the tile, rather than going into the grout joint. Alot of times, I'll even use a piece of granite tile, and round it out PAST the face of the tile, so that it doesn't even come doen the face of the tile, but actually gives a drip edge. Okay-- back to your niche. Just for the sake of argument, lets say the height is 51 1/2". You want to take into account the thickness of the cement board, as well as the kerdi (figure 5/8"). I would also, as you surmised, give it extra as a "fudge" factor . That way if you need the play, it's there, and if you don't, you can always fill it in with thinset. If it were up to me, and the chair rail was definitely going to stay, I'd set the framing at 50 1/2". The only question is, are you going to set your levels off the finished floor, or off the subfloor? Personally, I'd set it off the subfloor, but when I actually set the tile, set it over the finished floor, cutting it in. That way, if the floor's out of level at all, you'll never see it. Either way, it's up to you. The point is, I'd set the bottom of the niche framing an inch below what you expect the actual coursing to be. #10) That's the way it LOOKS when it's done. :-) You start with a full course above by nailing a piece of wood, and tiling off of that, and then removing it afterward and cutting in the bottom. As for the Kerdi in the shower, you can patch the holes afterward with Kerdi-Fix. You want to wait as long as possible to tile the shower and bathroom floors. You never want to be working over finished work any more than absolutely necessary. #11) I already addressed this above. #12) Install your wood trim first and tile to it. #13) Diamond hole saw. You can check some of the online tile tool supply sites. if you have a hard time locating them, let me know, and I'll see what I can do to find em for you. #14) this is where we get back to the thing about going from center to 1/4 and 3/4 tiles to get back to center. It works with diagonal layout, too. One other thing to think about, and this would work as a nice design feature, too-- from the chair rail up, turn one row of subway tiles on end, running them lengthwise up the sides of your diagonal tiles as a border. WOW!! This reminds me of Rodney Dangerfields's movie Back To School-- to paraphrase right after he finishes the oral exam and says "I feel like I just gave birth!! To an apprentice!!"...See MoreKitchen Backsplash Ideas
Comments (24)Thank you for the suggestions anenemity. While I'm tempted to go all the way up on the back wall I'd like to keep some of the green. I'm leaning toward going all the way from the right wall through the left at the height of the bottom of the wall cabinet except behind the range where it'll go up to the bottom of the hood. I'm going to try taping up some paper to visualize it. As for the shelf just above the tile on the right wall. I wanted to use corbels, but I'd either have to place the shelf first and tile around the corbels or drop the tile to just about 5 inches above the counter. I'm afraid a floating shelf might not be strong enough for plates and ceramic dishes....See MoreBacksplash Pencil Rail ? with pics
Comments (29)Just found this thread while trying to find a solution to our backsplash problem. Still haven't found one, but just had to comment. We also were going to do something very similar to your original idea with the marble pencil rails, and glass tiles. We are using 4 X 12 field tiles, 2 high, then were going to do a marble pencil rail- 5 rows of the glass tiles, another pencil rail, and one more 4X12 field tile. I was heading out of town for the weekend, leaving hubby with the tiling job, and got a phone call while on the ferry that there was a problem...turns out pencil rails were going to intersect the outlets...long story short, we decided to forgo using the rails- had to take them back and lose 25% restocking fee (grrr), but I think I actually like it better now without the pencil rail, we upped the glass tiles to 7 rows, and it looks great IMHO. My question which I will post separately is what to do at the two edges where the tiles end on the wall- looks like our manufacturer doesn't make the bull-nose tiles (which I had asked hubby to look into but he never did, and now that we have started, they are closed till Monday (long weekend here in Canada). Have done a search with no successful results (this was one of them...) Personally, I'm a little annoyed with tile place not asking these questions when we were there planning and choosing the tiles in the first place, but as with so much else in this never-ending reno, we ARE learning!...See MoreAlternatives to fabricating the ubiquitous 4" backsplash?
Comments (14)Thanks, coco99. You are right. We may well have this problem. We are also doing the laundry room across the hall, and I have already learned that it is not square. dovetonsils, that is a novel thought. Is there anyway you would do me the kindness of providing a picture of your countertop? I would love to see what a shorter backsplash looks like. As I mentioned, I had thought about doing the granite quarter-round. But a lower backsplash might be an interesting compromise. That said, After polling of my family who uses the guest bath, I found most of them did in fact think one sink would be better, and more counter space. So I have asked my designer to draw up an alternative plan showing a 30" vanity centered between two 15" drawer stacks. I have no idea how hard or how expensive it will be to move the plumbing since this is an upstairs bathroom. Hopefully, it would be doable. Then we would have to tackle the mirror issue. Just one big mirror, I guess? Thank you all....See More
chispa
4 years ago PRO
PROSkippack Tile & Stone
4 years ago- PRO
Patricia Colwell Consulting
4 years ago oreet
4 years ago
Rebecca Mauri
4 years ago PRO
PROHALLETT & Co.
4 years ago PRO
PROBeverlyFLADeziner
4 years agoRebecca Mauri
4 years agoRebecca Mauri
4 years ago


Related Stories
KITCHEN DESIGN10 Gorgeous Backsplash Alternatives to Subway Tile
Artistic installations, back-painted glass and pivoting windows prove there are backsplash possibilities beyond the platform
Full Story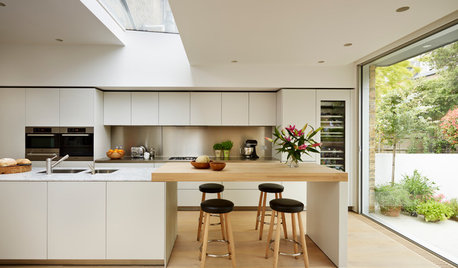
MATERIALSKitchen Ideas: How to Choose the Perfect Backsplash
Backsplashes not only protect your walls, they also add color, pattern and texture. Find out which material is right for you
Full Story
KITCHEN BACKSPLASHESHow to Install a Tile Backsplash
If you've got a steady hand, a few easy-to-find supplies and patience, you can install a tile backsplash in a kitchen or bathroom
Full Story
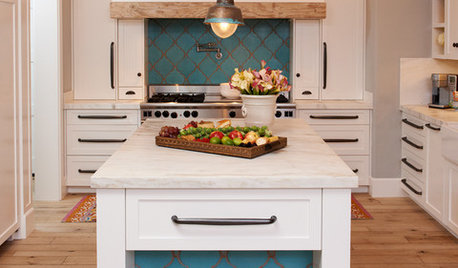
MOST POPULAR13 Tile Ideas You’ll Want to See
Playful patterns, fun colors, fresh layouts — consider these tile suggestions for tricking out kitchens and bathrooms
Full Story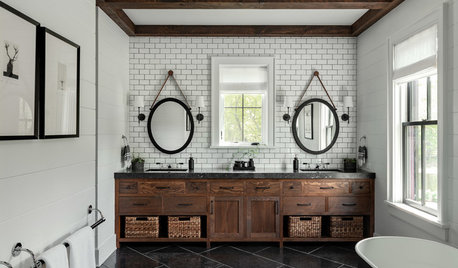
BATHROOM TILE6 Creative Bathroom Tile Ideas
Consider these tile colors, patterns and installation methods to make your bathroom more interesting
Full Story
TRIMTrim Color Tips: Get Your White Trim Right
Set off wood tones, highlight architectural features, go minimalist ... white trim is anything but standard when you know how to use it
Full Story
TILELet’s Talk Tile: An Alphabetical Guide to Tile Terminology
Get set for a tile project with this handy glossary of shapes, materials, finishes and more
Full Story
REMODELING GUIDESThe Perfect Finish for Your Tile
Bullnose? Quarter round? V-cap? Demystify trim terms and finish off your kitchen and bath tile in style
Full Story
TILEA Finishing Touch for Your Tile Walls and Floors
See how tile-edging trim adds graphic style to five bathrooms and kitchens
Full Story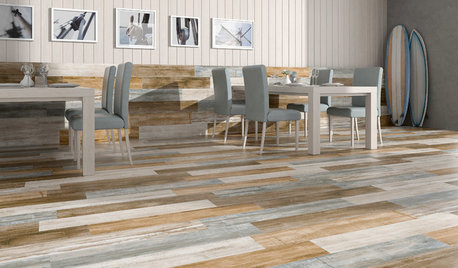
TILETop Tile Trends From the Coverings 2013 Show — the Wood Look
Get the beauty of wood while waving off potential splinters, rotting and long searches, thanks to eye-fooling ceramic and porcelain tiles
Full Story


Patricia Colwell Consulting