

Best canned pumpkin for soup and muffins ?
7 years ago
Featured Answer
Sort by:Oldest
Comments (13)
Related Discussions
Best Bran Muffin recipe
Comments (10)Perhaps the first one below is what you're remembering. Both recipes are from Cook's Illustrated, and both are very good. The first one uses Kellogg's All-Bran Original cereal (the sticks & twigs), and the second one uses actual wheat bran. I've copied my notes too. I make bran muffins weekly, alternating between these two recipes. Better Bran Muffins Cooks Illustrated 5/2007 The test kitchen prefers Kellogg's All-Bran Original cereal in this recipe. Dried cranberries or dried cherries may be substituted for raisins. Low-fat or nonfat yogurt can be substituted for whole milk yogurt, though the muffins will be slightly less flavorful. Notes: I use oil instead of melted butter, sometimes toasted walnut oil. Makes 12 small muffins or 6 jumbo muffins 1 cup raisins 1 teaspoon water 2 1/4 cups All-Bran Original cereal (5 ounces) 1 1/4 cups unbleached all-purpose flour (6 1/4 ounces) 1/2 cup whole wheat flour (2 1/2 ounces) 2 teaspoons baking soda 1/2 teaspoon table salt (I omit) 1 large egg 1 large egg yolk 2/3 cup packed light brown sugar (4 2/3 ounces) 3 tablespoons mild molasses (or light) 1 teaspoon vanilla extract 6 tablespoons unsalted butter (3/4 stick), melted and cooled 1 3/4 cups plain whole-milk yogurt 1. Adjust oven rack to middle position and heat oven to 400 degrees. Spray standard-sized muffin pan with nonstick cooking spray. Combine raisins and water in small microwave-safe bowl, cover with plastic wrap, cut several steam vents in plastic with paring knife, and microwave on high power for 30 seconds. Let stand, covered, until raisins are softened and plump, about 5 minutes. Transfer raisins to paper towel-lined plate to cool. 2. Process half of bran cereal in food processor until finely ground, about 1 minute. Whisk flours, baking soda, and salt in large bowl to combine; set aside. Whisk egg and yolk together in medium bowl until well-combined and light-colored, about 20 seconds. Add sugar, molasses, and vanilla; whisk until mixture is thick, about 30 seconds. Add melted butter and whisk to combine; add yogurt and whisk to combine. Stir in processed cereal and unprocessed cereal; let mixture sit until cereal is evenly moistened (there will still be some small lumps), about 5 minutes. (My note: Do not let sit longer than 5 minutes) 3. Add wet ingredients to dry ingredients and gently mix with rubber spatula until batter is combined and evenly moistened. Do not overmix. Gently fold raisins into batter. Using 1/3-cup measure or ice cream scoop, divide batter evenly among muffin cups, dropping batter to form mounds. Do not level or flatten surfaces of mounds. 4. Bake until muffins are dark golden and toothpick inserted into center of muffin comes out with a few crumbs attached, 16 to 20 minutes, rotating pan halfway through baking. Cool muffins in pan for 5 minutes, then transfer to wire rack and cool for 10 minutes before serving. Big Bran Muffins with Raisins and Dates CookÂs Illustrated 9/1993 You can substitute one cup oat bran for the wheat germ for a wholesome but slightly more dense muffin. My Notes: This was the best recipe so far that used wheat bran. It makes a dark, moist, flavorful bakery style muffin. ItÂs a little bit oily as is, so I make it with ½ cup oil & ¼ cup applesauce. The biggest problem was getting the time & temperature right. 20 mins. at 400 is NOT enough time to cook the insides. The first time I made them, I had to re-bake the first batch after the tops came off revealing a batter filled center. I've never use wheat germ; either I use all wheat bran or half wheat & half oat bran. Makes about 20 muffins 2 1/2 cups unbleached all-purpose flour plus 2 tablespoons (I use 1½ cups AP flour & 1 cup + 2 tbsp. white whole wheat) 4 1/2 teaspoons baking soda 1 tablespoon baking powder 2 teaspoons ground cinnamon 1/8 teaspoon table salt (I omit) 3/4 cup vegetable oil (I use ½ cup oil & ¼ cup applesauce) 2 teaspoons honey 1/4 cup molasses 1 cup light brown sugar plus 2 tablespoons, packed firm (I omit the extra 2 tbsp.) 1 teaspoon vanilla extract 3/4 teaspoon maple extract 1 1/2 teaspoons butter extract (I omit) 3 large eggs, lightly beaten 2 cups buttermilk 1 cup toasted wheat germ (I use another cup of wheat bran or oat bran) 1 cup wheat bran (not the cereal) 1/2 cup whole dates, plumped with scalding water, drained, and coarsely chopped (I pour boiling water over dried, sweetened blueberries several times, to plump & to remove excess sugar) 1 cup dark raisins, plumped with scalding water and drained (I use dried cranberries or cherries and pour boiling water over them just like the blueberries) 1. Whisk first five ingredients together in a bowl; set aside. 2. In a large bowl, whisk next 7 ingredients together. Whisk in eggs, then buttermilk, wheat germ, and bran. Let batter rest 10 minutes. 3. Whisk dry ingredients into wet mixture to partially blend. Continue mixing batter with a rubber spatula, making sure that ingredients at the bottom are incorporated into the batter. Fold in raisins and dates. 4. Cover batter with plastic wrap and refrigerate for at least 1 hour, preferably overnight (I leave it in overnight). 5. Adjust oven rack to middle position and heat over to 400 degrees. Lightly grease the top surface of 2, 12-cup muffin pans, use liners if necessary. Using an ice cream scoop, place a portion of the batter into each cup, filling to the brim (Fill them to the top). Fill empty muffin ups with water to ensure even baking. Bake until muffin tops brown, about 20 minutes. If muffins are not done after 20 minutes, reduce temperature to 350 degrees and bake until muffins test done. (This baking method works for me: Bake 10 minutes at 400 and then 15-20 minutes at 350. Check with pick; make sure center of muffins are completely done.) Let muffins cool in pan for 5 minutes, and then transfer them to a wire rack. Serve warm or at room temperature....See MorePumpkin Soup
Comments (3)I have two good ones for butternut squash which would also do for fresh pumpkin: BUTTERNUT SQUASH AND APPLE SOUP 4 Servings - 1 TBS olive oil 1 1/4 lbs butternut squash, peeled and seeded 1 medium leek, trimmed 1/2 onion, chopped 1/2 medium carrot 1/2 TBS fresh grated ginger 1/2 TBS fresh chopped thyme 1/2 teasp dried sage 1 small apple, peeled and cored 2 cups chicken or vegetable stock 1/2 cup unsweetened apple juice 1/2 - 15oz can cannellini beans chopped fresh chives sea salt and FG black pepper 1. Chop the leeks, using only the white and light green parts. Dice the butternut squash, carrot and apple into 1/2 inch cubes. 2. Heat the oil over a medium high heat in a large saucepan, then add the squash, leeks, onion, carrot, ginger, thyme and sage. Cook for 10 minutes or until the vegetables are slightly soft, then stir in the apple. 3. Pour in the stock and apple juice and bring to the boil. Reduce the heat, cover and simmer, stirring occasionally, for 20 minutes or until the vegetables are tender. 4. Pour half the soup into a blender or food processor (I used a stick blender) and puree (pur) until smooth. Return the puree (purée) to the saucepan, add the beans and cook for 2 minutes over a medium heat until hot and bubbling. Adjust seasoning and serve sprinkled with the chopped chives. Source: Adapted from - Rick Gallop's GI Diet Green-light Cookbook ****************************************** ROASTED GARLIC & BUTTERNUT SOUP 6 - 8 servings (My own recipe. I always make too much!) 1 1/2 lbs butternut squash - after baking there should be about 2 cups of mashed squash 1 lg Spanish onion - peeled and cut into 8 chunks 1 medium leek - washed & chopped, including best-looking top green leaves 1 teasp cumin 1 head of garlic - sliced across top to expose cloves 2 - 3 cups chicken or vegetable broth 200 ml (about 3/4 cup) light cream or half & half olive oil fresh ground black pepper and salt to taste homemade garlic croutons (optional) & chopped flat leaf parsley Utensils needed: oven or toaster oven and roasting pan or tray, frying pan & lid, blender or food processor, large heavy saucepan with lid. 1. Preheat oven or toaster oven to 300F 2. Split, quarter and seed butternut squash, and arrange on roasting tray together with cut chunks of onion and head of garlic. Drizzle with a little olive oil and roast 1 hr or until all is golden and tender, including garlic. 3. Clean and chop leek, including top green leaves. Sauté in a little oil for in frying pan 5 minutes. Then add 2 cups of chicken broth, turn down to simmer with lid on until tender - about 12 - 15 minutes. 4. When butternut etc is cooked, scrape it from skin and place in food processor along with the onion, cumin, and some pepper. Squeeze the garlic cloves - which should be soft and buttery - from their skins and add to food processor. 5. Add some of the rest of the chicken broth and process to a puré. Gradually add the leek and liquid from pan. Process until all is smooth, adding more of the chicken broth as needed. 6. Place the mixture in the saucepan and gently heat. Add the rest of the broth as needed for the desired consistency.. Add the cream, reserving 2 TBS for swirling as a garnish when served. Check the seasoning - adding salt and pepper as needed. 7. Serve with a swirl of cream, chopped parsley and small homemade garlic-flavoured croutons. SharonCb...See MoreLOOKING for: Pumpkin oat muffins
Comments (2)Here ya go: PUMPKIN PECAN MUFFINS 1/4 cup oats, quick-cooking (not instant) 1/3 cup chopped pecans 1 tsp. cinnamon 1/2 tsp. salt 1 cup pureed pumpkin 1/2 cup oil 1 egg 1 cup all-purpose flour 1 tsp. baking powder 1/2 tsp. baking soda 1/2 tsp. nutmeg 3/4 cup brown sugar 1/4 cup milk 1 tsp. vanilla TOPPING: 1/4 cup oats, quick-cooking (not instant) 1/4 cup brown sugar 1 tsp. cinnamon 1/4 cup all-purpose flour 3 Tblsp. chopped pecans 1/4 cup margarine, softened Heat oven to 400° F. Mix together and fill muffin cups 3/4-full. Mix topping and sprinkle evenly over top of muffins. Bake 20 minutes....See MoreWhat is the best way to start a pumpkin patch from scratch?
Comments (2)Well, the area you decide to till is entirely up to you, and will depend on the varieties and number of plants. Keep in mind that even if you are going to want an acre of pumpkin, the only reason to work a continuous area of soil is for efficient use of machinery. The only places that 'need' be tilled/turned (making conceptual room for no till gardening) are where the seeds will be sown/ transplants are to be placed. Some people do plant in mounds and whether you feel the need might be best determined by your climate and terrain. Mounds are not strictly necessary, but can help with drainage. If you have a flat area that can flood or not drain well, and you typically get ample-to-excess rainfall, then mounding can help. If your area is slopped, or raised, mounding can be unwieldy and can be affected by erosion. Your plans may not include them, but people who garden in raised beds are essentially growing all their plants in 'mounds'. Spacing is determined by variety. So, were it me, I would start by choosing my varieties. The ones you decide on will determine the amount of space you need, as well as distance apart. Bush types obviously need much less space, but some vines can be incredible growers. I probably live in a more Southern climate than you at 5a (Tn.), and grow a winter squash called North Georgia Candy Roaster. I raise mine under row covers to keep the vine borer off them, but they, like many pumpkins and winter squash, are vigorous vines that prefer space. There are a number of Candy Roaster and Banana types that are fun to watch grow, as well as extremely versatile in the kitchen. They can be made into soups, roasted, sauteed, made into desserts, etc... The flavor of the one I grow is mild, but quite delightful. Some of these get to enormous sizes! Choose varieties that do well in your climate, and can reach maturity based on average first and last frosts for the number of days between planting and harvesting. If you have vine borers, consider Moscata types. The staple, and probably the most popular, is the Butternut, but these too come in many shapes and sizes. They also have many uses in the kitchen, and fill your requirements for texture. Variety is always nice, and with seed catalogs now on the internet, it's more convenient than ever to find a huge selection from which to choose. I would start amending the space now. Once you decide on varieties, then plan out where you want to plant. Start dumping organic matter in a 3' - 4' round heaps. If you have access to 'clean' manure (no herbicides), dump that there too. Basically, make compost piles where you are going to plant seeds. Because you have so much time before planting, the manure can be raw (uncomposted.) In the fall, turn the organic matter into the soil (add the types of fertilizer that need time to decompose if you wish,) then mulch with leaves. Let that sit all Winter. Then, in Spring, till in your mulch and fertilize... mulch again. Plant when your soil warms for the varieties you've chosen. If you want to kill the grass in the entire area, you can either mulch thickly if you have access to such resources, or put down newspaper and cardboard. Wood chips and thick layers of straw/hay/grass clippings, leaves, etc... are examples of mulches that would be appropriate given the length of time between now and planting. Oh, and a soil test from a reputable lab (like those provided by your County Agricultural Ext. - in the U.S.) is the best way to find your soil pH and get recommendations for what amendments are appropriate for your soil and conditions. Hope that gets you started with ideas....See More- 7 years ago
 7 years agolinnea56 (zone 5b Chicago) thanked sleevendog (5a NY 6aNYC NL CA)
- 7 years ago


Related Stories
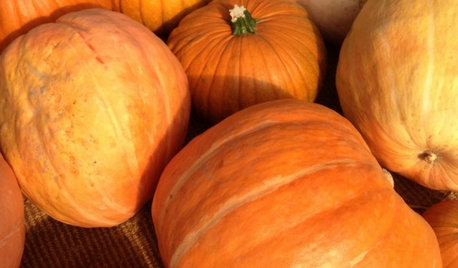
EDIBLE GARDENSSummer Crops: How to Grow Pumpkins
Start in spring to grow your own fall decorations and have plenty left for pies
Full Story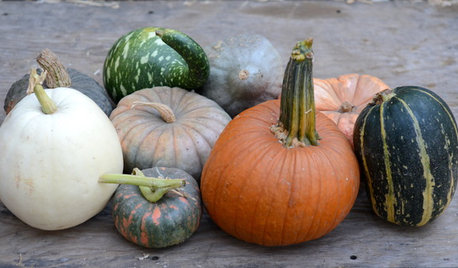
GARDENING GUIDESJoin Us for a Parade of Pumpkins
Fall eye candy: Get to know 9 winter squash varieties, including Long Island Cheese and Blue Hubbard
Full Story
DECORATING GUIDESPretty Up Pumpkins With Paint
Put down the carving knife — we've got a better way to prep your pumpkins for Halloween
Full Story
FALL AND THANKSGIVINGYour Guide for a Simpler Thanksgiving
Ease the stress of hosting the big day with these tips
Full Story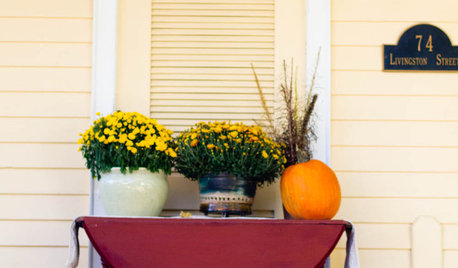
HOLIDAYSMercifully Minimal Halloween Decor
Don't fret last-minute Halloween decorating — sometimes just one perfect pumpkin is all the fall embellishment your front yard needs
Full Story
SHELTERING AT HOME15 Essentials for the Baker’s Kitchen
You can turn out delicious home-baked goods with ease when you own these utensils, tools and pans
Full Story
LIFEAt-Home Cures for Autumn’s Time Change Blues
The long, dark evenings of late fall and winter can be daunting. Lighten them up with these tips
Full Story
HOLIDAYSCelebrate Fall With 9 Nature-Themed Outdoor Decorations
Brighten up your landscape with strategically placed pumpkins, pots of fall flowers and more
Full Story
HOLIDAYSYour Guide to Stress-Free Thanksgiving Prep
We break down shopping, cleaning and cooking into manageable bites so you can enjoy yourself on the day
Full Story
ORGANIZING5 Storage Container Materials to Consider for Sustainability
These earth-friendly materials can help you get organized
Full Story
annie1992