


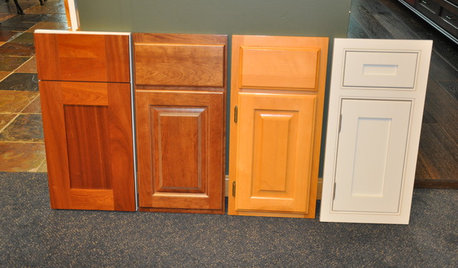
What construction technique do you use for cabinet doors?
Matt
5 years ago
Featured Answer
Sort by:Oldest
Comments (46)
 PRO
PROiCustomSofa
5 years ago
dan1888
5 years agoRelated Discussions
What Techniques Did You Try This Year?
Comments (4)We too read E.Coleman's book and are hooked. We purchased a used 100' hoop greenhouse and set up 50' of it last fall. We were late getting some seeds going but did manage to harvest through Dec. We used cold frames made from materials we had on hand. How amazing it was when the lettuce/spinach/chards/oriental greens/etc. started to grow again in March. By mid April it was salads galore and we're just now finishing up harvesting everything that was planted last fall. All this is even more amazing due to the fact that our greenhouse location received only three hours of direct sunlight all winter. Winter in itself was at it's "best" here. Three feet of snow from Dec. to April. We had to continually "shovel" snow away from the greenhouse for fear of it caving in. But I'm sure it also added insulation and protection to the plants. Since we live off grid and heat with wood, seed starting wasn't as successfull as it can be given consistant heat and light sources. I've heard there are DC grow lights but haven't as yet located them and are unsure how much they would tax our solar system. So much of our greens were started in the cold frames in the greenhouse. The sun has now crested the pine trees that had blocked it during the winter months and is doing wonderful. We have used row covers for a few years and find them extremely useful. I use them for shading(hung from the hoops of the greenhouse) as they will hold the heat on hot days and wilt lettuce. We also use raised beds and stones to add heat around the peppers....See MoreSecretary cabinet - where do you put it and how do you use it
Comments (9)My mom had hers at the bottom of the steps to the second floor and at the entrance to her kitchen in a hallway. It made a great place to set down your keys when entering the house. Hers had a top to it and she put collectibles in there. In the years since it was moved into a corner of her living room where she could open it up to use it for letter writing. My sister now has it proudly displayed in her living room. A wonderful, usual piece of furniture. In the drawers were the phone books, catalogs etc. Mary...See MoreWhat do you think of glass cabinet doors near the stove?
Comments (8)I have glass doors on the cabinets on each side of my stove. I used frosted glass though, and it is even worse than clear glass about showing grease spots. I have no trouble at all keeping the doors clean. I have a really good hood though, so that probably makes a difference. As long as you have a strong hood that pulls out the smoke and grease, you should have no trouble at all with the glass staying clean....See MoreWhat software do you use to make layouts & test cabinet colors/styles?
Comments (7)LWO- take a look at the Bluebeam app I mentioned- only available for iPad (which I consider the dark side :) I almost got an iPad mini just to use it. I still might but tech can simply be a bottomless pit and I always have a list. You can download a trial of the full BB (standard -no need for CAD) version on your laptop to get some idea of using it. Be a good idea to check the iPad resources they list to see which tools work and which don't before taking the plunge. Take a look at the sequence tools- great for numbering cabinets on pdfs from 2020 floor plans. Overall you can: markup, measure, place shapes, places appliances, doors, windows (to scale) draw lines, make notes, and insert an image. Getting an image to scale takes a little practice/math, measuring isn't too hard. The iPad app also imports photos and video taken with the tablet which is one of the big reasons I consider it. I kicked around a Surface Pro- I travel a lot and was looking to cut some of the weight. It's easy enough for me to move the Chief license. 2020 is a pain but I don't use it enough to care :) I have a 1.5 lb USB monitor for a second screen that will work with it. Transferring a Bluebeam license between machines is a pain and I couldn't live without it. A full version is $250 and (and I already have two), tack that onto an i7 Surface..$$$. I'd just as soon put 2 grand into an upcoming Skylake laptop. So I shelved my Briggs and Reilly bag and got a back pack for now; saved a few pounds and my back :)...See More
cookncarpenter
5 years ago
Hillside House
5 years agolast modified: 5 years ago- PRO
None
5 years ago Hillside House
5 years agolast modified: 5 years agodisantodesign
5 years agobry911
5 years ago PRO
PROSombreuil
5 years agoMatt
5 years agoMatt
5 years agoMatt
5 years ago PRO
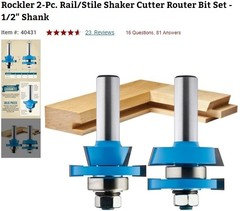
PROScherr's Cabinets & Doors Inc
5 years agoMatt
5 years ago- PRO
User
5 years ago 
salex
5 years agobry911
5 years agolast modified: 5 years agobry911
5 years agoMatt
5 years ago- PRO
iCustomSofa
5 years ago - PRO
None
5 years ago bry911
5 years agolast modified: 5 years ago- PRO
Sombreuil
5 years ago sushipup1
5 years ago
zmith
5 years agolast modified: 5 years ago- PRO
Scherr's Cabinets & Doors Inc
5 years agolast modified: 5 years ago bry911
5 years agolast modified: 5 years ago- PRO
Scherr's Cabinets & Doors Inc
5 years ago bry911
5 years ago- PRO
iCustomSofa
5 years ago Matt
5 years ago- PRO
Scherr's Cabinets & Doors Inc
5 years agolast modified: 5 years ago Matt
5 years agojdesign_gw
5 years agoMatt
5 years agosalex
5 years ago- PRO
Scherr's Cabinets & Doors Inc
5 years ago Matt
5 years agosalex
5 years agoUser
5 years agoUser
5 years ago- PRO
Sombreuil
5 years ago Matt
5 years agoMatt
5 years agosalex
5 years ago


Related Stories
KITCHEN CABINETSLearn the Lingo of Kitchen Cabinet Door Styles
Understand door types, materials and cabinet face construction to make the right choice when you shop
Full Story
KITCHEN CABINETSCabinets 101: How to Choose Construction, Materials and Style
Do you want custom, semicustom or stock cabinets? Frameless or framed construction? We review the options
Full Story
KITCHEN DESIGNPopular Cabinet Door Styles for Kitchens of All Kinds
Let our mini guide help you choose the right kitchen door style
Full Story
KITCHEN STORAGE8 Cabinet Door and Drawer Types for an Exceptional Kitchen
Pick a pocket or flip for hydraulic. These alternatives to standard swing-out cabinet doors offer more personalized functionality
Full Story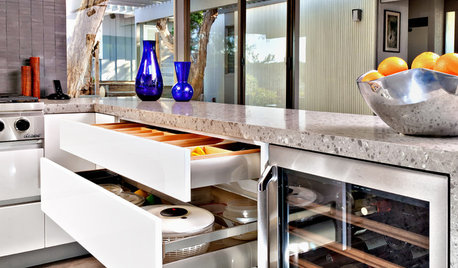
KITCHEN CABINETS9 Ways to Configure Your Cabinets for Comfort
Make your kitchen cabinets a joy to use with these ideas for depth, height and door style — or no door at all
Full Story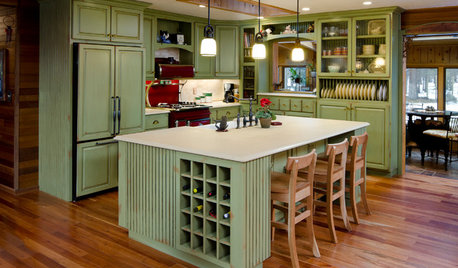
MOST POPULARHow to Reface Your Old Kitchen Cabinets
Find out what’s involved in updating your cabinets by refinishing or replacing doors and drawers
Full Story
KITCHEN CABINETSChoosing New Cabinets? Here’s What to Know Before You Shop
Get the scoop on kitchen and bathroom cabinet materials and construction methods to understand your options
Full Story
HOUSEKEEPINGHow to Clean Your Kitchen Cabinets
Learn the techniques for keeping stained, painted and laminate cabinets in tiptop shape
Full Story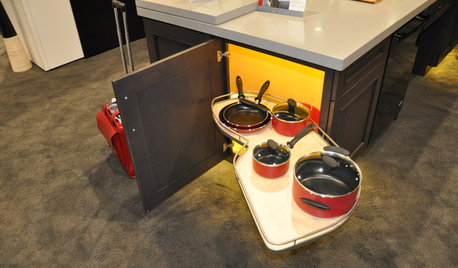
KITCHEN CABINETSWhat to Shop for in Cabinet Hardware and Millwork
Learn about finishing touches for kitchen and bath cabinets to pick the options that will work best for you
Full Story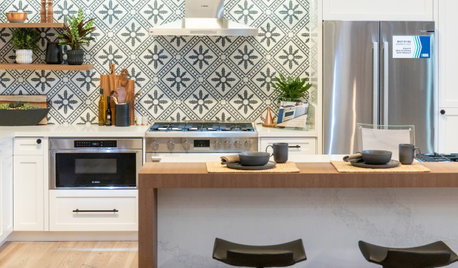
EVENTSThe Latest Looks for Cabinets at IBS and KBIS 2020
White and wood finishes dominated at the trade show, but companies also displayed black, blue, green, gray and more
Full Story
Scherr's Cabinets & Doors Inc