


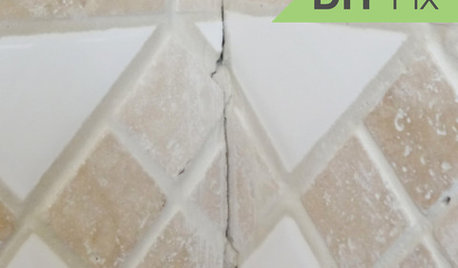
drywall repair from backsplash removal
allie
5 years ago
Featured Answer
Sort by:Oldest
Comments (8)

rantontoo
5 years agoRelated Discussions
Plexiglas over painted drywall for backsplash color: PMS376
Comments (8)live wire oak: Thanks for your reply! Yeah, I always get the two plastics mixed up! I think the deal is acrylic (Plexiglas) vs. polycarbonate (Lexan). I know that one is less susceptible to scratching, but more prone to yellowing, and the other is the reverse. Here, I've found a bullet list comparing the two--I'm going to quote it here for my own reference: Key characteristics/differences, acrylic (Plexiglas) compared to polycarbonate (Lexan): More likely to chip, less impact resistance then polycarbonate. (still 10-24 times more resistant than glass) Less likely to scratch. More of a consumer (household) level and is easier to find at hardware stores. Does NOT yellow after time. Better clarity and can be restored to optical clarity. Key characteristics/differences, polycarbonate (Lexan) compared to acrylic (Plexiglas): Impact/chip resistance is much higher with polycarbonate. (about 30 times more resistant than glass) More likely to scratch. Substantially more expensive. (roughly 2 to 3 times) Used for more industry applications. Bulletproof when thick enough. More bendable. More formable. Yellows over time due to ultraviolet rays Easier to work with (cut, less likely to break) Poorer clarity, diffuses light, can lighten (could be positive). --from hemineko.net The somewhat awkward semantics (what compared to what?) makes this summary a bit confusing, but it was one of the first summaries I could easily Google. trixieinthegarden: Interesting stuff! Great ideas! Thank you for the information! fran1523: Thanks for commenting! How has it held up?...See MoreAnyone Remove Old Tile and Retile Their Own Backsplash?
Comments (17)The description of how to do it sounds harder than it actually is. You will need to remove the drywall entirely and replace it with cement board It's easier than replacing it with more drywall as you don't have to mud it flat and the fiberglass mesh tape just needs the lightest skim coat of thinset to set it. To be able to do that job, you will need a heavy bladed utility knife, a flat prybar, a hammer, a T-square, a cordless drill of at least 12v, stainless steel screws, fiberglass mesh tape and cement board. The cement board is 36" x 60" and you will need a way to haul it home. Screw the cement board to the studs, getting the screw heads slightly indented into the surface of the board. Spray the cejent board with water and mix up a small batch of the thinset and use a flat bladed drywall tool to smooth it lightly over the seam. Imbed the fiberglass mesh tape into that smoothly and let dry. To be able to install the tile, you will need the dry mix thinset, a bucket to mix it in, a large paint stir stick to mix it, a notched trowel to apply it, the correct amount of tile, tile spacers and you will need a tile saw. You can purchase an inexpensive one for around $80 and have it for as long as you need it to be able to little bit the project to death. If you rent, you can expect to pay that $80 for a 24 hour rental, so really, it makes more sense to buy the saw and then you can take as long as you need to and you'll have it for other projects. Once the thinset has cured, you will need to grout it. You will need the powdered grout of your choice, another bucket to mix it in, another stir stick, a grout float, a couple of sponges and a bucket of water. Some microfiber cloths to polish off the rest of the residue after it's dried is also a good idea. You will want to seal the grout, so you will need an applicator bottle and grout sealer. Getting the items you need is half the battle. It's also a good idea to practice on a garage sale find and create yourself a small patio table first while you get the hang of how to mix up the thinset and grout....See MorePreparing drywall (after removing old backsplash) for new backsplash
Comments (3)I'm not a professional and it depends on the size of the area to be repaired, but it's pretty easy to cut out damaged dry wall and then mud the patch seams. You want to do whatever will maximize the clean, level surface. And, yes, you will need to feather and sand your mud until it is dead level. I wouldn't paint the mudded, repaired drywall before tiling, at least, I never have. And I've never primed drywall before mudding it. If you've only read or watched videos, be sure you practice. If your repair area is large, even if just 'paper', maybe hire somebody?...See MorePictures - Drywall installation where backsplash was taken out
Comments (24)Got all the materials today. Still doing work on the stairs so won't be able to get to it until Monday. Is the premixed Sheetrock joint compound with the green lid in a plastic jar about as effective as mixing the powder? To me, cutting the drywall rectangle in a straight line was tough given it's only 0.5 sheetrock and there are studs/wiring behind the main areas. Cutting the board in the same shape with holes for electrical is easy, but not sure how to mix and integrate the top part when it's the bottom of the kitchen cabinet cutoff, and the bottom touches the countertop (which will be replaced with granite, might as well wait for that to come in). So that's where I find this situation unique .. as opposed to a hole in a large wall....See Moreallie
5 years ago PRO
PROJoseph Corlett, LLC
5 years agoallie
5 years ago
Related Stories
BATHROOM TILEQuick Fix: Repair Cracked Bathroom Grout
Banish an eyesore and safeguard your bathroom from water damage in 30 minutes or less with this DIY repair
Full Story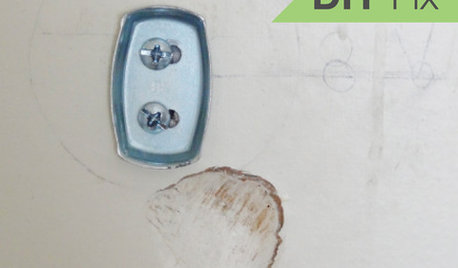
HOUSEKEEPINGQuick Fix: How to Patch a Drywall Hole
Dents and dings disappear, leaving your walls looking brand new, with this fix that even a novice can do
Full Story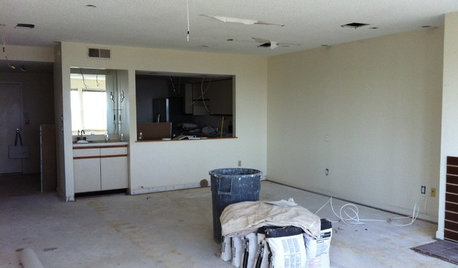
DISASTER PREP & RECOVERYRemodeling After Water Damage: Tips From a Homeowner Who Did It
Learn the crucial steps and coping mechanisms that can help when flooding strikes your home
Full Story
KITCHEN DESIGN10 Gorgeous Backsplash Alternatives to Subway Tile
Artistic installations, back-painted glass and pivoting windows prove there are backsplash possibilities beyond the platform
Full Story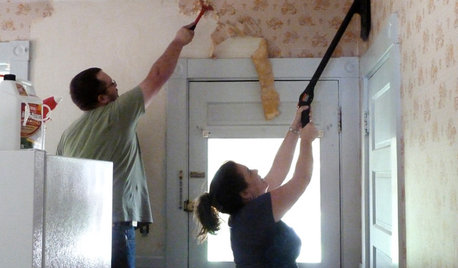
DECORATING GUIDESHow to Remove Wallpaper in 4 Steps
Learn the best way to remove wallpaper with only water (and elbow grease) so your next wall treatment will look great
Full Story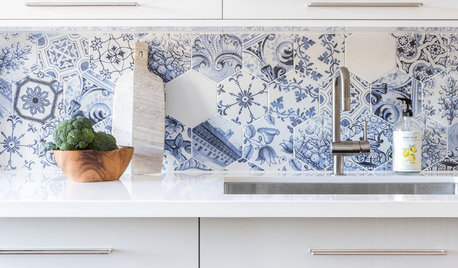
KITCHEN DESIGNBehold These Bold Kitchen Backsplashes
See how these 62 backsplashes bring beauty, personality and style to their kitchens
Full Story
MATERIALSKitchen Ideas: How to Choose the Perfect Backsplash
Backsplashes not only protect your walls, they also add color, pattern and texture. Find out which material is right for you
Full Story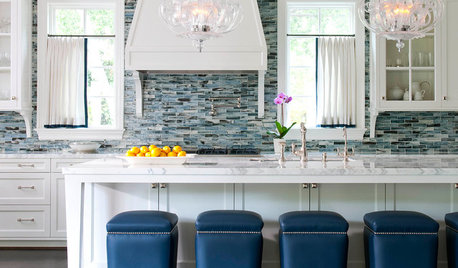
MOST POPULARBattle of the Backsplashes: Glass Mosaics vs. Natural Stone
Read about the pros and cons — and see great examples — of these two popular kitchen backsplash materials
Full Story
MATERIALSRaw Materials Revealed: Drywall Basics
Learn about the different sizes and types of this construction material for walls, plus which kinds work best for which rooms
Full Story
KITCHEN BACKSPLASHESWhy You Should Embrace a Solid Slab Backsplash
The effect is stunning, and yet the cost can be minimal. Here’s what to know about using full slabs of stone in your kitchen
Full Story


bossyvossy