


Beauty related money saving ideas: share yours
arkansas girl
6 years ago
last modified: 6 years ago
Featured Answer
Sort by:Oldest
Comments (73)

Izzy Mn
6 years ago
wildchild2x2
6 years agoRelated Discussions
Share tips on saving money on gardening
Comments (22)For nursery pots I started using old food cans, and pop bottles cut down to about 6" deep, & poke a few holes in the bottom. Seed saving from one year to the next. You can't save seed from foods you buy at the grocery store because most are hybrid varieties and won't reproduce true. You have to start with heirloom varieties, and save those seeds. Make my own compost from leaves, paper, grass and kitchen waste. You cut down on a lot of trash by composting junk mail and boxes that canned pet food comes in. Cardboard makes good compost, as does newspapers, paper grocery sacks, clothing labels, dryer lint and cereal boxes. Make your own seed starting mix from peat and perlite, because it needs to be sterile to prevent damping off and diseases that attack tender new growth. I make my own potting mix from screened compost, sand, used seed starting mix and perlite. It's especially important to have a loose, open potting mix with my nursery pots that have straight sides (cans and pop bottles) otherwise it would be too difficult to get plants out of them for up-potting. Cheryl...See MoreWhat things have you cut back on to save money?
Comments (53)Hi Kath, Congrats on getting your nursing degree! I'm sure you worked VERY hard for it! Use the DOLLAR STORES, esp. for laundry/cleaning items, Deoderant, toothpaste, misc. cutlery, glassware, plastic storage containers, etc. Get that crockpot out and use it! I work 2 jobs and I am so thankful for my crockpot! Plan ahead for meals, especially with you working. Get a FOODSAVER and make ahead meals and freeze them. Get the mixed salads at the lower cost grocery stores, roast some chicken...you've got dinner for that evening and a meal to take to work the next day! Take your own lunch and snacks to work. Refill water bottles. Buy a filter for the sink or a filtered water container. $10 at Walgreen. $5 to renew the filter every 3 months. Drink more water instead of fruity drinks or soda. You'll be surprised how you will get used to in and REALLY only WANT water. Buy secondhand clothing for yourself and your kids. CONSIGN any good clothes you need to get rid of, shoes, purses, belts. Our local Goodwill stocks underwear by HANES...'seconds' I guess. They sell for 80 cents apiece. Sell your nursing books you don't want to keep on the Internet (amazing.com half.com) Good Luck!...See MoreSaving money on pets?
Comments (41)BIRDS Yes on the cheap bird toys, and saving money on diet, too! :D TOYS: Get a 1 qt. stainless steel bucket (google for it) on the web for less than $5 and it will last forever and go in the dishwasher for cleaning. Hang it where he won't go potty in it, and cross your fingers. 1 qt. is a fine size for an Amazon. The big macaws and such can do a 2 qt. bucket. Just use the SS, no other metal, as other metals can contain zinc, which is toxic to birds. For a little bird like a 'tiel or 'keet, you can use a clean yogurt container, cut vertical slits in the side, and fasten it to the side of the cage with an electrical cable tie. Then fill the bucket with his "used" safe broken toy parts, new toy parts, smooth cleaned beach rocks he can pick up but not swallow (fun to drop on the cage floor for the noise), and SAFE branches, flowers, leaves, and pinecones from the yard. If you don't know which plants and trees are safe for birds, you can google for the info. If it's not nesting season, you can also put in balls of wadded up paper... but don't do that during nesting season. If your bird loves to undo screws with his feet (cockatoos love this), get some stainless steel washers, nuts and screws and thread them through a small block of wood, or some plastic disks. That'll keep 'em busy. They're expensive to buy, but they last forever. At night pick up the toys off the cage floor and wash them (I put the plastic stuff in the dishwasher, but not the wood or rope), then return them in the morning. My birds all LOVE their buckets. I love them because I don't have to string a bunch of stuff. Another toy my birds love: grab a few drinking straws, cinch them in at the "waist" with a cable tie to form a pompom. My 'zon also loves those plastic easter eggs, but watch hard plastic as it can be sharp if broken. You can hide goodies in those plastic eggs, too. I also buy plastic chain at the hardware store and run it through the dishwasher to sterilize. Then I cut fleece in 1/2" to 1" wide strips. Don't make the strips long enough to wrap around a little neck. Thread the fleece through the chain, knot it once, and tie beads, blocks, Mirabella beads and hoops, and bird toy parts on the ends of the strings. It's very colorful, very interesting, and the fleece and chain are indestructible (provided you use heavy enough chain for the bird in question). You can replace the toy parts when they're chewed off. I save a ton of money by going to the bird fairs and buying toy parts there. Never take your bird to those places, and carefully sterilize everything you get there before giving it to your bird. If you have any local parrot stores or breeders, they can probably tell you where and when the shows are, or watch your local newspaper in the classifieds in the Birds For Sale column. If there are no bird fairs in your area, watch eBay and you can pick up bargains there. Again, sterilize everything that might have come from where other birds are. To sterilize things, I use Avicine (google for it), since it's recommended by the top avian disease researcher in the country. There is also a great section called "The Toymaker" at birdsnways.com. But use your head, as there's no guarantee everything there is safe for every bird. I strictly avoid all cotton rope for my 'zon as he gets too into his toys, and he once got his foot caught in it. We were lucky he wasn't hurt. He snaps bird-tanned rawhide immediately in two, so that's no good for him either. But they can't bite the fleece in two, and the fleece doesn't unravel dangerous threads. You can also sometimes find cheap baby toys at the thrift shop, but be careful they're safe, and clean them well. My birds LOVE their buckets! I think it satisfies the need for them to forage as they rummage through the contents trying to get to the bottom. You can switch the toys out to keep it more interesting. One set is being washed, so you use a different set. I swap buckets between my 'zon and RFM, and also between my G2 and TAG. But I don't give the medium sized bird's toys to the big birds or they would destroy them in a heartbeat. I usually soak the dirty toys in the bucket in water for a while, then hand scrub them with a stiff brush. Then I soak them in Avicine water for a few minutes, then rinse thoroughly. I don't soak the toys in Avicine first, as I want them to absorb water, not chemicals. BTW, if you're handy with a saw, you can pick up chunks of 2x4 (pine or fir) free out of a burn heap at a new building site, but ask their permission before you take anything. With wood stuff, you can sterilize it by baking it in an oven at 200 degrees for 1/2 hour -- but double-check me on the temp and time, please, by googling for the info (that's just from my memory). Then cut it into suitable sized chunks and drill holes in it if you want to string it, or just toss it in the bucket. NEVER give them treated lumber, as it will poison them. Or, just buy a 2x4 at the lumber yard. You don't have to dye the wood. FOOD $ SAVINGS: Seeds are not good for birds; but if you sprout the seeds they're one of the most nutritious foods in the world. Invest in a decent sprouter (I love my EasySprouter). Learn safe sprouting methods. If you only feed organic, there are mixes you can buy on the web. If you can't afford organic, there are lots of safe things in a good health food market bulk department that will sprout -- ask the clerk. You can sprout lentils from the grocery store (very cheap). You can sprout pigeon mix from the feed store (my birds get these every night). That is very inexpensive! You can sprout parrot seed, but it's expensive and it often contains other junk you have to pick out like dried fruit, nuts, and pellets -- no good. Feed the sprouts when the tails are still just teensy nubbins, don't let them grow long. That's the optimal nutrition, and the longer the tails, the more bitter the sprout. The birds just snap the tails off and drop them anyway. Birds LOVE sprouts -- that's mostly the way they eat seeds in the wild, if they can. Of course, they need fruits and other veggies, too, so shop for bargains. Do feed organic if you can; otherwise wash very well and peel most stuff (they peel their own grapes). And your 'zon needs the equivalent (in size) of two peanuts (out of the shell) in nuts per day. More than that can give him fatty liver disease. I vary which kind of nut my birds get every day -- all UNsalted and preferably raw. You can sprout raw nuts, too. Just soak them over night and rinse well. They don't grow tails. Macaws need more nuts than other birds. My RFM (mid sized macaw at 1 lb and 2' long) gets about 6 nuts a night. Almonds, btw, are loaded with calcium, which Greys need. If you're nervous about sprouting, just soak your seeds overnight in hot (bath temp) tap water. Then drain them in the morning, rinse well and refrigerate. That is vastly better for your bird than seeds that aren't sprouted. The old farmers used to always soak their chicken feed in a bucket overnight. They knew! On diet, your bird also needs a wee bit of cooked egg or meat every other day or so. My 'zon gets 1/2 HB egg. I slice and dice fruits and veggies for my birds every morning. They get sprouts and frozen veggies at night... plus anything healthy and not salted that I'm eating. I thaw frozen mixed veggies in a strainer run under hot tap water for a few seconds. Don't nuke their food. Forget the dairy, as they're not mammals -- but a wee bit of yogurt every few days is okay. I also sprinkle just a wee bit of powdered health food store vitamins over their breakfast each day, just to make sure they're getting their nutrition -- you know, the kelp, barleygrass, powdered carrots, etc. type mixtures. Like lightly "salting" their food with the vitamins. Remember, variety is the ticket to good nutrition, and it's better to pay the grocery store than the vet (and cheaper). A good vet will tell you that about 90% of a bird's longevity is in good nutrition and in cleanliness. I hope this helps the bird owners out there. :D...See MoreWhat have you done this week to save money in your household?
Comments (35)Carol - Here's the short and long version of the recipe. I have it taped to my bread machine on a 3x5 card. It's our everyday bread, and I also use it for dinner rolls, cinnamon rolls, burger buns and hot dog buns. I've also included the long version of the recipe which includes instructions for making it in the bread machine, as well as by hand. I lovingly call the recipe "Mildred Bread". It was based on a recipe my friend, Mildred, got from Pleasant Hill Grain and some input from me. Sponge: 3/4 c. warm buttermilk (I use kefir) 3/4 c. warm water 2-1/2 c. milled whole wheat flour 1/4 t. ascorbic acid 2 t. instant yeast Mix on quick dough cycle for a few minutes. Stop machine and rest the sponge at least 2-1/2-hours. Stir in these ingredients: 1/3-1/2 c. chia seed goop (optional) 2 T. coconut oil (butter or vegetable oil can also be used) 2 T. agave nectar (or honey) 1 egg Add to the top: 2-1/4 c. whole wheat flour 2 t. salt (on top) Process on the quick dough cycle. Remove as soon as the kneading has stopped. Note: I sometimes add 1/3-1/2 c. multi-grain cereal at the add-in beep, and also add 2 T. flaxmeal. ----------------------------------------------------- The long version: 100% Whole Wheat Bread Bread Machine (changes for by hand in italic) Sponge: 3/4 c. lukewarm buttermilk (I use homemade kefir.) 3/4 c. lukewarm water 2-1/2 c. freshly-milled whole wheat flour (Prairie Gold from Wheat Montana is my favorite wheat) 1/4 t. ascorbic acid* 2 t. SAF-Instant Yeast Mix these ingredients in the bread machine pan and set the machine to QUICK DOUGH. As soon as the mixture is well mixed, unplug the machine and allow to sit (with the lid closed) at least 2-1/2 hours or up to 12 hours, or something in between. If you use a red variety of wheat, it will be less acidic-tasting if you use a 12-hour sponge. After the sponge has set, mix these ingredients into the sponge: 2 T. melted coconut oil (or butter or veg. oil) 2 T. agave nectar (or honey) 1 egg (I also add 1/3-1/2 c. chia seed gel. **) Add to the top of the sponge mixture in the pan: 2-1/4 c. freshly-milled whole wheat flour 2 t. salt (on top the flour) Set the bread machine on regular DOUGH cycle and process. Check the dough to make sure it's formed into a nice soft ball and adjust the hydration as needed. My changes: I process the dough in the bread machine until the dough is mixed and kneaded. I don't let it rise in the machine. I place the dough in a dough rising bucket, place the lid on the top and allow the dough to ALMOST rise to double. Whole wheat dough does NOT have the extensibility that white bread dough does, so try not to let it go more than double. Using a dough rising bucket helps you to accurately judge when dough has doubled. Place the dough into a dough rising bucket. It should come up to the 1-quart line. It's doubled when it reaches the 2-quart line. You can get plastic food storage containers (with a tight-fitting lid and graduated measures on the side) at restaurant supply stores (or through King Arthur Flour - aka dough doubler). For this recipe a 2-quart container works perfectly.) After the bread machine finishes the dough cycle (or has doubled in the dough rising bucket), dump the dough onto a Silpat and with oiled/greased hands deflate the dough by pushing it in the middle with your fist then drawing all edges of the outside dough into the middle (turning the dough inside-out so to speak). Divide the dough into portions (I scale the dough for accuracy.) Round each portion (make it into a smooth ball) so that all the gluten strands are going into the same direction. Cover and allow to rest 10-15 minutes so the gluten relaxes. Form dough, pan, cover with plastic wrap for the final proofing - etc.... I make this bread into 3 small loaves (7-1/2x3-1/2-inch pans - 350°F for 20-25 minutes), OR one 1# Pullman Loaf and use the other 1# of dough for 6 pecan rolls OR an 8-inch pan of dinner rolls - sometimes I use a portion of the recipe for hamburger or hot dog buns. A very versatile dough. ------------------------------------------------------ * ascorbic acid powder is available at most health food stores. It's a very important ingredient ANY time you make bread that includes wheat germ (which is in whole wheat flour). There is a substance in wheat germ called Glutathione. This substance breaks down the gluten and can result in a short loaf. The bran in whole wheat bread can also cut the gluten strands which results in a short squatty loaf. The sponge helps to soften the bran. The addition of 1/8 t. ascorbic acid per loaf of bread will counteract the negative effects of Glutathione. It will help prevent the gluten bonds from breaking down and will also help repair gluten bonds that have been broken. The ascorbic acid also helps sustain the leavening of bread loaves during baking. Yeast grows longer and faster when there is also ascorbic acid. Do not add it to sourdough recipes because they are naturally an acidic atmosphere. ** Chia seed gel is a mixture of chia seeds and water (1 part chia seeds to 9 parts water). This mixture thickens as the seeds absorb the water and adds hydration to the crumb of the loaf. It looks like poppy seeds in the bread after it's baked. Excellent nutritional boost and additional fiber. By hand, place sponge ingredients in a glass or plastic bowl and mix the sponge ingredients together with a Danish dough whisk or a wooden spoon and beat the ingredients about 100 strokes. Cover, and allow to sit at room temperature at least 2-1/2 hours. After the sponge is done: add the flour gradually to the sponge mixture using a Danish dough whisk (or wooden spoon) and carefully beat in each addition of flour before adding more. You may end up beating the dough 500-800 strokes, but do as much mixing as you have the strength to do. If you need to stop and rest, that's fine. The rest will allow the dough to hydrate. Towards the end of mixing, add the salt (DON'T FORGET!!!). The gluten will tighten up and make mixing harder after adding salt. The better job you do of mixing the dough and developing the gluten while it's in the bowl, the less time you'll need to knead it. When you knead the dough, avoid adding a lot of bench flour. If you have a problem adding too much flour during kneading, grease/oil your hands during kneading instead - especially during the last 2-3 minutes of kneading. -Grainlady...See More
Alisande
6 years ago
Hareball
6 years ago
sushipup1
6 years ago
pudgeder
6 years agomamapinky0
6 years ago
arkansas girl
6 years agolucillle
6 years ago
rob333 (zone 7b)
6 years agolast modified: 6 years agomamapinky0
6 years agoUser
6 years agotackykat
6 years agoChi
6 years agolast modified: 6 years ago
lgmd_gaz
6 years agolast modified: 6 years agomamapinky0
6 years agoHareball
6 years agoChi
6 years agopekemom
6 years agolast modified: 6 years agorhizo_1 (North AL) zone 7
6 years agopudgeder
6 years agoarkansas girl
6 years agoChi
6 years agokadefol
6 years agolast modified: 6 years agoUser
6 years agolast modified: 6 years agowildchild2x2
6 years agolast modified: 6 years ago
maggie200
6 years agoChi
6 years agolast modified: 6 years ago
lily316
6 years agoChi
6 years agorhizo_1 (North AL) zone 7
6 years agowildchild2x2
6 years ago
Elizabeth
6 years agoMrs Pete
6 years agolast modified: 6 years agoSuzieque
6 years agoTexas_Gem
6 years agoJennifer_in_KS
6 years agoHareball
6 years agolovemrmewey
6 years agolovemrmewey
6 years agoHareball
6 years ago
Yayagal
6 years agoAlisande
6 years agorob333 (zone 7b)
6 years agolast modified: 6 years ago
lisaw2015 (ME)
6 years ago
donna_loomis
6 years agojoyfulguy
6 years agolast modified: 6 years agoHareball
6 years agolast modified: 6 years agomamapinky0
6 years agorob333 (zone 7b)
6 years ago
Related Stories
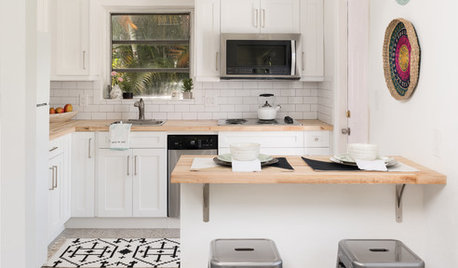
DECORATING GUIDES4 Ideas for Saving Space and Money, From This Week’s Stories
Learn methods for visually expanding a room and ways to stretch your budget during a remodel
Full Story
GREAT HOME PROJECTSUpgrade Your Windows for Beauty, Comfort and Big Energy Savings
Bid drafts or stuffiness farewell and say hello to lower utility bills with new, energy-efficient windows
Full Story
Replace Your Windows and Save Money — a How-to Guide
Reduce drafts to lower heating bills by swapping out old panes for new, in this DIY project for handy homeowners
Full Story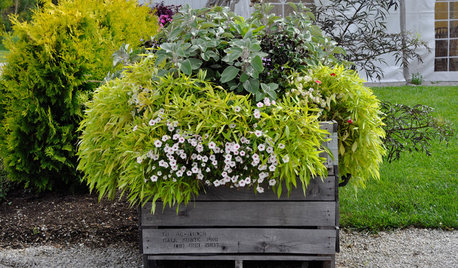
GARDENING 101This Pro Tip Will Save You Money on Your Container Garden
For large planters, use empty milk cartons or plastic bottles to fill extra space before putting in potting soil
Full StoryREMODELING GUIDESReuse or Replace? How to Save Money on Your Remodel the Smart Way
Find out when you should keep your appliances, fixtures, tile and countertops — and when you should replace them
Full Story
FATHER’S DAYHouzz Call: How Did Your Dad Shape Your Idea of Home?
For Father’s Day, share a memory of how your dad or stepdad taught you about the joy and hard work of maintaining a home
Full Story
KIDS’ SPACESShare Tactics: Great Ideas for Shared Kids' Rooms
Maintain peace and maybe even inspire togetherness with decorating strategies from a designer with seven grandchildren
Full Story
LIFEMake Money From Your Home While You're Away
New services are making occasionally renting your home easier than ever. Here's what you need to know
Full Story
HOME TECHSave Your Decor — Hide Your Media Stuff
When you tuck boxes, wires and speakers into walls and ceilings, all you'll notice is your favorite shows or music
Full Story
LIFEShare Your Vintage Photos of Your Cool Grandparents
Post an old photo of your grandparents at home. You might see it in an upcoming feature on Houzz
Full Story

amylou321