


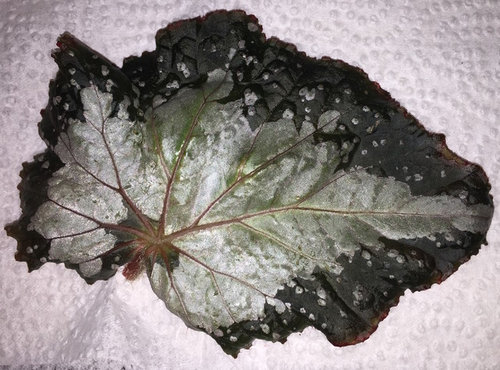
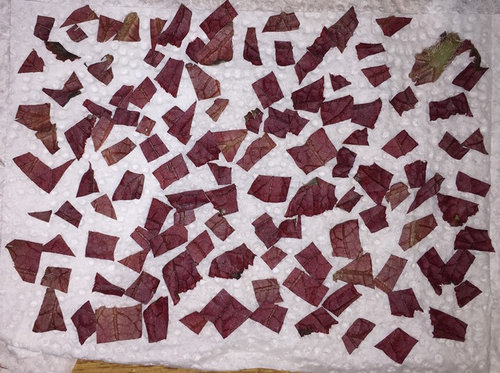
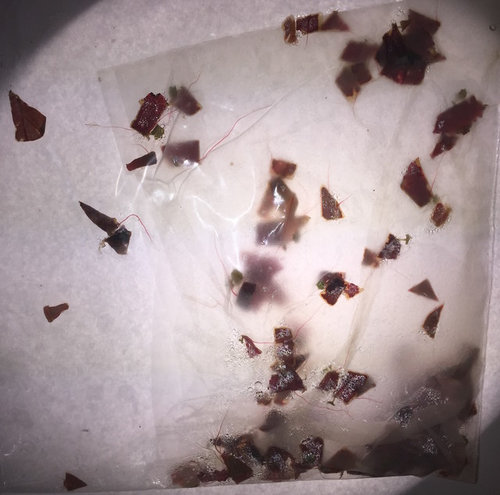
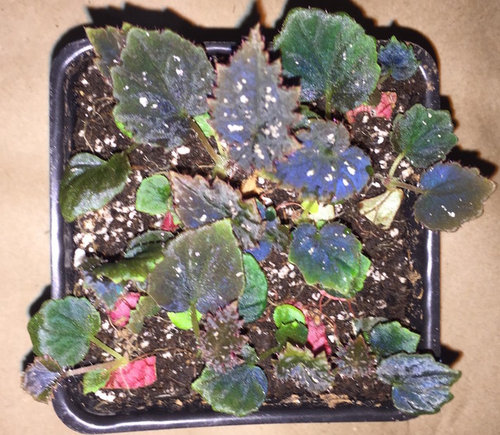
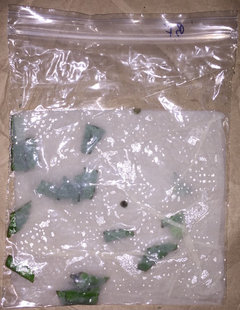
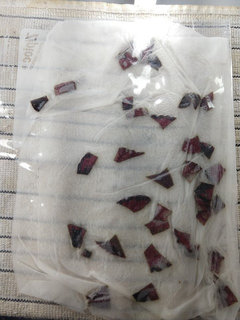
method for leaf propagation between paper in ziploc bags.
mark4321_gw
6 years ago
last modified: 6 years ago


Featured Answer
Sort by:Oldest
Comments (15)

mark4321_gw
6 years agomark4321_gw
6 years agoRelated Discussions
paper towel method
Comments (12)I double the vote on the coffee filters, they are cheaper then PTs, and they hold up much better then PTs. Covering the seed does depend on the seed, also how you handle the seedling depends on the size of the seed. I had some teeny-tiny seeds this year, when the long root got fairly long (which didn't take long) I put my soil in the planter I was using and made holes with a pencil and rounded out the hole to make it large enoungh to not hurt the root. Then I held the leaf part and aimed the root for the middle of the hole, I gently pushed dirt in around the root and watered gently so the water finished filling the hole and made sure there were no air pockets. BUT I caution, you have to be VERY VERY gentle in doing this so you do not disturb the root. Also, some seedlings may not live longer then a day or two if you don't get them planted soon enough. This method takes practice, and what works for someone else may not work for you, so you have to experiment with your own seeds and work out your own techinque. I like starting larger seeds this way, for me it is just easier to handle them and I can plant them where I want them once they have germinated. It might work better for you starting out to use vermiculite to cover most if not all of your germinated seedlings, or a soilless mix until you get used to handling the young babies, you won't need all of your plants usually so you can experiment with a few after you have treated the ones with care you plan on keeping. Experimenting is the key to this method if you haven't started many seeds. Take notes on what works and what doesn't and before you know it you will be able to start many seeds this way, with success in growing them to maturity. Good luck, Fran...See MoreCutting in Baggie method leafing too early in the bag before root
Comments (3)Keep doing exactly what you are doing.. Do not change the humidity.. I would have kept these in the bag personally until roots are showing. Usually in my experience after showing some leafing, the roots follow along very soon. Do not spray with fertilizer. As for your questions: Will just keeping humidity (& showing patience) be enough for cuttings to get roots eventually? Yes Is is too early for the leaves to be sprayed with liquid nutrients? Any suggestion will be appreciated. Yes, you may kill them or set them back. Be patient and wait for good roots. The other question is why my cuttings got the tendency to sprout leaves under the moist paper wrappings before good visible roots? It depends on lots of things, but I have seen the opposite be true in many cases. Do I need to lower the temperature? No, leave it alone. I have muked up cuttings trying to change too many things to keep or hurry cuttings along. Let me know if you have any more ??...See MorePropagation methods for Hoyas
Comments (27)1 DS-70 2 obscura? 3 kerrii 4 not a Hoya 5 variegated kerrii 6 not a Hoya (Cryptocereus) 7 ? maybe an archiboldiana? Too hard for me to tell. Regarding the Hoyas I would cut the DS-70 into 2-3 sections and then pot them up as described above, with multiple nodes touching the soil. I'd definitely loop at least one of them around the edge of the pot, since DS-70 has nice pliant vines and this is easy to do. The obscura? I would probably do as 2 starts. You could do it as one, too, but if you do two then you have a backup if something goes wrong. I would probably just stick the bottom of each section into the soil, so that the bottom-most node is dug into the soil but the leaf/leaves coming out of it can remain mostly above ground. The kerriis look fine at the size that they are. Just stick the bottom nodes into the soil. The solo leaf in picture 3 you might as well toss, as it is very unlikely to turn into a full plant. But you can stick it in the soil next to one of the other starts if you want and it will root and stay alive for a long time. The Cryptocereus is easy to root. Just stick the end in soil appropriate for a cactus, which is what it is. It's almost impossible to kill, so no worries. Number 7, just stick into the soil so the bottom node is submerged and the second node is touching the soil. Since it's fall, you might want to give them some extra humidity and even put them on a heat mat if you have one. You can put them in an aquarium, or clear tupperware container, or a large freezer bag with air blown into it. Keep them in bright indirect light while they are rooting. It's especially important not to expose baggie'd plants to direct sunlight because they'll cook in the bag....See MoreBegonia 'Curly Fireflush' from ziploc bags
Comments (25)Hello ! I was just doing a search online trying to find a place to purchase a Begonia ‘Curly Fireflush’ and ran across your discussion. I was wondering what happened with the baby plants. Did anyone post photos of their progress somewhere? Who won the tiny Begonia pteridiformis? Would anyone have a scrap of Curly Fireflush propagation material left to share or sell? I have been mostly raisino baby succulents started from leaves and most recently started with baby African Violets. I would love to try begonias next and the Curly looks so unusual!...See Morehc mcdole
6 years agomark4321_gw
6 years agolast modified: 6 years agomark4321_gw
6 years ago
phreckless
6 years agomark4321_gw
6 years agomark4321_gw
6 years agomark4321_gw
6 years agoTiffu (Oregon 8b)
6 years agomark4321_gw
6 years agoTiffu (Oregon 8b)
6 years agoTiffu (Oregon 8b)
6 years ago
Rosie1949
6 years agolast modified: 6 years ago


Related Stories
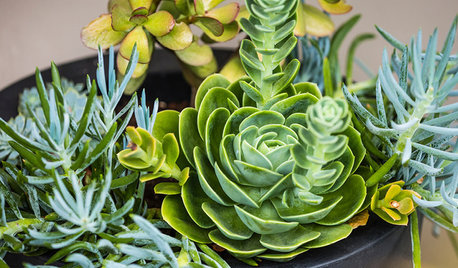
SUCCULENTSGardening 101: What to Know About Propagating Succulents
Here’s how to grow more succulents from the plants you already have
Full Story
LANDSCAPE DESIGNIs Your Garden Cut Out for Matisse Inspiration?
Look to the artist’s paper collages for a creative and easy approach to garden design
Full Story
HOUSEKEEPINGHow to Dust Your Home the Right Way
Learn the most efficient dusting methods for a spotless home
Full Story
KITCHEN DESIGN15 Strategies for a Spectacular Dream Kitchen
A designer shares several go-to methods for achieving knockout function and style
Full Story
MOST POPULAR10 Reasons to Get Rid of More Clutter
From a calmer mind to a more workable closet, the benefits of streamlining are just a few trash bags away
Full Story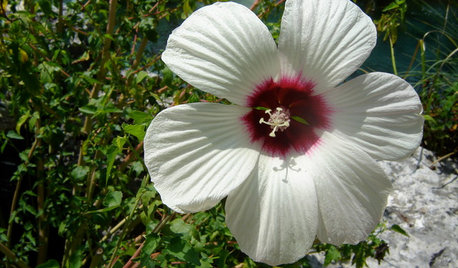
GARDENING GUIDESGreat Design Plant: Hibiscus Moscheutos
Crimsoneyed rosemallow is an ideal flowering perennial for wet sites and is ready to propagate now
Full Story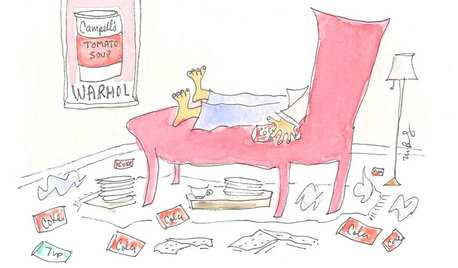
HOUSEKEEPINGPortrait of a Reformed Terrible Housekeeper
See how a man who once stashed dirty dishes under the couch is turning over a new leaf for a neater home
Full Story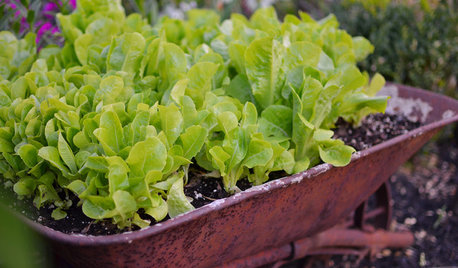
FARM YOUR YARDCool-Season Vegetables: How to Grow Lettuce
Leaf, butterhead, crisphead or romaine — lettuce is best harvested in the cool weather of spring and fall
Full Story
GARDENING GUIDESUnleash Your Guerilla Gardener
Toss some seed bombs around the yard for easy, beneficial plantings
Full Story
GARDENING GUIDESHow to Get More Plants Free
These techniques will let you grow your garden by creating new plants from those you already have
Full StorySponsored
mark4321_gwOriginal Author