


Layering/ Air-Layering/ Marcotting (another name for air-layering)
tapla (mid-Michigan, USDA z5b-6a)
6 years ago
last modified: 6 years ago


Featured Answer
Sort by:Oldest
Comments (8)

tapla (mid-Michigan, USDA z5b-6a)
6 years agoRelated Discussions
How long does air layering take??
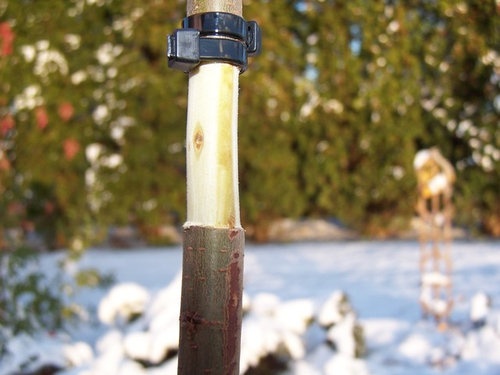
Comments (16)Describe the "small mound next to the girdled area, please. Are you describing callus tissue? Air layers don't get "irritated or distressed" when rubbed, but 'checking' them can result in unnecessary breakage of roots. If you use clear wrap to hold your rooting medium in place, then wrap that with aluminum foil to keep the sun from over-heating the medium or impacting root development, there should be no reason to peek. The roots will be conspicuous enough once they start growing. Also, some plants are genetically predisposed, even in the tropics, to stronger growth at certain times of the year - often it's in the rainy period. If the plant you're layering does exhibit cyclical growth patterns - try starting your layers about 1 month before you expect the strongest growth. It's difficult to suggest where you might be able to improve things if we don't know what you're doing. Watering an enclosed air layer daily sounds like a LOT of water, so you might be failing because you're asking the roots to transition back and forth between appropriate moisture levels to too wet; or, the medium might be consistently too wet. But that doesn't explain the dead branches. When you layer, you cut completely through the cambium down to the xylem. The plant can then still transport water and nutrients upward through the xylem to parts distal to the layer. Downward nutrient flow and polar flow of auxin terminates and collects in tissues immediately distal to the top ring of the layer, which is where roots should form. Tips: A) If you establish a layer on a branch or stem that isn't vertical, make your top and bottom cuts so they ARE horizontal. This means the cuts on a round branch that is say 10* to a vertical axis would be slightly elliptical, while a branch that's 60* to a vertical axis (30* to the horizon) would be would be much more elliptical. The reason for this is, the flow of auxin (stimulates rooting) is polar. Auxin will always find its way to the lowest part of a cut, which is where rooting will occur; and often, it might be the only root that grows from the layer site. You'd be better served if a multitude of roots emanated directly from the upper ring of your layer cut. B) You can help ensure success by applying a tourniquet immediately below wherever you want roots to grow on a branch. As soon as you see a bulge forming above the tourniquet, sprinkle an appropriate powdered rooting aid on the end of a piece of electrical tape. The rooting aid should cover enough tape to wrap one revolution around the layer site. The tape should be 2-3 times as long o/a as the part that's covered. Use a piece of string, a zip tie, or other method to secure the tape so it remains in place. Blanching (excluding light) the future layer site stimulates root initials to 'preform' and the rooting hormone and added moisture levels under the tape contribute significantly to the collective boost. You'll find a lot more info here. Al...See MoreAir layering large corn plant
Comments (18)There's a word for very large cuttings, truncheons. The last cutting I did of Dracaena marginata was over 3 feet long. I just cut it off and stuck it in a pot. That was about 3 months ago. It is rooted and growing new leaves. I haven't unpotted it to check the root system, but I'm sure the plant knows what to do, and that it has plenty of space to do it. I've repotted many various species of Dracaena plants that started as cuttings, and none of them had such compact, well-branched systems as shown in your pics, Rina. But, after being pruned, potted, and checked again a year later, they do more closely resemble the roots in your pics, more smaller roots that more evenly proliferate the pot. More like what a bonsai plant would have vs. a ground-grown specimen. When confining a plant to a pot, being as far toward the bonsai end of the spectrum is good, and a worthy goal. Those roots look great! I'm sure Dracaena is a good genus with which to learn and practice air layering, but I know it's not necessary. No doubt fun to watch, without the mystery of wondering "did my cutting root yet?" And fast results are very fun, gratifying. Once learned though, this technique can be applied to many other plants that are much more difficult to take root via cuttings. It also has the advantage of extremely high success rate. Though I don't think I've ever lost a cutting of Dracaena in particular, some very nice pieces of woody entities have been lost to failure over the years....See MoreCan you air layer a tree without cutting through a layer of bark?
Comments (8)Not with pear, but with a Japanese Maple, I've had success wrapping bonsai wire around the branch I want to layer and twisting it tight enough to restrict the flow of sap. You just tighten until you see the wire start to "bite" into the bark - don't crush the bark/branch. If there are enough branches to try layering, this technique might be worth testing....See MoreSuccessfully air layered my Midnight Blue!!!
Comments (12)Hi, Need2SeeGreen! At first I did not understand your question, but I've realized now that I may have used a confusing term to refer to the part of the plant I meant. As I understand it, a Terminal Bud Scar is a scar left by side buds that have fallen after the main one continues to form a branch. After this, what you end up with should look like the diagram. Please notice that a terminal bud is different to a terminal bud scar, you want to find a Terminal Bud Scar. Other terms that I found for this are "growth rings" or "annular rings" but looking this up brings up mostly results of the rings formed by a tree's bark and from which you can tell it's age... which we do not care for much at the moment. There doesn't seem to be much of a solid term to refer to it, so I found TBS the most appliable. TBS can be appreciated as several "stripes" or "bands" that ,in roses, are usually located where an older cane branches out into newer stems, usually, every one of those has their own set of growth rings/TBS right where it is attached to the older cane. The way you describe air-layering has possibilities of working, but when you do it like that you're just getting the peat to make contact with maybe two or tree nodes, a TBS is actually a lot of nodes squirmed together, every node anywhere in the plant is capable of developing "callus" which is the undifferentiated tissue that can turn to roots if the surrounding environment is in fact, appropriate for roots (damp, dark, and not too cold nor too hot). By using a TBS instead of a single or a couple nodes, you have more chances of getting a node to form callus, since there are many more nodes in that area. I hope to have answered your question, if not, please rephrase it and I'd be happy to help you. And yes! Midnight Blue is not only pretty to the eyes, the scent is really something! It is usually described as clove, but I and several other people I have shown it to think it is a lot like agua de jamaica, (which in some recipes actually has clove in it, but well, there's more to it). Seeingreen, I really wish it was like that year round, on the hotter months it will open to a more reddish, wine color, but at least the great scent is still there....See More
tropicofcancer (6b SW-PA)
6 years agolast modified: 6 years agotapla (mid-Michigan, USDA z5b-6a) thanked tropicofcancer (6b SW-PA)tropicofcancer (6b SW-PA)
4 years agotapla (mid-Michigan, USDA z5b-6a) thanked tropicofcancer (6b SW-PA)
plantwavy
2 years agotapla (mid-Michigan, USDA z5b-6a)
2 years agoplantwavy
2 years agolast modified: 2 years ago
Related Stories

HOUZZ TOURSMy Houzz: Peeling Back Layers in a 1908 Home
Hidden fireplaces, buried hardwood and covered beadboard resurface thanks to a Mississippi couple's DIY efforts
Full Story
LIGHTINGA Beginner’s Guide to Lighting in Layers
Discover the secrets of combining light sources to create richer-looking and more flexible living spaces
Full Story
EARTH DAYAdd Layers to Garden Beds for Beauty and Sustainability
You can renew nature at home by filling in gaps with native plants and extending the bloom season
Full Story
BATHROOM WORKBOOKBathroom Workbook: Layer on the Texture for High Bath Style
Make even a modern bath warm and welcoming with these 11 ideas for adding texture
Full Story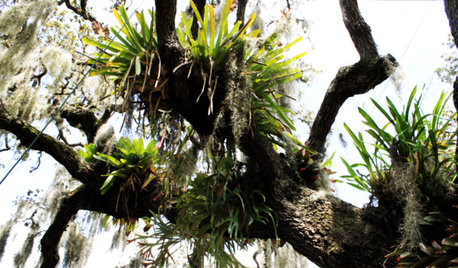
GARDENING GUIDESGot a Hot, Humid Landscape? Add Tropical Flair With Air Plants
Turn tree trunks and walls into lush canvases with plants adapted to the canopies of the rainforest
Full Story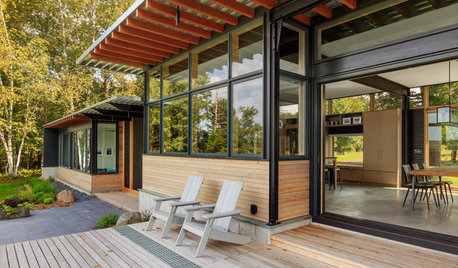
LIFE6 Ways to Cool Off Without Air Conditioning
These methods can reduce temperatures in the home and save on energy bills
Full Story
DECORATING GUIDES10 Ways to Hide That Air Conditioner
Feeling boxed in designing around your mini-split air conditioner? Try one of these clever disguises and distractions
Full Story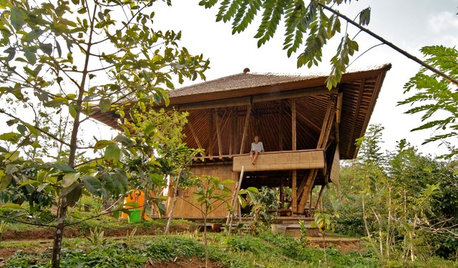
MOST POPULARMy Houzz: Open-Air Living in the Mountains of Bali
Community, jaw-dropping beauty and sustainability come together in a tropical paradise for a London expat
Full Story
HEALTHY HOMEA Guide to Indoor Air Purifiers
Get the lowdown on air filtration systems for your house and the important ratings to look out for
Full Story
ADDITIONSHouzz Tour: A Do-Over Addition Brings in Light, Air and Views
Double-height glass solves a host of the problems that plagued the previous add-on in this Washington, D.C., bungalow
Full Story

PinusParvifloraEnvy