


Bi-level Renovation &a style change
Amanda Welsh
6 years ago
Featured Answer
Sort by:Oldest
Comments (9)
Related Discussions
Converting a bi-level questions... X-Post
Comments (1)Anything is possible provided you can pay for it. Changing a bi-level to a 2 story or cape would not be worth the cost. Not only would you need to relocate the door to the lowest level, you would then need to completely relocate the stairs to another part of the house. That will cause you to lose some significant parts of the 1st and 2nd floors to accomodate the new stair, but will likely require some major reconfiguring of the upper level halls and possible bedrooms to accomodate the stairs. If the house is within your budget, works well for you and your family, but isn't quite the 'style' you want...I'd forget about the 'style' and buy the house and livie in it 'as is'....See MoreSplit-level house kitchen renovation, Holiday Cabinets
Comments (19)Thanks so much for the kind words, all! This was my first kitchen remodel and it was not without its challenges! But in the end, it was well worth it... a2Gemini -- the under cabinet lighting is not LED, i think it's xeon. That was a miss IMO -- if we had gone with LED I could have saved my cabinet installer the trouble of hiding the lighting (he had to install all those little strips of wood twice, as the first time they were done incorrectly. If I had to do it over, I would have gone with LED -- flatter, easier and cleaner. By the time I figured this out, though, the tile had been laid, so too late. Badgergal and gsciencechick -- That entry painting is from a local artist, and yes, both the entry hall fan and the light fixture in the dining room are project scope creep! In the six months since these photos were taken, the wood has darkened a wee bit, which is fine by me. AnnaA -- Lovely kitchen! We debated taking down that wall but ours was load bearing and at the end of the day we wanted a bit more separation of living room from kitchen. Yours looks great! The subway tile is not white, it's actually Ann Sacks Savoy Cornflower blue, which is gorgeous in person, you can't see the detail from the photos but each tile is tinged in a blue outline. And for all you 60's split-level lovers... it occurred to me, as I was doing this remodel, that in its day, this house style was considered modern, a big change from the styles that preceded it. And that remodeling our kitchen in flat panel contemporary was actually paying homage to and appropriate for that period. The light over the dining room table is also a nod to 60's design (which I am old enough to have lived through the first time as a child...If only we had kept those danish modern side tables!) I too love seeing the rebirth of these modest-sized homes as they are adapted for our times. -- goldchip...See Morekitchen style for bi-level (raised ranch) house ? advice wanted
Comments (19)OK, here are some options. [Note: Door & stair opening/landing measurements were taken from your older post.] BTW...is the Living Room wall a true, completely enclosed wall or is it partially open (like a pass-through or with spindles interspersed for the entire length of the wall)? I wasn't sure b/c it was not "filled in" like the other walls. On the off chance the wall is not solid, I created solid walls in some of the layouts -- if the wall is already solid, then no need to build one out. ++++++++++ All but two layouts have the refrigerator in the same place -- the bottom right -- to accommodate a table. The only ones that have the refrigerator elsewhere have banquette seating; not my favorite for the only table seating, but it's an option. The banquette is the only way the refrigerator can realistically fit anywhere else than along the far right wall, assuming you want decent aisles, that is! Note that I mixed things up. I did this to show you what options you have. In many cases, you can "mix & match", just be sure you keep decent aisles, a fairly open space around the door, and at least two Prep Zones, preferably with water next to both of them. If you have a question as to whether some options can be mixed, just ask! I'll work it up to show you yes or no. Walls...Note that while I did not modify the 4'5" wall (bottom right), I did modify the left side a bit in most cases, some more than others. Hopefully, you can modify that wall b/c it's one of the biggest reasons you have such a traffic jam -- it forces people to go into the middle of the room to go from the exterior door on the left to the rest of the home. One last thing, the Cooking Zone (with the range) should be the most protected Zone from traffic -- so if traffic is directed away from it or it's in a "dead end" area, it will work better. ++++++++++ Layout #1: Long "L" with China "hutch" for storing your good chin as well as a buffet for staging/serving food. There are three variations; all three share the same Work Zone Map, so only Zone map is included. Layout #1a has a shallow built-in pantry with 12"D shelves floor-to-ceiling. It still has two 24" pantry cabinets. I'm actually not a fan of pantry cabinets this wide and originally put in three 18" wide pullout pantries, but they didn't quite fit b/w the wall and window (you need some filler b/w the wall and the first pantry cabinet). Two didn't provide enough "buffer" to the door. Layout #1b has a tall cabinet with a MW alcove. See a later layout with two 18" pantries & a 12" Utility pullout. What I think is best, is a reach-in pantry (Layout 1a) or shallow pantry cabinets (Layout 3). ++++++++++ Layout #2: Similar to Layout #1 except it has two sinks -- one where the current one is as a prep sink and one in the old Dining Room for Cleanup. This provides two or three very nice Prep Zones -- all with their own counterspace as well as sink access for all three. It also creates a Prep Zone separate from the Cleanup Zone, very helpful if someone is trying to load/unload the DW while someone else is preparing a meal or snack. ++++++++++ Layout #3: Short "L" + small island + Shallow Pantry cabinets and a China cabinet ++++++++++ Layout #4: It has banquette for table seating, a small island, and the refrigerator is on the top wall b/w the windows. The MW is in a tall cabinet to the right of the range. ++++++++++ Layout #5: As with Layout #4, it has banquette for table seating, a small island, and the refrigerator is on the top wall b/w the windows. In this case, there's a prep sink along the right wall creating a Prep Zone separate from the Cleanup Zone, very helpful if someone is trying to load/unload the DW while someone else is preparing a meal or snack....See MoreFamily Room bi level furniture placement help
Comments (7)Your title says "bi level". Is there a change in floor level behind the sofa? You obviously have two separate areas to decorate, so maybe that is what you meant. I can give you my opinions, but you really should make a floor plan for these areas. Start in one corner and measure the length of a wall. Note how far a door is from that corner. Write down these measurements, with notations, such as Point A to B = east wall = 16' 3" and east wall closet door 8' 5" from point A. When you have measured all the walls and doors draw the walls on 1/4-inch graph paper (aka quadrille paper) which you can print from HERE. Your room is larger than an 8.5 x 11 page will hold, so print out more pages, then trim one edge and tape two or more pages together. Draw the floorplan so that 1 foot equals 4 squares on the paper. Each square will represent 3". Door placement doesn't have to be exact, but note which way the door swings, so it isn't blocked by furniture. Next, measure whatever furniture you intend to keep. How long and how deep is the piece? Most sofas are around 7' long by 3' deep, but there are variations. Take a tape measure with you when shopping. Furniture always looks small in an expansive showrooms. Make sure it will fit before you buy. After you have measured the furniture draw the outlines of each piece on another page of graph paper to the same 1' equals 4 sqares. Label each and cut it out. Now you can move the furniture about on the floorplan until you find the best position. Make sure you will have room to walk around the furniture. Try for a 42" pathway. I'm thinking you should leave a path on the left side of the TV area so it's easy to get to the bathroom from the fireplace area. I personally do not like sectionals, preferring a single sofa with 2 or more chairs that can be angled toward the TV or towards people for conversation. If, however, this room will primarily be for TV viewing a sectional could be better. Here is a Houzz ARTICLE on sectionals. The fireplace area is small and should be made cozy, IMO. A couple of chairs with ottoman and a table between. Perhaps a loveseat or divan under the windows. Maybe you like sitting in front of the fire, so how you place the furniture depends on how you will use the space. Once again, use the floor plan to see how furniture fits....See More
Amanda Welsh
6 years ago
Peter Roehrich
6 years ago
User
6 years ago- PRO
Patricia Colwell Consulting
6 years ago  PRO
PROJudyG Designs
6 years ago
Milly Rey
6 years ago
Related Stories
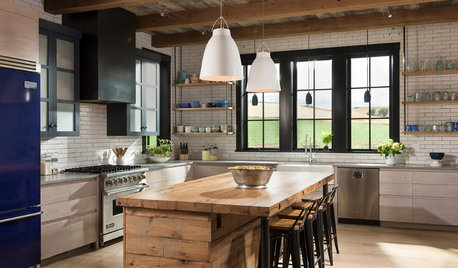
INSIDE HOUZZData Watch: Top Layouts and Styles in Kitchen Renovations
Find out which kitchen style bumped traditional out of the top 3, with new data from Houzz
Full Story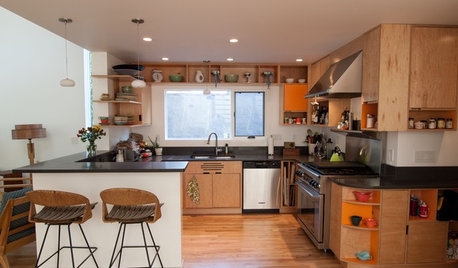
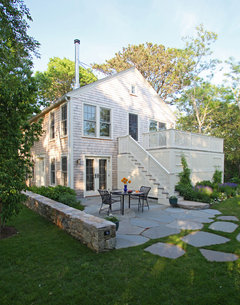
HOUZZ TOURSMy Houzz: Added Space and Style for a 1960s Split Level
With a new second story and downstairs suite, custom touches and midcentury pieces, this Portland family home suits 3 generations
Full Story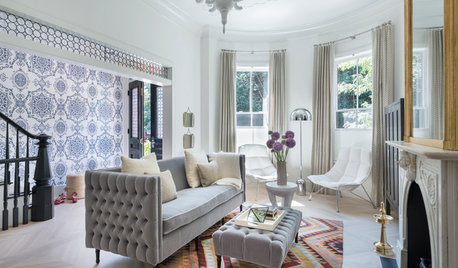
HOUZZ TOURSHouzz Tour: High Style With Kids in a 4-Level Boston Townhouse
Custom touches abound in this conversion from multiunit mess to single-family stunner
Full Story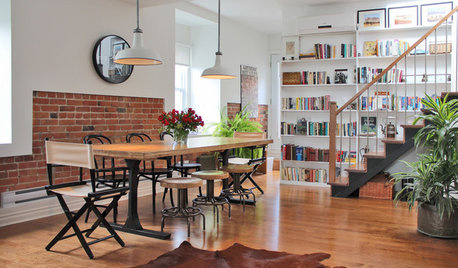
HOUZZ TOURSMy Houzz: Clean and Contemporary Style for a Renovated Montreal Factory
Years of patient collecting help this nomadic traveler create a place where she can feel at home
Full Story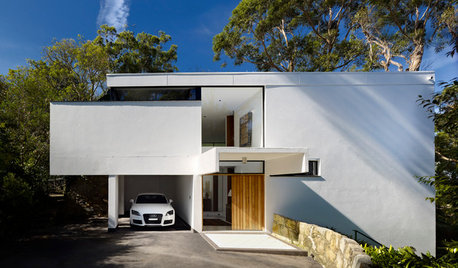
MODERN ARCHITECTURERoots of Style: International Style Celebrates Pure Form
Using technology and materials of the time, International style is always current. See its expression in these 16 homes around the world
Full Story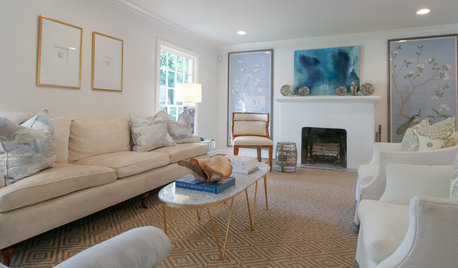
HOUZZ TOURSMy Houzz: A Light Touch for a San Antonio Renovation
Elegant finishes and traditional style update an interior designer’s home in Texas
Full Story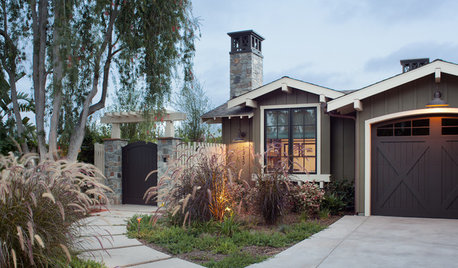
RANCH HOMESHouzz Tour: Casual Ranch-Style Living at Its Best
A Southern California home renovation incorporates barn details, splashes of red and warm, woodsy comfort
Full Story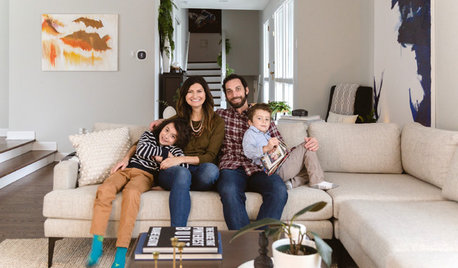
BEFORE AND AFTERSMy Houzz: Minimalist, Airy Style in a Chicago Family’s 1950s Home
See how these homeowners resolved their layout design dilemmas in a midcentury split-level house
Full Story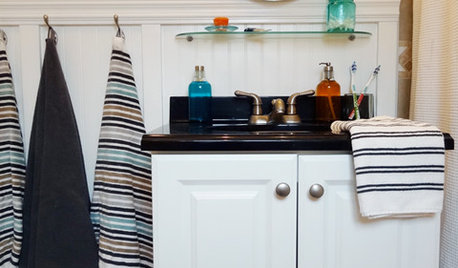
WALL TREATMENTSBeadboard Panels Offer a Shortcut to a Classic Style
Traditional touch: Change up plain bathroom walls with beaded hardwood planks and trim you can install yourself
Full Story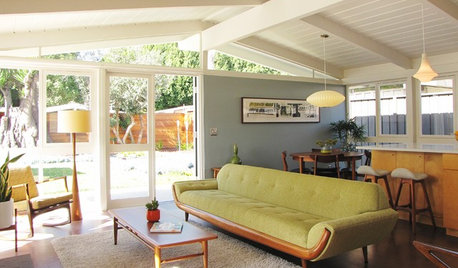
ARCHITECTURERanch House Love: Inspiration From 13 Ranch Renovations
Kick-start a ranch remodel with tips based on lovingly renovated homes done up in all kinds of styles
Full StoryMore Discussions


Sina Sadeddin Architectural Design