


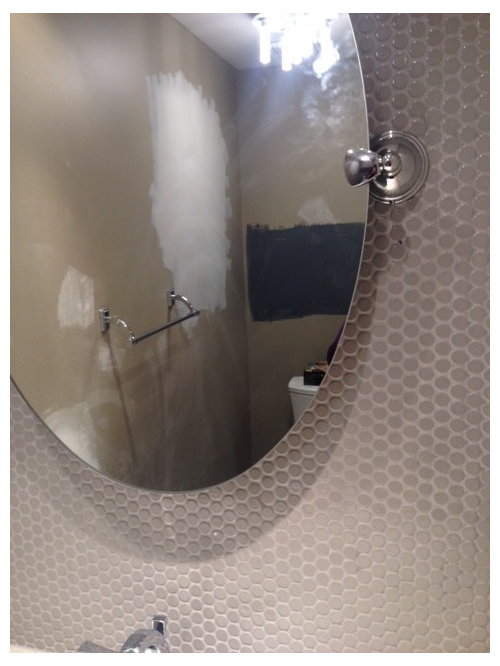
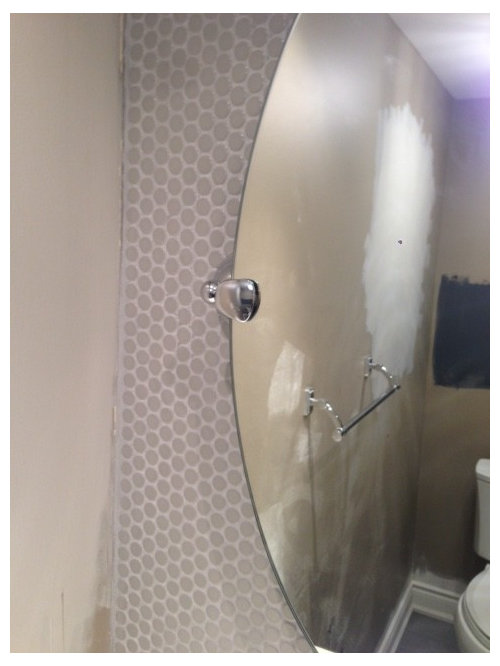
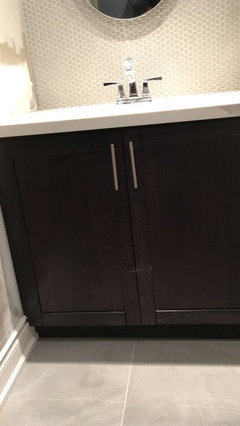
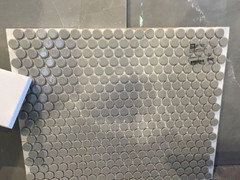
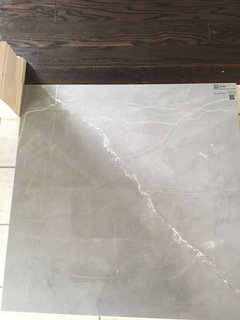
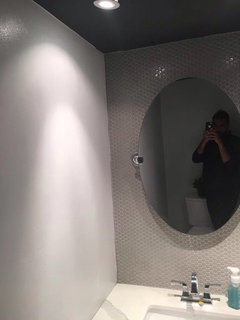
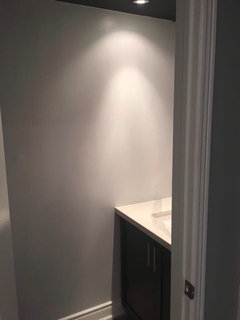
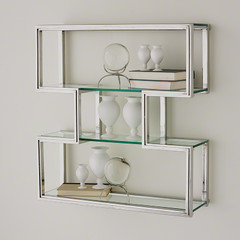
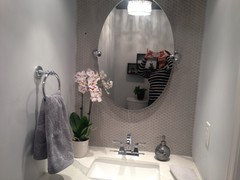
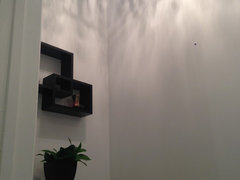
Powder Room Help - just doesn't look right
oomph18
6 years ago

Featured Answer
Sort by:Oldest
Comments (41)

oomph18
6 years agoRelated Discussions
More before/after but it needs help and doesn't look right..
Comments (8)This is a difficult question to answer, Think jigsaw puzzle, when we did our rockwork, we laid the largest flat pieces on the bottom, then as we built up we kept trying pieces one at a time until they fit and looked right to us. Sometimes we had to add some dirt to make the rocks fit to our liking. Each row we did was slightly back from the one below and they were all staggered so the gaps didn't line up and no real jutty pieces were sticking out over the row below. It was slow work for us as we had never done this before. The same thing when we built our little waterfall for the Koi pool, I mean puddle, it was a struggle, I kept saying it doesn't look right, DH got annoyed and left in a huff, I kept at it until I was happy with it. All this is probably as clear as mud. LOL Back to what I first said think jigsaw puzzle. Take your time, you will get it just the way you want it. I know you can do it. By the way you've got some cool rock there. A.........See MoreWell, that doesn't look right. Now what?
Comments (18)OK, I'm back with more exciting pictures! First, so it doesn't get lost below -- marcolo -- I read installation instructions for a different one of these shower kits to get an idea of how they are installed, and they said do NOT use 100% silicone caulk. I don't know why. Also, it said NOT to caulk the interior where the frame base meets the pan, only the exterior seam. Why is that? Before I ripped this out, it was caulked (and coming loose) on both sides. Anyway, I decided to partially disassemble the shower frame to get a better idea of what is going on and how to fix it. Here's where I am now: First, as you can see, the wall panel was not plumb when it was adhered to the wall. That would be, of course, because they didn't level the pan when they put it in, so when they lined the wall panel up with the pan, it ended up crooked. Duh. Pretty sure whoever installed this never heard of a level. A closeup view shows it even better. The jamb (metal frame part that was screwed to the wall) only barely overlapped the wall panel by the time it reached the bottom. The screws at the top of the frame went through the wall panel, while the screws at the bottom did not. The pan is badly out of level in all directions (the other wall is even more out of plumb, sigh). Now we can see the state of the drywall underneath the panel... ...and it is really not good. Crumbling drywall and scary black stuff (mold?) extends several inches up behind the wall panel. Here's a little drawing I did showing how the studs/drywall/shower wall come together -- or don't, as the case may be. The studs are badly out of plumb too. Easy to see how the slightest gap in the caulk inside the shower meant water getting under the edge of the shower wall panel and wicking up into the green board. Sooo....now I'm not sure where to go next with this. One thought is to cut away (from behind) the edge of the drywall that is sitting down inside the pan, and then insert some kind of extra flashing behind the wall panel so that any water that got behind it would not get any further. Another would be to cut away all of the damaged drywall (several inches) and patch it, adding flashing as in the first option -- again, this would be from behind. No, I don't exactly know how I would do that, but maybe there's a way to McGyver it. ;) I could try to remove the wall panel (it seems to come away from the green board pretty easily), replace the studs (they are not plumb either) and all the green board, and re-adhere the wall panel. The studs are only there to support the shower wall. This could help solve the fact that the wall flexes where it doesn't meet the studs. The risk of course is that I could break the wall panel, and then I'd really be in trouble. Also, I'm not sure how easy it would be to get just the one panel out without having to take the corner and the other panel as well. Removing only the one panel wouldn't address the other wall of the shower which doesn't seem to have leak problems (probably due to the slope of the pan and the fact that the shower head is on that wall) but I would not be surprised to find water damage to that side as well. And of course there's always the chance this is just a complete waste of time and I will have to bite the bullet and replace this shower kit with another. I don't think there's any way to get the pan leveled, and the fact that it's not level really throws the rest of the installation off. I'm not clear on whether removing and leveling the pan would mean having to do something with the drain height, which might be outside of my DIY abilities (though I do have a great plumber I could call). I'm just not too confident this shower can be made watertight enough to not leak into the room beneath. I haven't even shown the issues we have with the seal thingy at the bottom of the door, where water can easily leak out onto the bathroom floor, and I know that if a good bit of water ends up on the floor, that alone can mean a leak downstairs -- water that goes under the baseboard pretty much goes right on through the subfloor. Any advice at all would be very much appreciated. As is my usual habit, I decided to dig into this problem while my husband is out of town, and I'm going to be nobody's favorite person in my house if I don't restore this bathroom to working order pretty soon! (The other shower is in the basement, and none of us really likes using it -- plus it's the same shower kit and I'm betting it isn't installed any more accurately than this one was!)...See MoreDoesn't look right
Comments (4)They don't look right because they are too close in color qualities. Nantucket Gray is from the Yellow Hue Family and Ashen Tan is right nextdoor on the cusp of the Yellow-Red Hue Family and the Yellow Hue Family. Two colors being close in terms of hue isn't always a bad thing. In fact, analogous color scheme means two colors next to each other on the color wheel - it's a basic color relationship. The problem is a harmonious color relationship depends on more than one quality (or part) of color. So, if you're choosing to call it undertone that's fine but whatever you want to call it the bottom line is you can't base color relationships on just ONE part. There are three qualities of color: hue, value and chroma. And they all matter when it comes to creating harmonious color combinations. If two colors are close in hue, then there needs to be a healthy degree of difference in value and/or chroma. Value is about lightness and darkness. Chroma is about the strength of color. And there in lies the issue with using Nantucket Gray and Ashen Tan together. They are close in hue as I mentioned before. They are close in LRV Nantucket is 39.4 and Ashen is 53. They are close in chromaticity at right about the 1.5 mark. First, you have to decide if you want to stay in the same hue family as Ashen Tan. The other option is to go with a color from the same hue family as Nantucket Gray. Second, you have to decide if you want the kitchen color to be lighter or dark than Nantucket Gray. Third, you have to decide if you would prefer the kitchen color to be less chromatic or more chromatic. In other words, less grayed or more grayed -- compared to Nantucket Gray. And lastly, if you like the consistency, flow, and low points of contrast room to room, you could just paint the kitchen Nantucket Gray too. The contrast would primarily be between the Nantucket Gray walls and cabinets. The Benjamin Moore site might be helpful. When you look up a color they will show you what goes with the colors, similar colors, and additional shades. Here is a link that might be useful: Ashen Tan...See MoreCabinet install - it doesn't look right - HELP!!!
Comments (36)lazygardens photo shoes variations, but just different shades of the same tone. RED is a whole different family than Brown, and I can't imagine the same wood turning RED with a simple varnish. I'm with you. I would be bothered by the completely different color hues. It would be understandable, light vs dark in the SAME color family, but 2 different families on one piece of wood? Looks to me like 2 different woods. I just walked in our pub and looked at the butcher block top, stained in a walnut tone, and yes, there are variations, but every little piece of the block has the same tone. Maybe the fix would be to strip the whole thing, stain it all one color, and then apply varnish? I am sorry this happened to you. Good luck with getting the contractor to fix it for you. If you still owe money you do have leverage. An unhappy customer is not good business for any contractor. Fingers Crossed for you!...See Moreoomph18
6 years agooomph18
6 years agolast modified: 6 years ago PRO
PROGiz Design Studio LLC
6 years agooomph18
6 years agooomph18
6 years agooomph18
6 years ago PRO
PROBeth H. :
6 years agoUser
6 years agolast modified: 6 years ago
Susan Davis
6 years ago PRO
PROJodie White Designs
6 years agolast modified: 6 years ago PRO
PRONew York Hardware
6 years agooomph18
6 years agooomph18
6 years ago- PRO
Jodie White Designs
6 years agolast modified: 6 years ago - PRO
Jodie White Designs
6 years ago - PRO
Jodie White Designs
6 years ago User
6 years agooomph18
6 years ago
Gail Stivers
6 years agooomph18
6 years agooomph18
6 years agolast modified: 6 years ago- PRO
Jodie White Designs
6 years ago oomph18
6 years agolast modified: 6 years ago
Godswood
6 years ago- PRO
Jodie White Designs
6 years ago


Related Stories
RUGS10 Tips for Getting a Dining Room Rug Just Right
Is the rug you’re considering the right size, shape and weave for your dining room? Here’s what to keep in mind
Full Story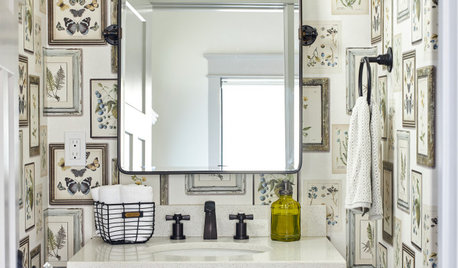
BATHROOM DESIGNKey Measurements to Help You Design a Powder Room
Clearances, codes and coordination are critical in small spaces such as a powder room. Here’s what you should know
Full Story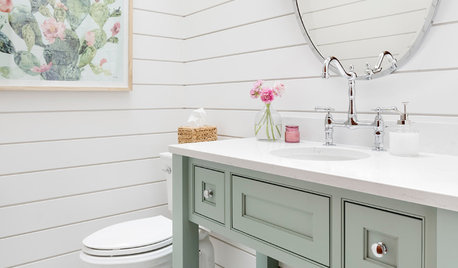
TRENDING NOWThe 10 Most Popular Powder Rooms Right Now
Shiplap, dramatic wallpaper and unique vanities stand out in this collection of popular photos
Full Story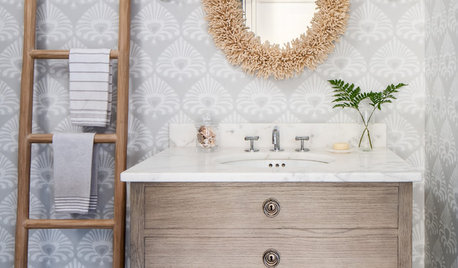
TRENDING NOWThe 10 Most Popular Powder Rooms on Houzz Right Now
See which small-bathroom photos Houzz users have been saving to their ideabooks lately
Full Story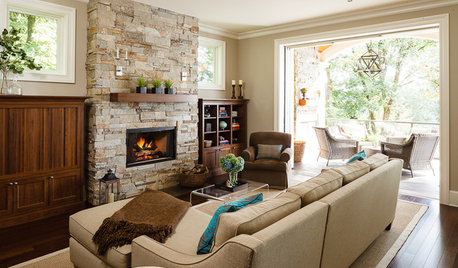
LIVING ROOMSRoom of the Day: Just Right for 2 and a Crowd
Cozy enough for a couple but welcoming to extended family, this Portland home has lots of design tricks up its sleeve
Full StoryROOM OF THE DAYRoom of the Day: Right-Scaled Furniture Opens Up a Tight Living Room
Smaller, more proportionally fitting furniture, a cooler paint color and better window treatments help bring life to a limiting layout
Full Story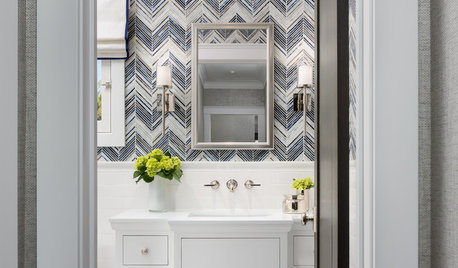
BATHROOM MAKEOVERSRoom of the Day: A Fresh Take on Classic Style for a Powder Room
A better floor plan and tiles in a striking chevron pattern help update a California bathroom with timeless appeal
Full Story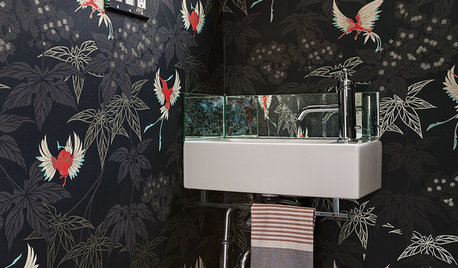
POWDER ROOMSRoom of the Day: Drab Toilet Closet Now a Dramatic Powder Room
Moving a wall, reconfiguring the layout and adding graphic wallpaper help turn a former water closet into a functional space
Full Story
DECORATING GUIDESRevive Your Room’s Look in Just 5 Steps
Not in total-makeover mode? Give your space polish and a pulled-together look with this easily doable plan
Full Story
COLORColor Palette Extravaganza: Room-by-Room Help for Your Paint Picks
Take the guesswork out of choosing paint colors with these conveniently collected links to well-considered interior palettes
Full Story

Patricia Colwell Consulting