


speed up a sewing machine?
6 years ago
Featured Answer
Sort by:Oldest
Comments (6)
 6 years ago
 6 years ago
Related Discussions
Machine sew eyelets
Comments (5)I don't know if you can do it on a regular machine unless it has that specific stitch... there may be a way to, but I don't know it! However, a machine in your price range should include this stitch... especially an electronic one... My favorite budget friendly machine is the Brother PC 420.... I've owned it for years... I wrote this review for a ladies blog (she was requesting reviews of various machines for her blog) and spent 6 hours doing it and taking pictures and she never responded back me or posted it or even said thanks, so if it helps someone here, good! I am so excited to share my enthusiasm for what I think is one of the most awesome budget friendly machines on the market! My name is Bobby and I'm a 30 year old guy who lives in Orlando, Florida and loves to quilt. I have 3 sewing machines (a vintage metal Brother straight stitcher from the 50s, a Brother PC 420, and a Bernina Artista 200) and love them all for different reasons. The machine I'm going to review here is the Brother PC 420. I think that Brother often gets overlooked in favor of more prestigious brands, so allow me to introduce you to this wonderful gem. This machine is not available in big box stores like some of the lower end Brothers are. It is also not one you will find at most dealers. I bought mine on Amazon, after watching a QVC demo and falling in love with the feature set. It is still available from those two vendors. When I bought mine in 2009, I paid 499 for it. That is also what it sells for on QVC and even Brother.com. Right now, the machine is on Amazon for 379.99! I think it is worth every penny of 499, so 379.99 is an absolute steal! It is also available on Ebay, but return policies and shipping practices can be sketchy there so I'd steer clear from that if possible. So, what makes this Brother so special? The Brother PC 420 is a 294 stitch electronic (computerized) sewing machine with a 7 millimeter stitch width. If you are looking at Brother, this is the the least expensive model you should consider. There are two very important reasons for that. The first of which is that this is one of the few lower end Brothers that allows the user to control the presser foot pressure. A lot of machines now are starting to lack that feature (though old machines always had it), and I really think that is something the user needs to be in control of. Sometimes the pressure has to be reduced or increased to prevent puckering or to make the fabric feed properly. The other reason is that this machine has a metal internal frame. Lower end Brothers are lighter weight, but they have plastic "veins" or fins inside for support instead of a metal frame. Over time, these veins can break and the internal workings of the machine virtually fall in on themselves. You really want a machine with a metal frame! We are just getting started as features abound on this glorious machine. My two favorite features are the needle threader and the automatic thread cutter. Many machines, even lower end Brothers have needle threaders, so that feature alone isn't special. What is special, is that the needle threader on the PC 420 actually works! It is a one touch, one finger needle threader that works the first time every time! Regular needle threaders require the user to hold the threader's lever down with one hand and carefully draw the thread across 2 or 3 guides and hope the hook catches it. This usually miss the first few times, the hook breaks over time, and they require two hands. It's almost easier to thread the needle manually with those! The PC 420 threader is quite different! Just draw the thread through a slit and pull the lever straight down with one finger. It will actually put the thread through the needle with that one step, and it NEVER misses! Not ever! That is huge! My other favorite feature is the push button thread slicer. It is becoming a common feature of late, but it is seldom found on a machine in this price range. Just press the button with a scissor icon and top and bobbin threads are cut automatically. This saves time, energy, and thread! It also brings both threads to the bottom and raises the needle automatically so the fabric can be removed. If you've never sewn on a machine with an automatic thread cutter, you simply must. It is something you have to try to fully appreciate! Of course the PC 420 also has a built in thread cutting razor on the side of the sewing head for times when you feel like doing it the "old fashioned" way. The PC 420 also sports needle up/down, push button start/stop with sliding speed control (which can also be set to be the stitch width control), drop feed, and a knee lifter for the presser foot (unheard of at this price, except with this machine). I use the knee lifter when quilting sometimes and it really is nice to be able to keep both hands on the fabric at all times. The needle up/down button is so handy that I don't think I've ever needed to use the hand wheel since I got the machine. Still good to have one if the machine ever jams or if you need to "walk" the machine over something especially heavy. Brother even put some attention to detail on the PC 420. The buttons on the right side of the machine are covered with a clear coating so the graphic doesn't wear off over time. There is also a ridge on the hand wheel that will be at the top when the needle is in the highest position. That is something that is really important to know (you typically have the needle in the highest position when starting to sew or when threading, the needle threader will not work if the needle is in any other position). On lots of machines, you can tell if the needle is in the highest position by looking at the thread take up lever, but the take up lever is hidden on the PC 420. Another thing that I appreciate is that the switch to drop the feed dogs is in the back of the Brother PC 420. Many machines have that switch somewhere in the front between the flat bed and free arm and the flat bed storage compartment has to be removed every time the feed dogs are raised or lowered; it is convenient to not have to do that each time. What about threading? There are 9 steps to threading the PC 420. The steps are all logical and they are numbered in order on the machine. If you ever forget how to do it, the machine has a built in tutorial complete with graphics! Just press the question mark button by the screen and pictures of each step with come on the display in order to show you what to do! This tutorial will show how to thread the machine, how to wind the bobbin, how to load the bobbin, and how to change presser feet. You advance through the steps in the tutorial by pressing the up or right arrow keys, so you are in control of the pace... it cannot go too fast for you! What about the bobbin? The bobbin is plastic and it is a top loading drop in bobbin. I love top loading, drop in bobbins. No bobbin case to mess with and you always know how much thread is left because you can see it through the transparent cover (of all the features the PC 420 boasts, a bobbin level sensor is not one of them, but those seldom work properly anyway). The PC 420 bobbin is not a standard class 15 or 66 bobbin, so it cannot be found readily at local retailers. The machine comes with 4 to start, and more can be ordered online. The bobbin for the PC 420 is specific to this machine and larger and holds more thread than many others. I ordered 20 extra bobbins from Amazon, and they were reasonably priced, but took a TWO MONTHS to arrive from Japan. One thing I especially appreciate about the bobbin is that it does not require the user to draw the bobbin thread up before starting to stitch like a lot of older/cheaper machines do. There's a guide on the machine to show which direction the bobbin should be installed. Once the bobbin is dropped into place, the only step left is to draw it through the guide (which is basically an upside down u shaped slit in the machine bed) and replace the clear plastic cover. The thread will be sliced by the built in razor when it is drawn through that guide, so it isn't getting in the way. The bobbin winder is on the top right of the machine, near the hand wheel. It is not an independent bobbin winder (meaning that a bobbin cannot be wound during sewing). It is a snap to set up and winds the bobbins evenly every time. It stops by itself when the bobbin is full and even the bobbin winder itself has built in thread cutting razor. The bobbin winder must simply be slid to the right to engage, there is no need to de-clutch the hand wheel on the PC 420. I don't like holding down the foot pedal to run the machine when winding, so I always use the stop/start button to wind bobbins (and only then, because I don't like giving up control for regular sewing). Are the presser feet easy to change? Most of the presser feet are very easy to change! There is a button on the back of the presser foot ankle, that when pressed, will allow the foot to just drop off. A new one is attached by putting it under the ankle and lowering the presser foot ankle right on top if it. The only times a screw driver is necessary to change feet are when the walking foot and free motion foot are used. What about accessories? The Brother PC 420 comes with a ton of wonderful accessories! The included feet are the regular zig zag foot (also used for straight stitching, but doesn't have a single hole like quarter inch feet do), blind hem foot, buttonhole foot, button attaching foot, zipper foot, free motion foot, quilting foot (but not a quarter inch foot), walking foot, teflon foot, overcasting foot, and monogramming foot. All the feet fit neatly in the storage compartment of the flat bed part of the machine (the part you remove to make it a free arm machine). Also included are 3 spool pin caps, an auxiliary spool pin for twin needle sewing, a twin needle, an eyelet punch, 4 bobbins, a seam ripper, a lint brush, a slippery spool net, screwdrivers, a hard case cover, and the instruction book. Oh yeah, and the cord and foot pedal too. The only things I had to buy for the Brother PC 420 were a quarter inch foot with a single hole and guide and a guide bar for the walking foot... I got one from Amazon and one from Ebay and didn't spend more than 10 dollars for both. Brother accessories are very reasonably priced. Many machines, especially in this price range do not include a walking foot, so that alone is wonderful. There is an extension table available for this machine as well to give extra surface area, and while I never bought it, it would be very handy when quilting. It is available on Amazon for around 56 dollars. What about the measurements and stats on this baby? This is Sewing Machine Adultery after all, right? Measurements and stats are a prerequisite for such an act! The Brother PC 420 weighs 17 pounds. Not feather light, but that is good because it will not go skittering across the table when sewing. It is still very manageable at that weight and easy to take to classes, sit and sews, and retreats (it does have a built in handle, flip down dust cover, and hard carrying case to further facilitate easy transporting). The throat or harp space is rather generous on the PC 420 at 7.4 inches side and 4.1 inches tall. The exterior measurements of the machine are 17.32" (height) x 7.87" (width) x 11" (depth). The PC 420 has a maximum sewing speed of 850 stitches per minute. I can't imagine ever sewing that fast and still having the project turn out, but it's great to know it has the ability. What about the computer part and stitch controls? The computerized portion of the PC 420 reminds me very much of a primitive cell phone. There is a small display screen that has simple graphics and is back lit (this is important because many cheap machines do not have back lit screens and they are harder to read). The screen displays the current stitch, length and width of the stitch, what presser foot to use, and whether or not any special settings are selected (like twin needle sewing, mirror imaging, single or infinity pattern, stitch elongation, or automatic tie off). There are four arrow keys with OK, clear, and previous screen buttons and these are used to navigate the menus. The up and down arrow keys also serve as the way to raise or lower the stitch length. The left and right arrow keys also serve to increase or decrease stitch width. Of course, as previously noted, the speed control slider can also be set to be the stitch width control. The default stitch lengths and widths can be overridden just by pressing the arrow keys. The default setting will remain highlighted in case you need to revert back to it at any time. The stitch length and width can be adjusted in half millimeter increments above the default setting and .2 millimeter increments below the default setting. The smallest width the machine will sew is 0.5 and the largest is 7.0. The smallest length stitch the PC 420 will sew is 0.1, the largest 5.0. There are 14 needle positions on the PC 420, which really serve to make it versatile. Within the computer, the language of the display can be changed, the beep the buttons make can be turned on or off, and even the contrast of the display screen can be altered. Selecting a stitch requires just pressing the stitch selector button and scrolling through with the arrow keys until you find the one you want, then press OK and start sewing! The menus are well organized into different categories like utility stitch, satin stitch, decorative stitch, and monogramming (yes, it does letters and numbers too! It has 3 fonts!). Identifying stitches is easy because there is a graphic on the display screen of each stitch. No cards or books look through, no numbers to press. Any combination of stitches can be selected in any order! This machine also provides the ability to create your own stitch. It also has 4 memory pockets so that stitch combinations can be saved and recalled later (and those to not get erased when the machine is turned off!). There are 6 buttons on the bottom of the control panel that are quick start buttons. They allow the user to select the most commonly used stitches without having to go through the menus in the computer. I don't know what all of them are, but the ones I use frequently are middle needle position straight stitch, zig zag, and blanket stitch. This machine has many decorative stitches: several leaves and flowers, a heart, an alligator, scalloped edge, tapering stitches, and vines. It has a piecing stitch and a stippling stitch. It also does eyelets and 10 different button hole styles... and they are one step button holes! I've never made any for practical reasons because I sew quilts instead of garments, but I did play with them once and they were beautiful and very easy. I absolutely love the button sew on stitch! I'm always popping buttons on my clothes (did I forget to mention that my other hobby was baking/eating!), and I do a terrible job with hand sewing buttons. This machine has come to the rescue more than a few times with that feature alone! What about performance? The motor in the Brother PC 420 is very smooth and quiet. I'll admit that I've never tried to go over multiple layers of denim or anything like that, but it handles everything I can throw at it (typically piecing quilting cotton, quilting quilt sandwiches, and mending my clothes). The machine never makes fabric pucker and it never gets a bird's nest. The tension has never been messed up, and I've had this machine for 4 years now. It feeds fabric evenly and smoothly. Stitch quality is very good for the most part (see below for further details on that). The whole time I've had this machine, it has never broken thread or jammed! Also, it is not picky about threads. I typically use Gutermann cotton or polyester thread, and it does fine with that. I've used clear monofilament thread and multi-colored variegated threads with no issues. I've also used vintage threads that my grandmothers gave me when I was a teenager wanting learn to sew (people often recommend not to do that because they can break and be more linty, but sometimes I just need a certain color and that's all I have). I've even used cheap Coats and Clark thread from a big box retailer when that was all I had in the color I needed (don't tell my quilting teacher, she will smack me with an acrylic ruler!). The machine didn't balk or complain one bit (if I even get those threads in the general vicinity of my prissy Bernina, she throws a hissy fit!). The Brother really is a laid back, anything goes, easy going sort of fellow! Is there any maintenance? This machine does not need to be oiled. It comes with a lint brush, and the only maintenance that needs to be done outside of changing needles, is to brush lint that builds up from the hook and race (the area under the black bobbin holder case). Just be sure to put the bobbin holder case back in correctly. I didn't put it back together correctly one time and started stitching and the silly bobbin few up and got me in the eye with the first stitch! Of course the machine should be serviced by a proper technician once a year, just like any other sewing machine. I had mine done at the local Brother dealer (which is an hour away) after owning it for two years... they didn't have any issues at all with servicing the machine even though I didn't buy it from them. I called them when I was looking and they didn't carry this model. I didn't have it serviced because something broke, it really was just to clean and service parts that I can't access and it was less than 100 bucks. Miscellaneous details I wanted to say a little bit about the lighting on the machine. There are two LED bulbs on this machine to light the work area. One on each side of the needle in the sewing head. They stay cool (I burn myself on my vintage machine's bulb all the time) and do not create shadows like regular bulbs do. They also last longer, but they can't be replaced by the user, they must be replaced by a dealer. They cast a white light and while not blindingly bright, are definitely adequate. I've seen machines with lights in the middle of the harp area before, and this machine doesn't have those; I can't understand why they would be necessary there anyway. Another thing that I appreciate about this machine is a feature that makes it great for really detailed work like paper piecing where you have to stop at an exact point. If you just need to sew one full stitch and only one, just tap the foot pedal and release it immediately. It will sew one stitch and then stop on a dime. Truly awesome! Another great feature is that the thread spool pin is right in the front on this machine, so is is easily accessed. On my Bernina and many other machines with the spool pin in the back, I practically have to sit on a phone book to reach the thread! Are there any cons? Just a few, and not very serious ones at that. My major pet peeve with this machine is that the default needle position is a left justified straight stitch. I don't know anyone who sews with the needle all the way to the left, ever! I have to move to the middle every time I start sewing, which just requires pressing one button on the front of the machine. The problem is that when using a quarter inch foot with a single hole, if the needle is in the left position and you start sewing, the needle will hit the foot and break. I'd have saved at least 30 needles if the machine just defaulted to a center needle position! Another thing I don't like is that in order to use the stop/start button, the foot pedal must be unplugged. That just seems unnecessary to me! Also, the stitch quality with some of the decorative stitches is not good. Sometimes, the decorative stitches aren't formed completely, they are just distorted for reasons unknown. The letters for the monogramming function aren't very versatile either. Only capital letters, no lowercase at all, and there aren't many sizes available for the fonts. The last thing that annoys me about this machine is that the spool pin cannot accommodate large thread cones. I have an auxiliary thread stand if I need to use cones, but I don't like being required to use it. Concluding thoughts. So I've had this machine for 4 years and I've never had to touch the hand wheel, the tension dial, or a pair of scissors. I've had my Bernina for 6 months, I bought it used and paid two months rent for the silly thing... I do like it, but it has been in the shop three times, it's fussy, the threader and bobbin are tedious, and it takes 3 minutes to boot up! For the most part, using any other machine makes me want to run back to my Brother PC 420. Even when I cheat on him with another machine, he is always ready and waiting for me to return, eager to put in a hard day's work and not require much in return. That makes the Brother PC 420 a winner in my book, and if you get your hands on one, I'm sure you'll feel the same way! If you have any specific questions about the PC 420 not covered here, I'd be glad to answer them!...See MoreSewing Machine Back-up?
Comments (4)A truly industrial machine is going to set you back some bucks unless you find an older machine at auction or thrift store. Don't be fooled by labels of "commercial/industrial heavy-duty machine" on some of the ebay auctions. People that know have pointed out that the machines being sold are not industrial - just work-horse vintage machines with too high a price tag. A vintage Singer 99 or 15-91 or 301 machine would be a the types of machines I would suggest. Unless you are trying to sew thru leather or layers of denim, a commercial machine may not be necessary for your business....See MoreOn the hunt for a new sewing machine
Comments (2)Actually, on second thought, Bernina or Husqvarna-Viking? Joann Fabrics and Crafts has H-V on sale right now & I'm considering the Emerald 118. Thoughts? This post was edited by hobby_libby on Tue, Aug 19, 14 at 15:29...See MoreNeed Sovereign sewing machine take-up spring
Comments (1)Try Cindy Peters at stitchesintime@earthlink.net She specializes in parts for antique and vintage sewing machines. Annie...See More- 6 years ago
- 6 years ago
 6 years ago
Related Stories
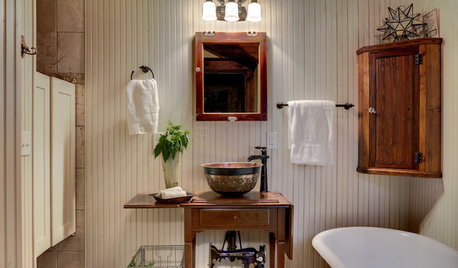
VINTAGE STYLEAntique Sewing Machines: Tailor Made for Nostalgic Decor
In full-on vintage rooms or contrasting modern looks, old sewing machines and tables are stirring up the past in a most stylish way
Full Story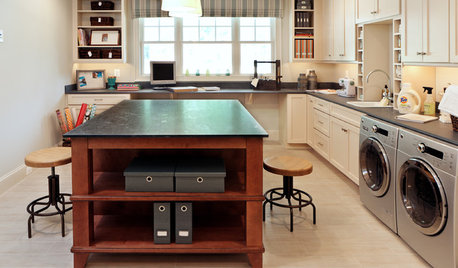
HOME OFFICESSmall-Business Savvy: Set Up a Shipping Station
Packaging and shipping products efficiently is an essential part of your creative business. Is your studio up to the task?
Full Story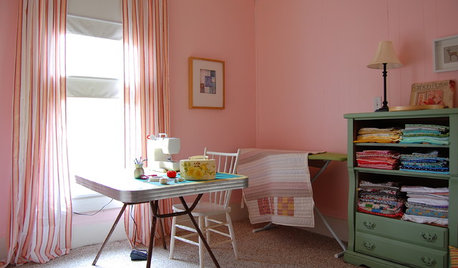
STUDIOS AND WORKSHOPSA Stitch in Time: Creative Sewing Spaces
Sewing rooms have become popular again as people of all ages embrace simple crafts they can do at home
Full Story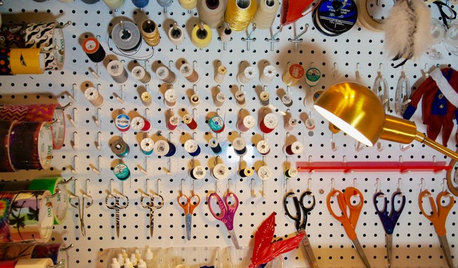
ORGANIZINGRoom of the Day: Cluttered Closet Becomes Tween’s Sewing Nook
A mother helps her 11-year-old daughter create an organized space for her passion
Full Story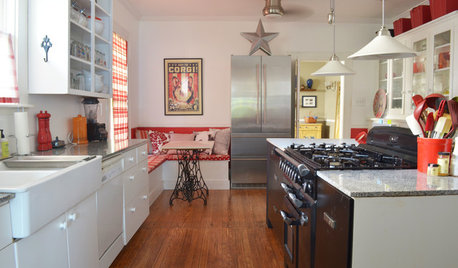
FURNITUREGreat Vintage Find: Antique Sewing Tables and Cabinets
These history-rich pieces add unique style and function all over the house
Full Story
BUDGET DECORATINGBudget Decorator: 11 No-Sew Home Decor Projects
No seamstress skills? You can still show off fab fabrics and trim — not to mention your creative ingenuity — all around your home
Full Story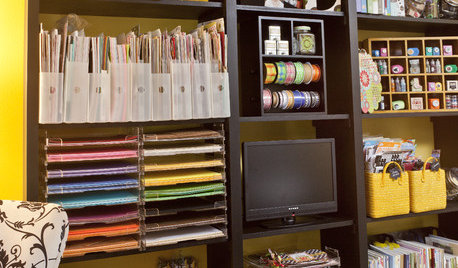
STUDIOS AND WORKSHOPSHow to Set Up a Craft Room
Keep bits and bobs from winding their way into the rest of your home by setting up a designated area for craft projects
Full Story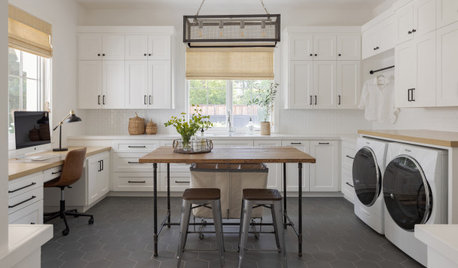
HOUSEKEEPINGHow to Clean Your Washing Machine
Cleaning your washer once a month will ensure that it stays spick-and-span along with your clothes
Full Story
BOOKSCan Tidying Up Result in Life-Changing Magic?
Organizing phenom Marie Kondo promises big results — if you embrace enormous changes and tough choices
Full Story
ORGANIZINGAfter Tidying Up, How to Organize Your Laundry Room
When you’re done giving your laundry area the Marie Kondo treatment, these storage tools can help keep it neat and clean
Full StorySponsored
More Discussions
juneroses Z9a Cntrl Fl