


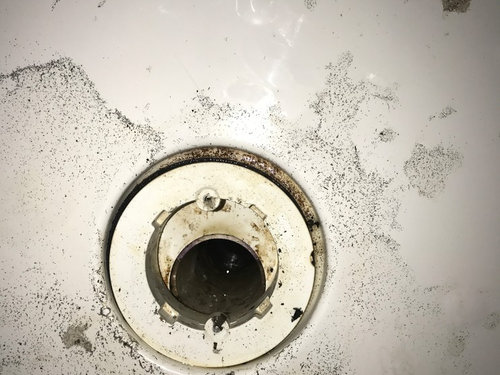
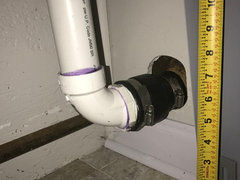
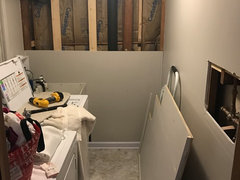
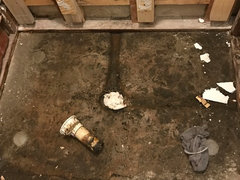
Leaking shower drain and vent issue
Doyal Richard
7 years ago
Featured Answer
Sort by:Oldest
Comments (14)

Jake The Wonderdog
7 years ago
Doyal Richard
7 years agoRelated Discussions
tub drain issues
Comments (5)Do you mean the whole wall extends 14-18 inches? Anyway, I'd double check the insulation "envelope" and seal any/all air gaps, however small. Keep in mind that you may need just a bit of space, on the inside of the "envelope", between the joist insulation and the subfloor (a baffle might help). This would allow some cavity air to get to those pipes. But the main thing is to seal everything, including the end joists. Btw, if you can get your arm in the joists from below on a cold day, it's easy to find the air leaks with your hand. One last thing, I found that when sealing these crazy, hard-to-reach spots w/ spray foam, it sometimes helps to get a roll of clear vinyl tubing, 1/4" outside diameter ($3) that fits over the end of the spray straw nozzles (like "great stuff"). Cut to fit, like 12" or so. You can even tape a piece of wire to it to make it more rigid. BTW, be careful, the "great stuff" nozzles break easily and you'll get that stuff all over yourself. If you can find "Touch n' Foam" brand, the nozzle holds up much better....See MoreNew Drains/Vents routing. . .
Comments (0)I have this posted on a few forums. . .here goes! Hello All! I am hoping for a quick answer from the experts to a drain/vent issue in a bathroom renovation currently in progress. Please see the pic for more details. The bathroom originally had a small shower stall and one sink. I'd like to install a double shower and double sink which will require moving the drains and vent pipes (ALL pvc). I think I have this right. . . As you can see from my crude mock up, the new shower drain (2 inch) will be located as pictured and run parallel with the floor joists and then through one floor joist and into the soil stack (connecting with a furnco fitting). [B]1. Are two 45s better than a 90 degree fitting to make the turn?[/B] [B]2. Since the drain is more than 5 feet from the stack, I understand that I need to vent it. . .correct? [/B] My plan was to use a tee from the drain (as pictured), use a 90 to take it up through the (yet to be built) side shower wall, and then use another 90 to take it back over to the existing roof vent (which lies roughly above the new drain as I have pictured). [B]3. As I understand it, a 1.5 inch vent is required. . .or can 1.25 inch (what the original was) be used? 4. Also, is it ok that the horizontal portion coming from the drain through the joists be in two sections (as I don't believe I could put that in as one solid piece)?[/B] For the sink drains/vents, I have a few concerns/questions. I plan to install my own vanity top and use two vessel sinks. The drain/vent pipes for the original sink was 1.25 inch. It's my understanding that with two sinks, 1.5 inch is required (recommended?)? Since the drain pipe for the original sink entering the stack is obviously 1.25 inches. . . 5. Can 1.25 inch be used to drain the two sinks or does it need to be 1.5 inch? If I use 1.5 inch, I would still have to reduce it to 1.25 inch to enter the stack, so. . .:confused: To the right of the pic, the X on the wall marks the center of the vanity placement. I was planning to "T" off the sink P traps and use one pipe for the drain and one pipe for the vent. The vent would go up the wall, 90 off, then tie into the vent from the shower vent, and then tie in to the roof vent. I plan on building a 2x3 wall on the existing wall since 1. that is a bedroom wall, and 2. the duct work runs right under that existing plate, making it difficult to place the 90 degree turn (in the existing wall) to go to the stack. So. . . [B]6. Is it better to run the sink drain as pictured "above," which would entail progressively notching the top of the joists (2x10), come over the duct, notch the next joist, use a 45, then hopefully be low enough to drill [U]through[/U] the remaining joists to continue the downward slope to the stack. It looks like I would be able to do it with two pieces (piece from drain--->45--->piece to stack). [/B] [B]7. Or would it be better to move everything to the "right" near the right side sink (sort of out of frame in the pic) and run the drain "straight" across (notched and through) the joists (bottom blue line)?[/B] I hope that is clear and anticipate some advice from the experts! Thanks in advance! Tom...See MoreNew tub spout leaking from drain hole when diverter used?
Comments (9)Yes, it does. I suspect the problem is the area in the circle (see below). If you want to take a better photo of that I can confirm it. The way to fix it is to remove the rubber o-ring, then heat the solder with a torch until it melts. You will need to remove the brass piece with a pair of pliers (channel locks) by rotating it back and forth as you pull it forward. This may be something that would be better as a 2 person job if you haven't used a torch before - (one holding the torch, one using the pliers and removing the brass piece). Replacing the brass piece is the best bet although it's possible to reuse it In either case, you will want to clean the inside of the brass piece with a wire brush. You will also want to clean the end of the pipe with sandpaper / emery cloth. Both parts need to be shiny clean. Then apply flux, reheat and solder it. When you solder that, you want to heat the metal pieces so that the solder will flow around them - not heat the solder itself. If the metal itself isn't hot enough to melt solder, the solder will just run off. On a good solder joint the solder will flow all around the joint. The elements of a good solder connection are 1. Clean metal 2. Flux 3. Enough heat on the metal parts. If you do that your solder joints will be good every time. BTW: Put something in the bottom of the tub to protect it from melted solder that will drip, esp if the tub is plastic/fiberglass. Here are the tools and supplies if you want to do it yourself: Push button torch kit flux solder emery cloth or sand paper inside pipe cleaner (1/2")...See MorePlumbing drain pipe too high for shower drain
Comments (8)Plumbing new drains and vents can be complicated, but in this case it seems you are just replacing your old shower pan and drain with a new curbless design. You are not really changing the basic plumbing design; you are just trying to get the drain to align. I assume you have fully researched the design for a curbless shower, since that is more complicated to implement than your plumbing changes. In most cases its easier to use a pre-sloped pan covered with a waterproof membrane by Schluter or other good company. They recommend also using waterproofing membrane under the bathroom floor for several feet around the shower, since its hard to predict how much water will end up on the floor when you have a curbless design. This company has a low profile P-trap, but I'm not sure it will be low enough for what you need. https://pvcpipesupplies.com/1-1-2-p-trap-low-profile-dwv-fitting-d706-016.html If the vertical pipe in the wall is accessible and made out of PVC or ABS, it is a relatively simple job to cut it and lower the drain connection. If you are motivated enough to break up concrete, cutting into and splicing a drain pipe should not be that hard for you. Bruce...See MoreJake The Wonderdog
7 years agoDoyal Richard
7 years agoDoyal Richard
7 years agoJake The Wonderdog
7 years agoDoyal Richard
7 years agoDoyal Richard
7 years agoJake The Wonderdog
7 years agoBruce in Northern Virginia
7 years agoDoyal Richard
7 years agoEmma Jacob
7 years agoDoyal Richard
7 years ago
Related Stories
BATHROOM DESIGNHow to Choose the Best Drain for Your Shower
Don't settle for a cheap fix when you can pick a shower drain that suits your style preferences and renovation codes alike
Full Story
BATHROOM DESIGNConvert Your Tub Space Into a Shower — Waterproofing and Drainage
Step 4 in swapping your tub for a sleek new shower: Pick your waterproofing materials and drain, and don't forget to test
Full Story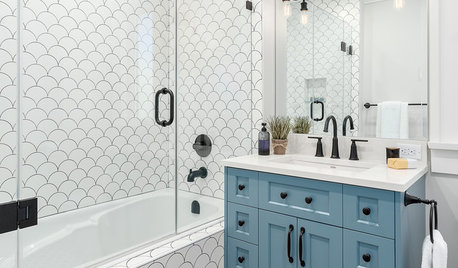
BATHROOM DESIGNShower Curtain or Shower Door?
Find out which option is the ideal partner for your shower-bath combo
Full Story
BATHROOM DESIGNConvert Your Tub Space to a Shower — the Fixtures-Shopping Phase
Step 2 in swapping your tub for a sleek new shower: Determine your mechanical needs and buy quality fixtures
Full Story
BATHROOM DESIGNDream Spaces: Spa-Worthy Showers to Refresh the Senses
In these fantasy baths, open designs let in natural light and views, and intriguing materials create drama
Full Story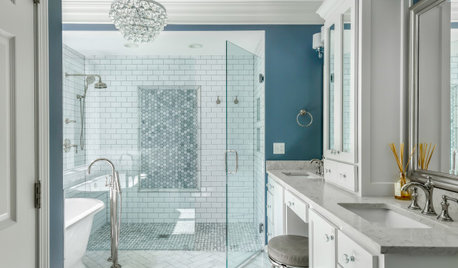
HOUSEKEEPINGHow to Clean a Glass Shower Door
See which tools and methods will keep those glass shower walls and doors sparkling clean
Full Story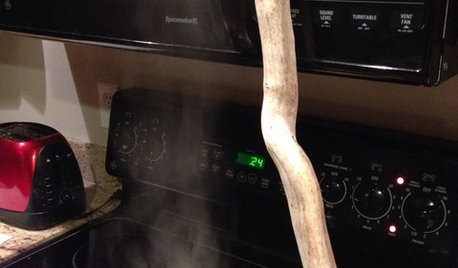
LIFEHouzz Call: Show Us Your Nutty Home Fixes
If you've masterminded a solution — silly or ingenious — to a home issue, we want to know
Full Story
KITCHEN DESIGNA Cook’s 6 Tips for Buying Kitchen Appliances
An avid home chef answers tricky questions about choosing the right oven, stovetop, vent hood and more
Full Story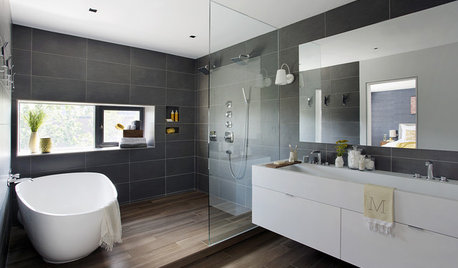
SHOWERSYour Guide to Shower Floor Materials
Discover the pros and cons of marble, travertine, porcelain and more
Full Story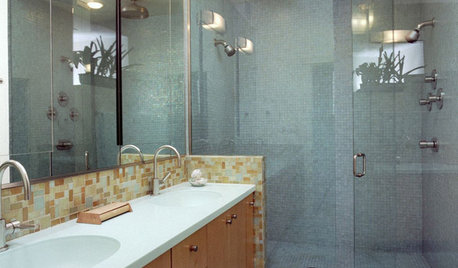
BATHROOM DESIGNThe No-Threshold Shower: Accessibility With Style
Go curbless between main bath and shower for an elegant addition to any home
Full Story


Jake The Wonderdog