


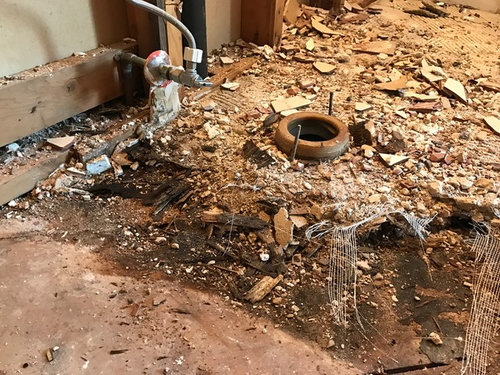
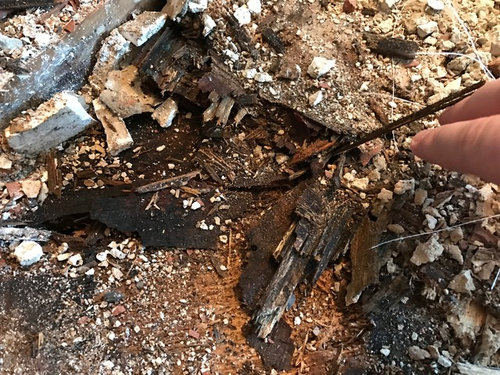
Water leak - Self fix - BIGGER PROBLEMS
Aaron Hurst
7 years ago
Featured Answer
Sort by:Oldest
Comments (9)

kudzu9
7 years agobadgergal
7 years agoRelated Discussions
How to Fix/Adjust Toro 20017 Self-Propel Cable
Comments (17)I have the same model, now laying there apart. I specified the exact part # for the traction cable at a dealer, got the parts manual for my serial # online. But the old cable had a ball at the end that retained it in the spring. The new one has like an "S" curve at the end of the cable, at both ends really. I see how to insert it at the handle assembly. But there is no way it will go into the spring. It looks like the one I got is made to insert into the bracket at the transmission end rather than through the spring. I sent an email to Toro, maybe they will tell me I was sold the wrong part. Oh, and there is no way that black plastic part at the housing was going to come off by sliding it through the slot into the bigger hole. I had to chisel it off, no matter because the cable was broken anyway and the new one comes with this plastic part. If this works the photo at the link shows the old cable and spring at bottom, new one at top. Here is a link that might be useful: photo...See MoreWater leak - Richmond needs to fix, need advice
Comments (1)When it's raining, check where the water is going. Often downspouts clog and water leaks from the joints, down the wall and finally into the basement. Also, check that the grading is moving the water away from the foundation. If the sump pump is working, be sure the water is moving away from the property--whether it's to daylight further out or to a sewer/storm drain. The occasional water you get in the basement is likely a result of poor external drainage on the foundation wall--no plastic membrane or similar stout barrier against the wall combined with slow draining soils. As a rule, tract builders simply backfill with whatever they've excavated. Instead of caulking around the water supply, a more permanent remedy would be a hydraulic cement based material. Frankly, the bit of water is nowhere as disturbing as that horrendous diaper insulation that is guaranteed to lead to problems....See MoreFixing leaking PVC pipe joint
Comments (17)I went to make the repair and realized I have 1.5" pipe, not 2" (stupid). I was originally surprised at the amount of water accumulation, but I'm not well versed on how much condensate to expect. I have a cup underneath the drip right now, and collected maybe a few ounces in a 24 hour period. I can tell you this: After coming down from the roof, the line goes horizontal and from visual inspection appears to be pitched in the right direction. After maybe 8' of horizontal run there is a short 90 elbow, also horizontal. Then there is a short, say 1" section of pipe connected to this 90. This 1" section is mated up with a pvc coupling ring. This coupling is mated with about another 4" section of pipe until it meets a 90 oriented vertically. The drip is between the coupling and the 4" section of pipe. It appears they glued the wrong length pipe and then used a coupling to fix the problem. There must be a small gap between the coupling and the 4" section of pipe where the water finds a low spot. My plan was to cut the long 8' run of pipe just upstream of the horizontal 90, and also cut the 4" section of pipe after the leak. Then put new couplings on the existing pipe and connect a new horizontal 90 with new 1.5" pipe. I've done a number of pvc glue jobs and one thing that always bothered me: When I dry fit the pieces to check spacing, I can only twist the various parts together so much. When I apply glue the pieces then slide together tighter due to the lubrication, and then my spacing is off a little. I'm reluctant to push the pieces together less than the full amount when lubricated for fear of getting a leak. Do you oversize your piping sections a little to account for this, or just leave a little slack with plenty of glue? I haven't had any pvc leak on me yet, but always struggled with this. I thought maybe to glue everything together except the last coupling, and then dry fit that last connection and cut down the pipe as needed to make the final fit....See MoreWill my attempt to fix this leak end in disaster?
Comments (8)The fixtures are in remarkable condition which lead's me to think they will not be difficult to disassemble. I take it you own and know your way around tools so here we go. First off since you are only having a little by-passing at diverter,let's only do it to see how things go. The worst that can happen unless you get crazy is you make the diverter worse but there's no flood and surly you can take tub baths for a few days without drowning. Set handle at mid way between tub and shower. Hold knob while removing screw. If handle doesn't slide off with a little pulling and wiggling,pull while tapping with metal object from behind. After handle stem cover are removed you will likly see one small plus one large place for a wrench. Don't mess with small nut,that's to adjust packing in case water leaks around stem. Use a box end wrench or deep socket (6 point preferred but certainly not nessary)to remove stem. O-rings and washer are self explainitory but seat that remains in fixture can be tricky to remove and difficult to find replacement for. If you don't see shinny scratches on seat you might get by without replacment. The seat will have either square or hex hole in center. Seat wrenches are inexpensive but if you are carful,seat can be removed with ever day tools. Allen wrench for hex and an old manual operated wood drill bit for square. Just make sure it fit's and keep it straight or you risk damage to new soft brass seat while installing. While stem is out,lub stem where it go's through packing plus course threads that pull and push stem when handle is turned. If that go's well you can put new washers in hot and cold before they start dripping ( don't forget to adjustmid-way open and closed while removing and reinstalling). Good luck...See Morekudzu9
7 years agolast modified: 7 years agobadgergal
7 years agocooper8828
7 years agoUser
7 years agogeoffrey_b
7 years ago
ILoveRed
7 years ago
Related Stories

GREAT HOME PROJECTSHow to Identify and Fix Plumbing Issues
Whether minor drips or major leaks, when water starts flowing, it’s time to call in a pro
Full Story
REMODELING GUIDESThe Hidden Problems in Old Houses
Before snatching up an old home, get to know what you’re in for by understanding the potential horrors that lurk below the surface
Full Story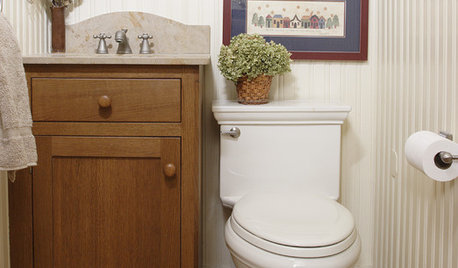
HOUSEKEEPINGWhat's That Sound? 9 Home Noises and How to Fix Them
Bumps and thumps might be driving you crazy, but they also might mean big trouble. We give you the lowdown and which pro to call for help
Full Story
BEDROOMS7 Ways to Make a Small Bedroom Look Bigger and Work Better
Max out on comfort and function in a mini space with built-ins, wall mounts and decorating tricks that fool the eye
Full Story
GARDENING GUIDESLearn the Secret to Bigger and Better Roses
Grow beautiful roses using both ordinary and unusual soil amendments
Full Story
DECORATING GUIDESSolve Privacy Problems With Window Film
Let the light in and keep prying eyes out with an inexpensive and decorative window film you can apply yourself
Full Story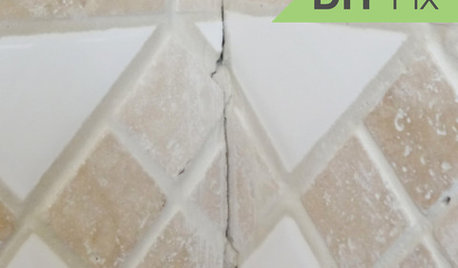
BATHROOM TILEQuick Fix: Repair Cracked Bathroom Grout
Banish an eyesore and safeguard your bathroom from water damage in 30 minutes or less with this DIY repair
Full Story
LIFEHouzz Call: Show Us Your Nutty Home Fixes
If you've masterminded a solution — silly or ingenious — to a home issue, we want to know
Full Story
LIFEYou Showed Us: 20 Nutty Home Fixes
We made the call for your Band-Aid solutions around the house, and you delivered. Here's how you are making what's broken work again
Full Story
SELLING YOUR HOUSEFix It or Not? What to Know When Prepping Your Home for Sale
Find out whether a repair is worth making before you put your house on the market
Full Story


Joseph Corlett, LLC