


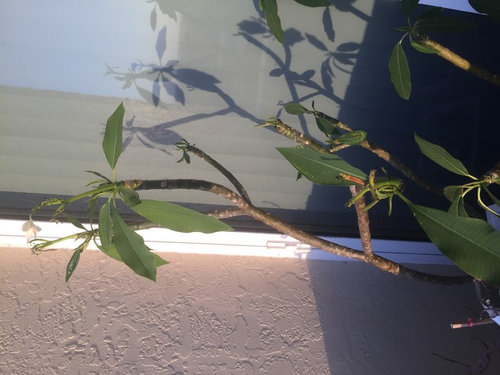
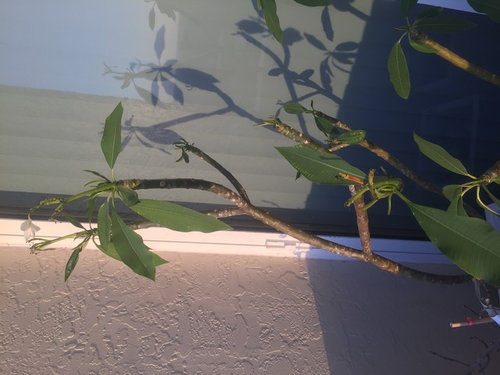
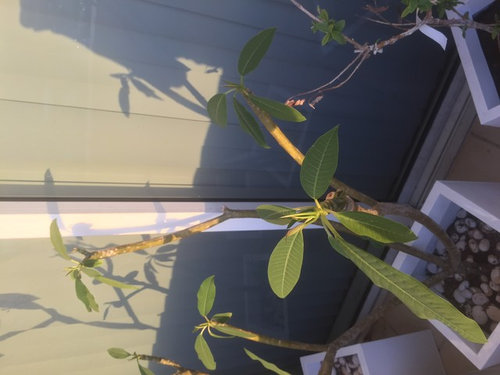
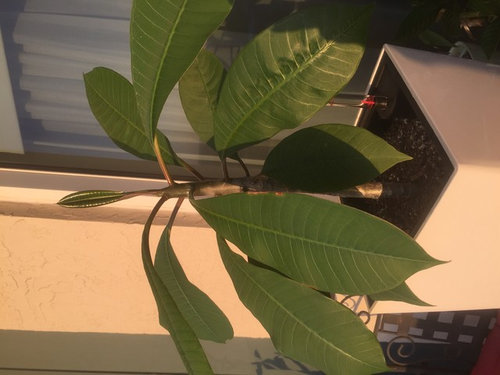
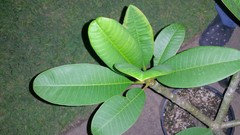
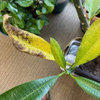
Baby leaves not growing out, not blooming, brown along edges?
Jessica C
8 years ago


Featured Answer
Sort by:Oldest
Comments (12)
 PRO
PROthe_first_kms2
8 years ago
Jessica C
8 years agoRelated Discussions
edges of leaves turning brown and dry
Comments (3)Thanks for your response. The seed was planted about January 18th, and seems to be growing so slowly. I had started it in a small peat pot but have transplanted it all into a windowbox type planter which is about 24 inches long, 10 inches wide and about 10 inches deep. Its possible that the MG soil has too much nitrogen, but I have other things planted in that same medium and no problems. The lights are not hot to the touch, but maybe the lettuce only needs 10 hrs of light rather than 16? I dont have it planted to close to each other, so its not crowded, Its just taking this so long to grow, but there is signs of growth, however so slow. I know you dont have a crystal ball, so thanks for the sugggestions. This is my first time with seeds, so I am going to let it go for now and see what happens. I am finding everything is a learning experience! jlum...See MoreBrown tips on calathea leaves edges.
Comments (13)Strangely enough, some soils seem to drain quickly, but still hold too much water, and how much water the soil holds between the soil particles is a PRIMARY factor in determining what sort of opportunity the soil offers in terms of the plant's ability to realize as much of its genetic potential as possible. Your plants are programmed such that if you do your part, the plant will always look stellar. The problem is, how to figure out what 'your part' is. Briefly, the growers only job is to figure out what's stopping the plant from realizing all of its potential, and then fixing it. The biggest problem most growers deal with is an inappropriate-because-it's-much-too-water-retentive soil, followed closely by an inability to provide as much light as the plant needs. Some soils, right from the bag, will support 4-6" of perched water, which means that when you've watered correctly - so you've saturated the soil completely and at least 15-20% of the total volume of water applied has exited the drain hole(s) - 4-6" of soil at the bottom of the pot is 100% saturated. Obviously, anything you can do to reduce the volume of saturated soil will have an impact on root health and the ability of roots to function as they should. This info can help eliminate a lot of the limitations associated with excessive water retention. Most growers don't realize that a reduction in photo load can cause foliage of plants perfectly healthy at a given level of fertility and grown at higher light levels to show symptoms of fertilizer burn when moved to lower light levels. The closer to being ideal cultural conditions are, the greater fertility the plant will tolerate/appreciate. I also flush plants at the first opportunity after I buy them, for the reason I just mentioned and for the fact that I like to be in control of what my plants get and when they get it. Al...See MoreBrom leaves browning from edges, any ideas?
Comments (17)Hi everyone. Kamereone - Regarding the treatment of de-hydrated plants using the sugar and water method. I soak the whole plant (or as much of it as possible). As plants absorb moisture through their roots and leaves alike, it stands to reason the more of the plant that can be soaked the quicker the fluid will be absorbed. Usually I soak the whole plant, but with tall plants where they whole plant won’t fit in the bucket, I place as much of the lower half as possible in the mixture and fill the centre well of the plant with the mixture as well as occasionally taking the plant out and inverting it so that I can dunk the upper foliage as well. The ratio quantities of sugar to water aren’t critical nor is the amount of time immersed, but I like to keep them soaking for at least 2 -24 hours (or even up to a couple of days) depending on how severely dehydrated they are. Usually the plants I’ve treated were plants that came in the post and they had been wrapped in newspaper and packed in a box for several days; in one case, a little over two weeks when the parcel went astray, and even those plants after a couple of days of this treatment responded well and after a week or two you would never have known they had been severely dehydrated. When the plants first arrive and were unwrapped, they look a bit like a butterfly when it first comes out of its cocoon; all squashed up and wrinkled. After an hour or two in the mixture the wrinkles seem to gradually disappear as the leaves straighten themselves out again and return to their normal shape; again the comparison with the butterfly fresh out of its cocoon is a good example. You mention those, "spikes that supposedly are just stick-and-forget and claim to address Mealy Bugs”, I’ve never seen or heard of them here. But I did read where as an alternative to toxic chemicals, you can sprinkle “Fossil Flour” (Diatomaceous earth) on the top of your potting mix and water it in and it will kill Root Mealy Bug. I did a trial with this last year when I found a plant with Root Mealy Bug after knocking it out of the pot in preparation for dividing and re-potting. I cleaned off as much of the potting mix that I could and removed about half of the roots that were covered in the root Mealy Bugs and re-potted in fresh potting mix and new potI sprinkled about ½ teaspoon of Fossil Flour over the top of the potting mix (it was a five inch pot and as the fossil flour is very fine you don’t need very much, just a dusting) and then added a topping of fresh mix and watered in well. When the plant was knocked out of the pot again after six months, there was no sign of any active root Mealy Bug (even under a microscope) and I was so pleased to have found a natural insecticide that didn’t harm other insects, It’s now become part of my normal re-potting routine and I use it on every plant I re-pot as a preventative. To read more about this natural product, go to : https://en.wikipedia.org/wiki/Diatomaceous_earth CAUTION: As it’s a very fine powder you should take the same precautions you would when using any other dusty products and wear a dust mask with an appropriate filter to prevent inhaling this powder. All the best, Nev....See MoreCalathea Musaica: leave edges turning brown, yellowing
Comments (3)Thank you, tropicbeezent. I have included a photo. By temperatures being too cold, I mean for the plant: 60 degrees and below. It is in a room that's approximately 70 degrees with what feels to be a higher humidity, but I have yet to have a humidistat in place. I have been cutting down on spritzing in case it's keeping the soil too moist, but I have been maintaining a wet pebble tray. I have it filled so that the pot can rest on the pebbles without getting wet, but the water is only a few millimeters away. With the yellowing on the corner of the top right leaf, I am holding the leaf that was overlapping that exact area. I also noticed the yellowing is starting in the lowest leaves, and the youngest. Should I line the bottom of the pot with perlite to encourage drainage for the time being? I intend on transplanting once it stabilizes, so I can remove it then....See More
moonie_57 (8 NC)
8 years ago- PRO
the_first_kms2
8 years ago Jessica C
8 years agoJessica C
8 years agoJessica C
8 years ago
stu span SF bay area 9b
8 years agojasonindallas
8 years agoJessica C
8 years agojasonindallas
8 years ago
Related Stories

LANDSCAPE DESIGNGet Along With Less Lawn — Ideas to Save Water and Effort
Ditch the mower and lower your water bill while creating a feast for the eyes with diverse plantings and gathering places
Full Story
MOST POPULARSummer Crops: How to Grow Sunflowers
Savor snack-tastic sunflower seeds once the radiant blooms have faded — if the birds have saved you any, that is
Full Story
BEDROOMSRoom of the Day: Chic Neutrals Give a Nursery an Edge
No little-boy blues in this California baby’s room. Black and white walls and graphic accents promise to grow with him
Full Story
HOUSEPLANTSHow to Grow Orchids Indoors
Orchids are the exotic aristocrats of the flower world and can make themselves comfortable in almost any home
Full Story
EDIBLE GARDENSHow to Grow Your Own Sweet Summer Crops
This guide will help any gardener get started on growing the freshest warm-season veggies and berries for summer
Full Story
HOUZZ TOURSMy Houzz: A Grand Overhaul for a Growing Family
A suburban home's top-to-bottom remodel creates plenty of room for entertaining and for little ones
Full Story
GARDENING GUIDESTop 12 Summer-Blooming Perennials for Deer-Resistant Drama
Can you have garden color, fragrance and exciting foliage with hungry deer afoot? These beauties say yes
Full Story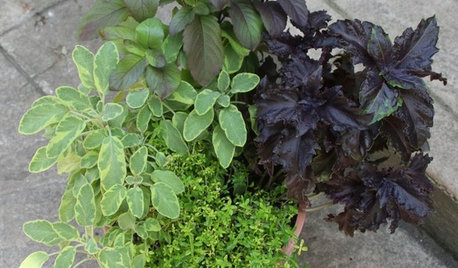
CONTAINER GARDENS8 Easy Container Plants to Grow From Seed
Get beautiful blooms and herbs in summer by starting these choice garden picks from seed in spring
Full Story
TRADITIONAL HOMESHouzz Tour: Historic Victorian Grows to Fit Its Family
Instead of leaving their downtown Santa Barbara home for the suburbs, a couple decided to stay put and add space
Full Story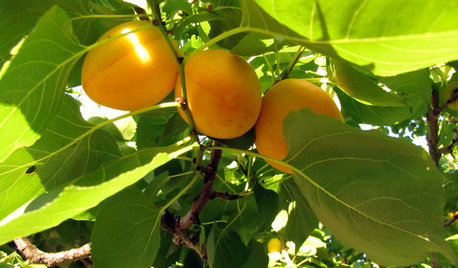
EDIBLE GARDENSHow to Grow Your Own Apricots
Velvety fruit, pretty blossoms and interesting bark make apricot trees a delight — and they’re great for smaller gardens
Full StorySponsored
More Discussions
stu span SF bay area 9b