


"Scum" on washer drum.
beaglenc
9 years ago
Featured Answer
Sort by:Oldest
Comments (121)

sparky823
8 years agoUser
8 years agoRelated Discussions
Kenmore washer drum wobble:
Comments (1)You should post your question on the Laundry Forum, where there are a lot of "laundry enthusiasts" to help you. Here is a link that might be useful: Gardenweb's Laundry Forum...See MoreStopped using Charlie's, now I have soap scum/buildup!!!!
Comments (21)asolo... 'town' water in central MA from underground wells pumped into tanks (not an 'open' reservoir system)... per the 'quality' reports we get, we do not have "issues" or mineral or other problems, although it is not 'soft' water.... that said I will say there are days when I fill the bath and the water has a brown sheen to it... other days a blue sheen... so I know they have consistancy issues. I don't know that I could "tell" if I had buildup/scum issues in my old tl machine... all you ever see ther is the inside of the tub.... not the window or the boot/drainage holes... in the tl that was all out of sight.... As far as temp goes, i typically always run my bosch using the water heater, so that should not be the problem here... All that said... after two weeks of going back to charlie's except for my whites (when my 'sample' arrives from charlies I'll try their first auggested approach for whites and see how that goes)... the scum is now totally off my door and the boot/drain hole area is back to looking like new from a cleanliness perspective... scum is gone... I will stay with the charlie's for all but whites for now... it seems to be working at keeping my machine clean and all but my whites clean... now to fix the whites problem... liriodendron... can't use cheer or most 'mainstream' laundry products with my husband's skin problems... but thanks for the suggestion......See MoreSamsung washer drum issues?
Comments (2)Can be caused by a broken tub support strut (not a large deal to fix). Also by a broken drum spider, which is a big deal to fix but an unusual failure at only 1.5 years....See MoreCalling all Miele Masters (W1215 Washer drum won't turn)
Comments (10)So as luck would have it, I was surprised to see a package at my doorstep on Saturday afternoon containing the carbon brushes (Miele part# 4 297 413). Installing the brushes was fairly straightforward without having to remove the entire motor assembly. You'll need to remove Front Panel. Start by opening the door, then unplug the unit. I guess you can also unplug first then use the manual door release to open the door. Whatever you do, unplug for sure before working on the unit. Remove the rubber seal spring/wire that surrounds the seal. Easiest way is to use a small screwdriver to spread the tiny spring on the bottom until you get enough clearance from the seal to remove.Remove the front panel of the washer, (5 screws total), 2 screws behind the bottom kickplate and 2 more on the door latch and one big one dead center under the rubber door seal. Once screws removed, the door sort of falls on its own so be mindful. You may have to pull the bottom towards you a little and then pull straight down. With the front panel removed, you'll see the motor assembly sitting under the steel drum. It is covered by a plastic shield which is held by 2 screws. Also there are 3 electrical connectors to remove. Once the connectors are removed along with the 2 screws, the plastic cover can pull out. Be careful here since the connectors are still attached to the plastic cover via a wiring harness. There's enough play in the wires to just bring the cover outside the washer and set aside next to the washer with wires still connected. Once the cover is removed, you'll see another plastic piece that holds the carbon brushes. There are 5 screws to remove here. After screw removal, carefully pull the plastic piece straight out. The old brushes are held in by a plastic tab cover and have a small wire with an electrical connector. Remove the plastic tab, then disconnect the connector. The old brushes now simply pull out and then replace with the new ones. Hint: The carbon brushes themselves kind of resemble a lipstick. The brushes are engaged by a small spring. Before installation, if the carbon piece is outside of the "lipstick" push it back in. (Note: after installed, you'll need to release the brush from the spring before completing installation, see below) Once the new brushes are replaced, lock the small plastic tab back over the brushes, connect the small wire and carefully replace back on to the motor housing. Be aware that there are electrical connectors so be sure to line those up when pushing the plastic housing back on to the motor. Replace 5 screws, and once in place, you'll need to use a small screwdriver to just push the carbon brush back out of the lipstick holder. this step needs a little dexterity, if you have a small mechanics mirror that helps to see. I didn't, but just used the screwdriver to poke around the side until the brush released. You'll hear a click to confirm the spring and brush has released. Then replace the larger plastic housing with the wire harness. Reattach the 3 wire connectors and secure the 2 screws. Front panel installation is reverse of removal. Don't forget to install the rubber seal wire. Took me about an hour and a half to complete. Powered back on, held my breath and Voila....works again! I did notice that the washer has an increased whine/hum while spinning at high speed. I don't remember it being that pronounced before, but it doesn't sound like it's a bad noise. More of a by-product of the motor spinning. I'm not an electrical engineer so I'm not sure if the new brushes help create that noise, but as long as it works, I'm happy. Hope to get a few more years out of this washer. Hope this helps someone else at some point. Thanks for all the help. best, Eric...See MoreUser
8 years agomamapinky0
8 years agoUser
8 years agoUser
8 years agomamapinky0
8 years agoPat Z5or6 SEMich
8 years agomamapinky0
8 years agosparky823
8 years agoUser
8 years agobeaglenc
8 years agoUser
8 years agomamapinky0
8 years agoPat Z5or6 SEMich
8 years agoUser
8 years agomamapinky0
8 years agoPat Z5or6 SEMich
8 years agomamapinky0
8 years agoUser
8 years agolast modified: 8 years agoUser
8 years agolast modified: 8 years agomamapinky0
8 years agoUser
8 years agolast modified: 8 years agosparky823
8 years agomamapinky0
8 years agosparky823
8 years agomamapinky0
8 years agosmith02_gw
8 years agomamapinky0
8 years agomamapinky0
8 years agoUser
8 years agosmith02_gw
8 years agomamapinky0
8 years agosparky823
8 years agobeaglenc
8 years agoUser
8 years agomamapinky0
8 years agoUser
8 years agomamapinky0
8 years agomamapinky0
8 years agomamapinky0
8 years agoUser
8 years agomamapinky0
8 years agoUser
8 years agomamapinky0
8 years agoUser
8 years agomamapinky0
8 years agodadoes
8 years agoUser
8 years ago
Related Stories

HOUSEKEEPINGGet Glass Windows and Doors Gleaming Clean
Preserve a spotless view with these guidelines for keeping soap scum, hard water spots and dirt at bay on glass surfaces around the home
Full Story
REMODELING GUIDESContractor Tips: Advice for Laundry Room Design
Thinking ahead when installing or moving a washer and dryer can prevent frustration and damage down the road
Full Story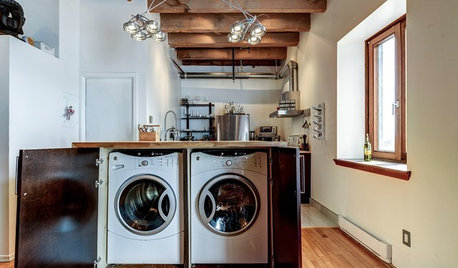
LAUNDRY ROOMSA Kitchen Laundry Cabinet Full of Surprises
A little DIY spirit allowed this homeowner to add a washer, dryer, kitchen countertop and dining table all in one
Full Story
DECORATING GUIDESFor Your Next Sink, Think Unique
Any kind of vessel can do the trick — from buckets to barrels, outsized shells to old-fashioned washers
Full Story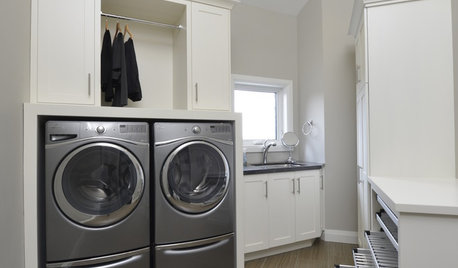
MOST POPULAR10 Smart Ideas for Your Laundry Room Remodel
Make washing and drying easier and more comfortable by considering ergonomics, storage and special features
Full Story
DIY PROJECTSHow to Fix Up a Thrifted Lamp
Save money and earn DIY cred by rewiring and snazzing up a damaged lamp you scored on the cheap
Full Story
HOUSEKEEPINGTackle Big Messes Better With a Sparkling-Clean Dishwasher
You might think it’s self-cleaning, but your dishwasher needs regular upkeep to keep it working hard for you
Full Story
BATHROOM DESIGN7-Day Plan: Get a Spotless, Beautifully Organized Bathroom
We’ve broken down cleaning and decluttering the bath into daily, manageable tasks
Full Story
BATHROOM VANITIESBetter Places to Stash That Soap
Banish gloppy bars and flimsy pumps, and the only things you’ll need to clean are your hands
Full Story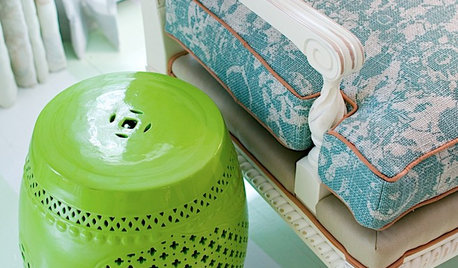
DECORATING GUIDESThe Most Helpful Furniture Piece You May Ever Own
Use it as a table, a seat, a display space, a footrest ... and indoors or out. Meet the ever-versatile Chinese garden stool
Full Story

mamapinky0