

When did Campbell's Chicken Noodle Soup become so blah?
12 years ago
Featured Answer
Sort by:Oldest
Comments (54)
 12 years ago
 12 years ago
Related Discussions
Canning Chicken Soup
Comments (8)I see no one has addressed your question, and it is an important one. The vegetables you use in your soup can't be raw, in the main because all the soup ingredients need to be hot when they are placed in the jars. The safe processing times are calibrated based upon boiling contents. However, you don't need to overcook them either. Boil everything 5 minutes before jarring up and that's sufficient. I think you may be surprised at how well the vegetables hold up. The texture of the chicken will probably be more of an issue. Also, if you think of it, with uncooked vegetables, especially chunks of potato, you risk some absorbtion of the liquid during processing. It wouldn't be fun to pull your jars out of the pressure canner and see they're only 2/3 full of a dense sludge-like mixture. So be sure the mixture has been boiled 5 minutes and then aim for 1/2 solid contents and 1/2 liquid for appropriate density. You should be able to eyeball a half-jar and still come reasonably close to equally distributed contents. If you have a leftover jar of plain or thin stock, that's not a bad thing because it can be used lots of ways. You do have another option, and that's to can plain chicken and broth in one batch and mixed vegetables in another batch. Combine one jar of each for soup. This gives you maximum versatility and you may find this brings you closer to the flavor and texture you prefer. Carol...See MoreCampbells soups
Comments (24)When I buy soup to eat as a soup, rather than added into something (like the cream of critter) I usually get the Chunky Soup. I like most of those. Occasionally, if I'm not feeling the greatest I'll go for a beef noodle or chicken noodle but those need to be Campbells. I haven't found a generic that I like in either the chunky or the "noodle" ones. I've gotten away from using cream soups in things too so I don't buy it often. I've found a few generics I find OK but if I want to be sure of a consistent result, I still go with Campbells. And I've never been able to stomach tomato soup unless it's in something like chili or sloppy joes. I'm just not a tomato freak....See MoreThoughts: DIY Instant Noodles Cups
Comments (21)tishtoshnm -- As with many gluten-free books, they use more high-glycemic starches and all-purpose gluten-free flour mixtures than I care to consume. I tend to use more almond and coconut flour for baked goods. You are right, my "shoestring" is definitely much smaller than the author's (LOL). To give credit where credit is due, she does the math with many of the recipes in the book to prove her "shoestring" theory - based on making her recipe or buying a g-f frozen version. Personally, I can live without a gluten-free baked pretzel - at any price. Some foods you just can't make a good gluten-free substitute, so I don't waste my time/money. There are a lot of meat-related and vegetable recipes, but most people who are gluten-free don't need a recipe for glazed carrots or pot roast. The only recipe I've tried was for Arepas: (makes 10-12) 1 c. precooked cornmeal flour (P.A.N.) 1 c. grated mozzarella cheese 1/8 t. kosher salt 1 c. plus 2-4 T. tepid water 1/4 c. vegetable oil (I use coconut oil) In a large bowl, combine the cornmeal flour, cheese, and salt. Add 1 cup of water and stir to combine and incorporate the water into the flour mixture. Add more water by the tablespoonful if necessary for the dough to come together. Once the dough has come together, cover the towel with plastic wrap and allow it to stand at room temperature for 3-4 minutes. The cornmeal flour will continue to absorb water, and the dough will stiffen as it stands. After the dough has stiffened, wet your hands and divide the dough into 10-12 portions of about 3 T. each. With wet hands again, form the first piece of dough into a ball, then flatten into a disk about 1/4-inch thick and 2-1/2-inches wide. Repeat with each piece of dough. Pour the oil into a 12-inch skillet with at least 2-inch high sides, and heat the oil over medium-high heat until it shimmers. While the oil heats, prepare the first portion of dough for frying. Wet your hands again and press all around the edge of the disk, eliminating any cracks. Flatten along the side, smoothing as you go. When you fry the Arepas, if you have successfully eliminated all the cracks, steam will build up inside and they will puff and swell. It takes some practice, but it's well worth the effort. When the oil is ready, place each portion of dough carefully in the pan, and fry until golden brown, turning over once during frying and frying for 4-5 minutes per side. Do not crowd the pan. Fry in batches. Drain Arepas on towels before serving. With a wet serrated knife, slice the Arepas in half horizontally and serve warm or at room temperature. (Grainlady note: I slice them open before wrapping the leftovers for the freezer. In fact, I use my English Muffin "fork" for the task. I like to toast the inside on a dry griddle after they are thawed, apply the filling of choice - we often make ham and cheese - then grill the outside to melt the cheese inside and warm the ham. I also use them with poached eggs (using one-half of an arepa, toasted), shredded pork/beef/chicken sandwiches, egg salad, tuna salad...... I always wish I would have know this recipe for my mother, who had Celiac disease. She would have loved these little beauties. :-) -Grainlady...See MoreDoing The Chicken Soup Like Ina
Comments (37)A bit boring but i've done the same method for years. A roasted chicken dinner, very comforting. I roast two organic chickens using the oven roasting heat. Cut some onions in half, cut side down in the roasting pan for 'feet' under the chickens....add some big carrots cut in large chunks and a few celery ribs. Garlic. Add a cup of water and roast. Another 1/2 sheet pan of mixed veg and root veggies go on the lower rack half way through the chicken roasting. Kale or collards as a side dish. I also have a mixed sprouted grain side and/or a bean, usually white beans. Sometimes black beans. A Saturday or Sunday no brainer dinner but comfort food. Pan juices and veg make a nice gravy. Stock pot is already simmering with veg cuttings and h2o when we sit down for a nice meal. That roast chicken is then picked of meat, usually more than half left over, then the bones, the carcass back, is cracked and broken then into the stock pot. I always have chicken feet, (great pup snacks), in the freezer. And duck paws frozen in packs with duck necks for stock. The other chicken i cut into parts and give it a spice rub and marinade for a bbq style roasted chicken dinner. Pick more of the meat and fridge it. I end up with a dozen or more meals that are not at all left-overs. Chicken salad, a few qrts of soup...add some of the picked chicken to each qrt, then some of the finely sliced greens uncooked i set aside, some rice or some of the beans, fridge those container, then top with the stock/broth once it is chilled, then freeze. A few smaller pints i fill with beans and rice, then top with stock as well for the freezer. Gives me quick options later for soups. I often food saver some picked chicken with a spice rub that can be pulled out of the freezer for tacos or a filling for arepas...easy small sauce pan heat-up with some miropoix and chili sauce. Still have a few pints of just stock i freeze. Produce is expensive. My garden produce is special enough that canned or purchased stock/broth is not worthy. Making our own stock is practically free. Just the stovetop heat cost. And maybe i just enjoy it. I'm making my own choices and using basic cooking skills. I never salt it. Enough sodium in the veg. Celery and carrots and greens have plenty of salt. Fresh greens i may add later when i make soups and stews from the stock/broth have sodium as well. I may add some parm to a soup later. I adjust for salt to the table. A spicy garlic yogurt salsa as a topping for a stew or soup is huge in flavor and i may not want an extra salty. We made sea salt last spring and find a finishing salt much better added when needed, a pinch, at the table, is a better flavor enhancer as a last minute ingredient....See More- 12 years ago
- 12 years ago
 12 years ago
- 12 years ago
- 12 years ago
 12 years ago
 12 years ago
 12 years ago
- 12 years ago
- 12 years ago
 12 years ago
- 12 years ago
- 12 years ago
- 12 years ago
- 12 years ago
- 12 years ago
- 12 years ago
- 12 years ago
- 12 years ago
- 12 years ago
- 12 years ago
- 12 years ago
 12 years ago
- 12 years ago
- 12 years ago
- 12 years ago
- 12 years ago
- 10 years agolast modified: 10 years ago
- 10 years agolast modified: 10 years ago
- 10 years agolast modified: 10 years ago
- 10 years ago
- 10 years ago
- 10 years ago
- 10 years ago
 10 years ago
- 10 years ago
- 10 years ago
- 10 years ago
- 10 years ago
- 10 years agolast modified: 10 years ago
- 9 years ago
- 9 years ago
- 9 years ago
- 9 years ago
 9 years ago
- 9 years ago
- 9 years ago
Related Stories
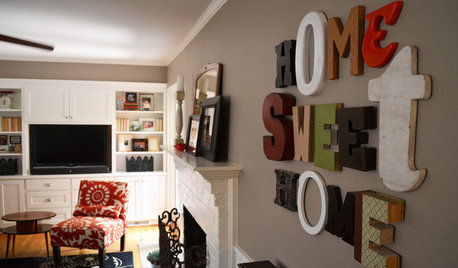
MOST POPULARWhen Does a House Become a Home?
Getting settled can take more than arranging all your stuff. Discover how to make a real connection with where you live
Full Story
LIFE6 Ways to Beat the Winter Blahs
Snow and dark days dampening your spirits? These ideas will have you looking on the bright side
Full Story
FUN HOUZZWhat You Do When There’s No One Around
Ice cream binges, air guitar concerts, napping in the closet. Houzzers worldwide disclose their quirky secret indulgences
Full Story
DECORATING GUIDESNo Neutral Ground? Why the Color Camps Are So Opinionated
Can't we all just get along when it comes to color versus neutrals?
Full Story
MOST POPULARThanksgiving Tales: When the Turkey Tanks
Houzz readers prove adept at snatching victory from the jaws of entertaining defeat
Full Story
KITCHEN DESIGNCooking With Color: When to Use White in the Kitchen
Make sure your snowy walls, cabinets and counters don't feel cold while you're riding white's popularity peak
Full Story
WORKING WITH PROSWorking With Pros: When You Just Need a Little Design Guidance
Save money with a design consultation for the big picture or specific details
Full Story
FARM YOUR YARD4 Farm-Fresh Chicken Coops in Urban Backyards
These Atlanta henhouses are worth crowing about for their charming, practical designs
Full Story
HOUZZ TOURSHouzz Tour: A Ranch House Is Reborn in a Los Angeles Canyon
Can you get back to nature in the heart of an urban mecca? This family — and their horses, dogs and chickens — did just that
Full Story
PRODUCT PICKSGuest Picks: 20 Finds to Cluck About
If you have or love chickens, you’ll flock to these coops, themed accessories, artwork and more
Full Story
oldfixer