


Beadboard or other wainscoting?
judydel
14 years ago
Featured Answer
Sort by:Oldest
Comments (19)

kristin42
14 years agomamalynn
14 years agoRelated Discussions
black beadboard wainscoting
Comments (1)In a basic room I usually keep trim the same color; wainscot, door/window casing, cabinets and and crown. In a small half-bath, especially with a dark color it's an "it depends" answer. Depends on sight lines, lighting, how much "trim color" versus "wall" or "non-trim" color. So..."it depends" means I really can't give you a definitive answer on this and thus I'm tossing the paint swatches back into your corner, as it's really dependent on your space. It can be done. Nothing wrong with doing it. But it depends... If you need to break things away and use other colors, often times the cabinets will be the first to be broken away, either through necessity or design. A different finish (stain for example) or a different paint color. Next will be the crown. Black can be difficult in a small room because it eats light. It can be used, often to dramatic effect. But it devours lumens. I'm all for strong colors...or strong "non-colors" depending on how you view black. My office is painted black; black wainscot, black window/door trim, black crown, black floor-to-ceiling bookshelves on one wall, and black file cabinets and high wall cabinets on two other walls. The upper walls are beige or cream-ish cork with a bit of cranberry red in them. But it's larger than a half-bath. But the beauty of paint? Things that don't quite work the way we envisioned can be repaired with a gallon of our next best guess at design happiness....See MoreWould beadboard wainscoting be appropriate...
Comments (8)I really like the beadboard. Thanks for bringing the link to waterproof wainscoting. You can buy a sheet of plywood which is grooved to look like beadboard, and that would be 48 inches high if not shortened. It is not as fine as using the separate bead boards which require separate installation of each board. The first is more economical, the second a more time consuming but prettier installation. Sorry my first post was confusing. I meant I would use wainscoting, and I would choose beadboard AS my wainscoting material. We used the plywood panels made to look like beadboard in our tiny little bath. It looks okay, but in our master bath, I want the ceiling real beaded boards, and also the tub alcove real beaded boards. At this time, I am thinking beaded boards floor to ceiling in this alcove, not wainscoting. The wainscoting would be in the lav/toilet portion of the bath. The real wood will be more expensive but absolutely great IMO....See MoreInstalling Bead-board
Comments (3)Use a primer-sealer and apply it on all sides, including in the tongue and groove, and do the same with one coat of paint. Allow to dry for a couple of days before installing, caulking where needed, and applying your final coat of paint. Beadboard plank will move with changes in moisture level and if you only paint it after it's installed, especially in summer, you will get small amounts of bare wood showing when it shrinks in wintertime. The primer/sealer and paint on the back side will protect it from any moisture that might get back there. Also add nailing strips above and below any electrical boxes or other interruptions; you will probably need some little square plastic thingies called receptacle extenders to bring the face of the outlet flush to the beadboard. If there's insulation in the stud bays, 1x2s set at the top, middle, and bottom of the wainscot area will smush the insulation less and therefore your maximum R-value is preserved, and a 1x2 still provides a good nailing surface. You only have to toenail it through the groove, you don't need to nail the tongue. A nail gun is a lot easier than a hammer and nails but you have to be careful not to split the side of the groove that you nail through. When you put your trim pieces on though, predrill them and use a hammer and finish nails as the trim pieces split easily, as I found to my sorrow. If you use an adhesive on the back and/or in the groove, use one that remains FLEXIBLE, because as the house shrinks and expands with the seasons it can and will literally rip the wood on the beadboard apart, causing cracks and splits. Most often it is the tongue splitting off the main board. The BANG! as the wood splits will scare the bejeezus out of you, and it invariably seemed to happen just as we were falling asleep! Stop every couple of boards to make sure you are level and plumb. Get a good long level, like a 4 foot....See MoreBead-board bathroom - any ideas?
Comments (9)Thanks for the feedback and ideas. The varnish idea is intriguing; I think I've seen similar applications and they end up looking very shiny and not a match for the paint. This is not so terrible, but would be a bit of a different look. Are there any varnish-type products which would have a more neutral finish? Also do you think I'd need to varnish the ceiling as well to protect from condensation, or only on the walls which would be receiving direct 'splashes'? We are leaning towards keeping the tub, and retrofitting it with a shower. The idea of a hand-held European-style shower is very appealing; we're wondering if maybe a ceiling-mounted curtain ring would be sufficient to prevent splashes if the shower hardware were somehow mounted inside the curtain, maybe from a bar mounted to the ceiling? We did something similar to a clawfoot tub in our previous house - link added to show what that may look like. It would be a tricky install since the curtain ring would probably need to be mounted at the same angle as the slope of the ceiling. We would probably just leave the current tub faucet set in place and add another faucet set that operates just the shower. There's not really an economical way to create space for a separate shower, changing the footprint of the room is off-the-table for us at this point. Here is a link that might be useful: clawfoot shower system...See Morekatieob
14 years agodrjoann
14 years agojudydel
14 years agodrjoann
14 years agoaallman27
14 years agoiluvgardens
14 years agotntwalter
14 years agomythreesonsnc
14 years agoloucie
14 years agoartemis78
14 years agojudydel
14 years agotimber.j
14 years agojudydel
14 years agotimber.j
14 years agoprill
14 years ago
Gena Hooper
14 years ago

Related Stories
REMODELING GUIDESRenovation Detail: Beadboard Wainscoting
Tastefully protecting your walls from knocks and splashes, beadboard wainscoting is an eye-pleasing design element as well
Full Story
WALL TREATMENTSHorizontal Wainscoting Widens Wall Appeal
Turn beadboard or paneling 90 degrees and watch it wake up your walls in a whole new way
Full Story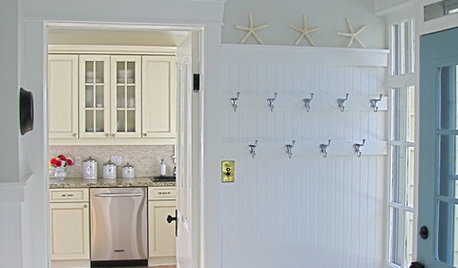
REMODELING GUIDESThe Timeless Elegance of Beadboard
Classic Wall Paneling Adds Instant Beach Cottage Charm
Full Story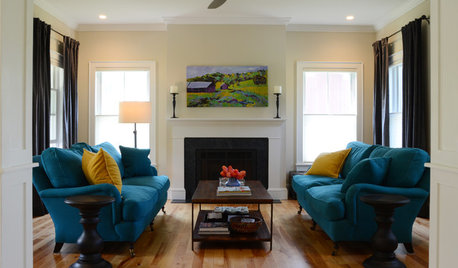
MY HOUZZMy Houzz: Classic Style and Colors in a Vermont Family Home
Beadboard wainscoting, historically inspired paint colors and an open layout define a family’s modern farmhouse-style home
Full Story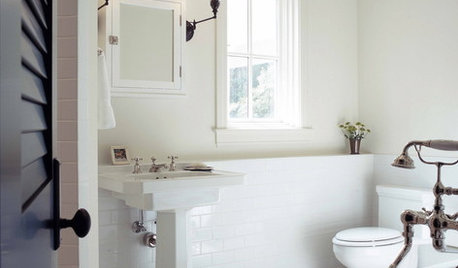
BATHROOM DESIGNSubway Tile Wainscoting Puts Bathrooms on the Right Track
It repels water. It looks clean. It works with many architectural styles. Looks like bathrooms have a ticket to a no-brainer
Full Story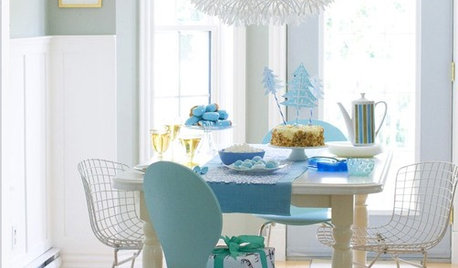
DECORATING GUIDESBeautiful Details: Wainscoting and Paneled Walls
Paneled Walls Add Substance and Style to Both Modern and Traditional Homes
Full Story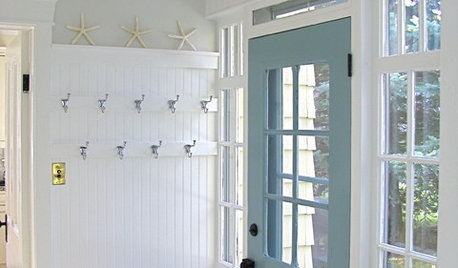
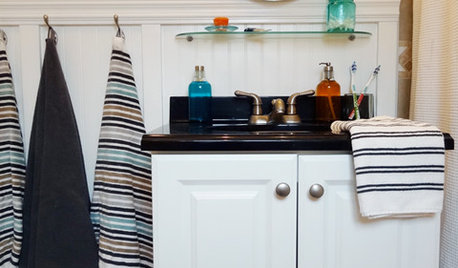
WALL TREATMENTSBeadboard Panels Offer a Shortcut to a Classic Style
Traditional touch: Change up plain bathroom walls with beaded hardwood planks and trim you can install yourself
Full Story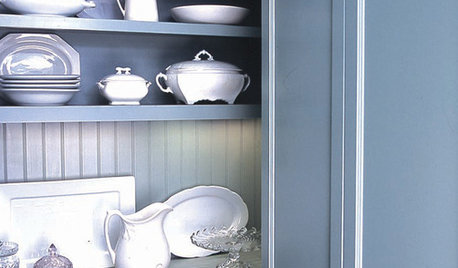
REMODELING GUIDES8 Great Ways to Use Beadboard
Grooved Paneling Works Wonders on Backsplash, Bookshelf, Ceiling or Tub
Full Story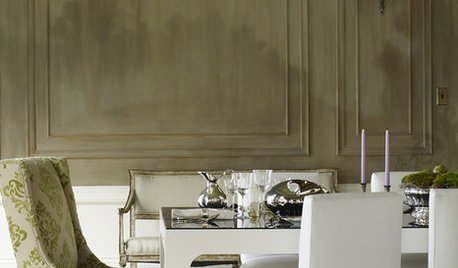
DECORATING GUIDESGive Your Walls an Architectural Dimension
Make a room special with the texture of wainscoting, panels, shiplap and more
Full Story

pps7